I have been searching for the right phone case for such a long time now, without any success of finding one, when I realized: I could make one myself, with a simple phone case DIY project!
The problem is 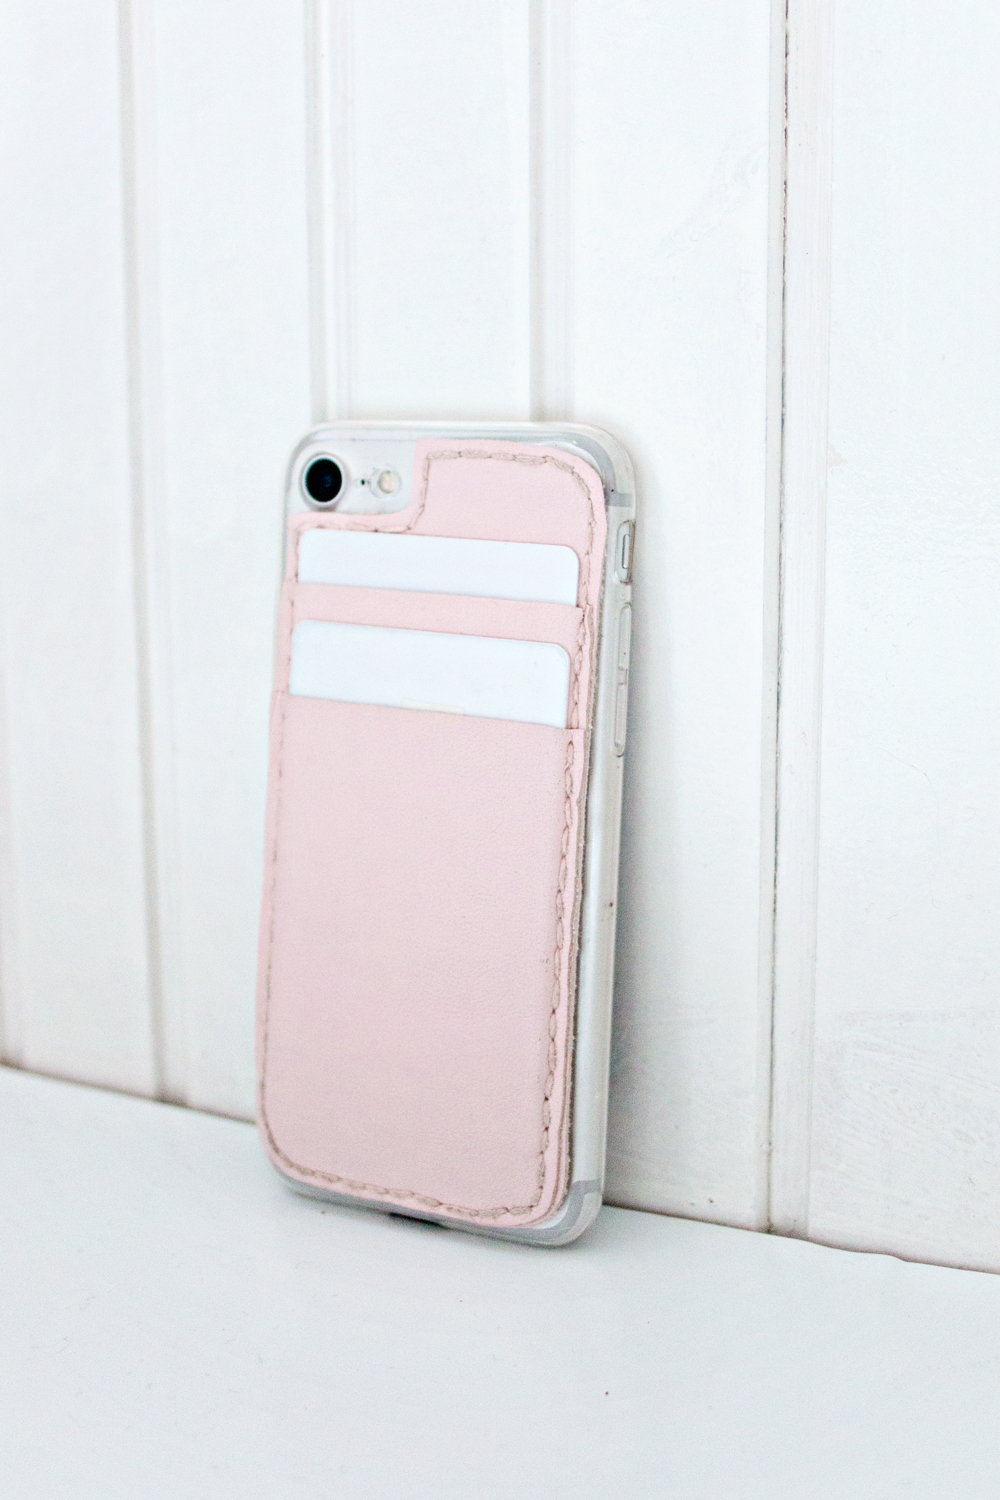 that I had some very important requirements:
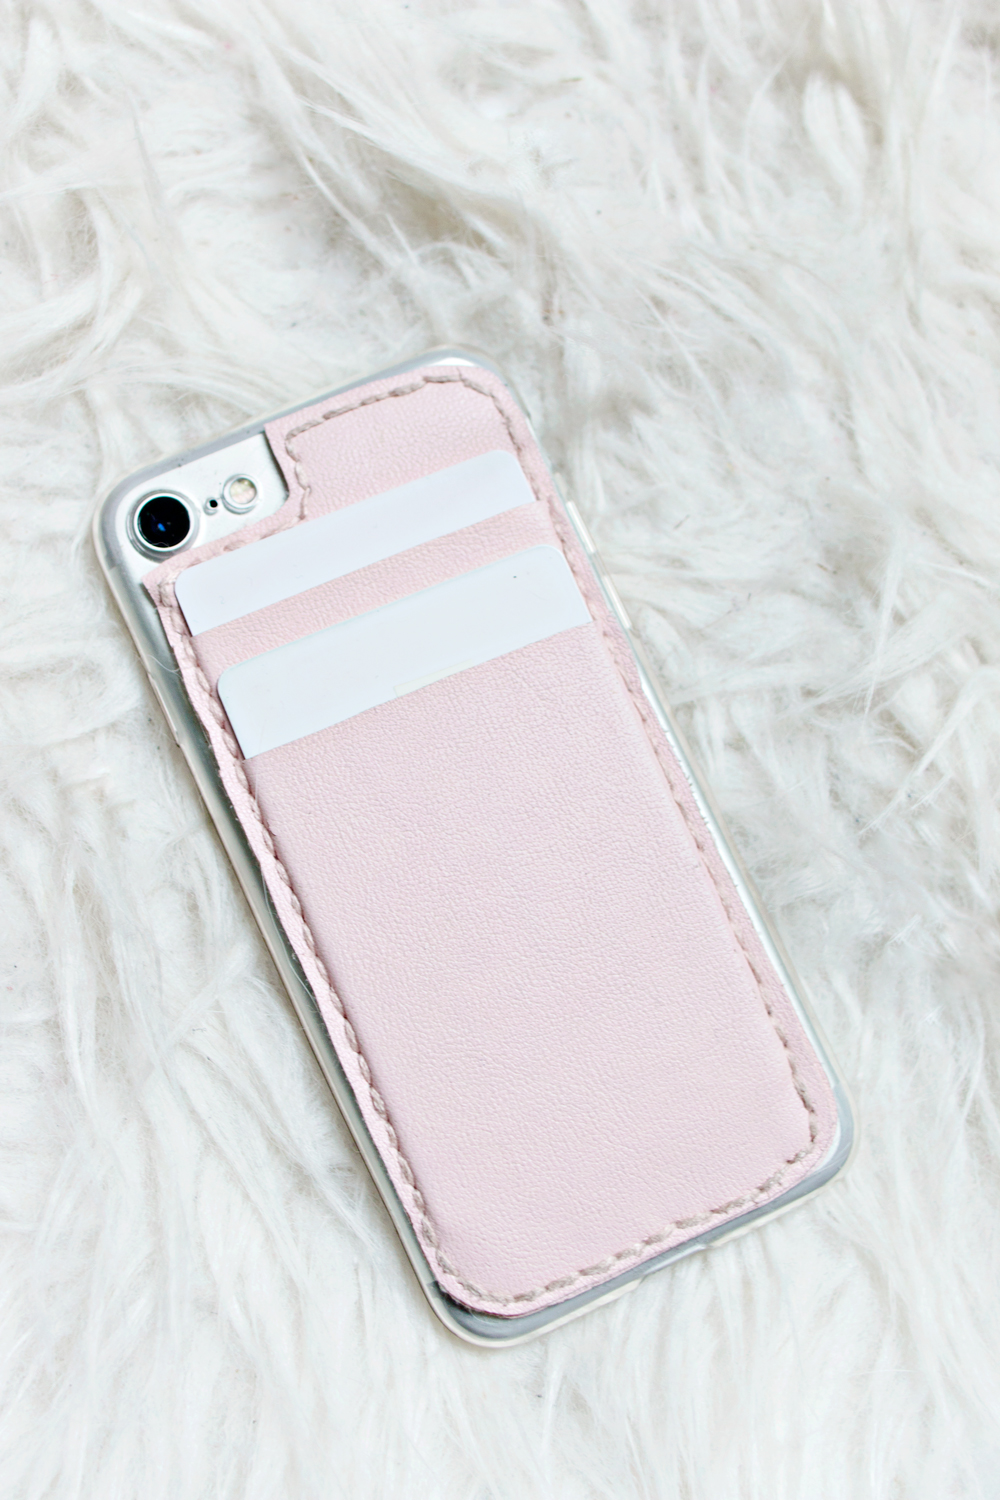
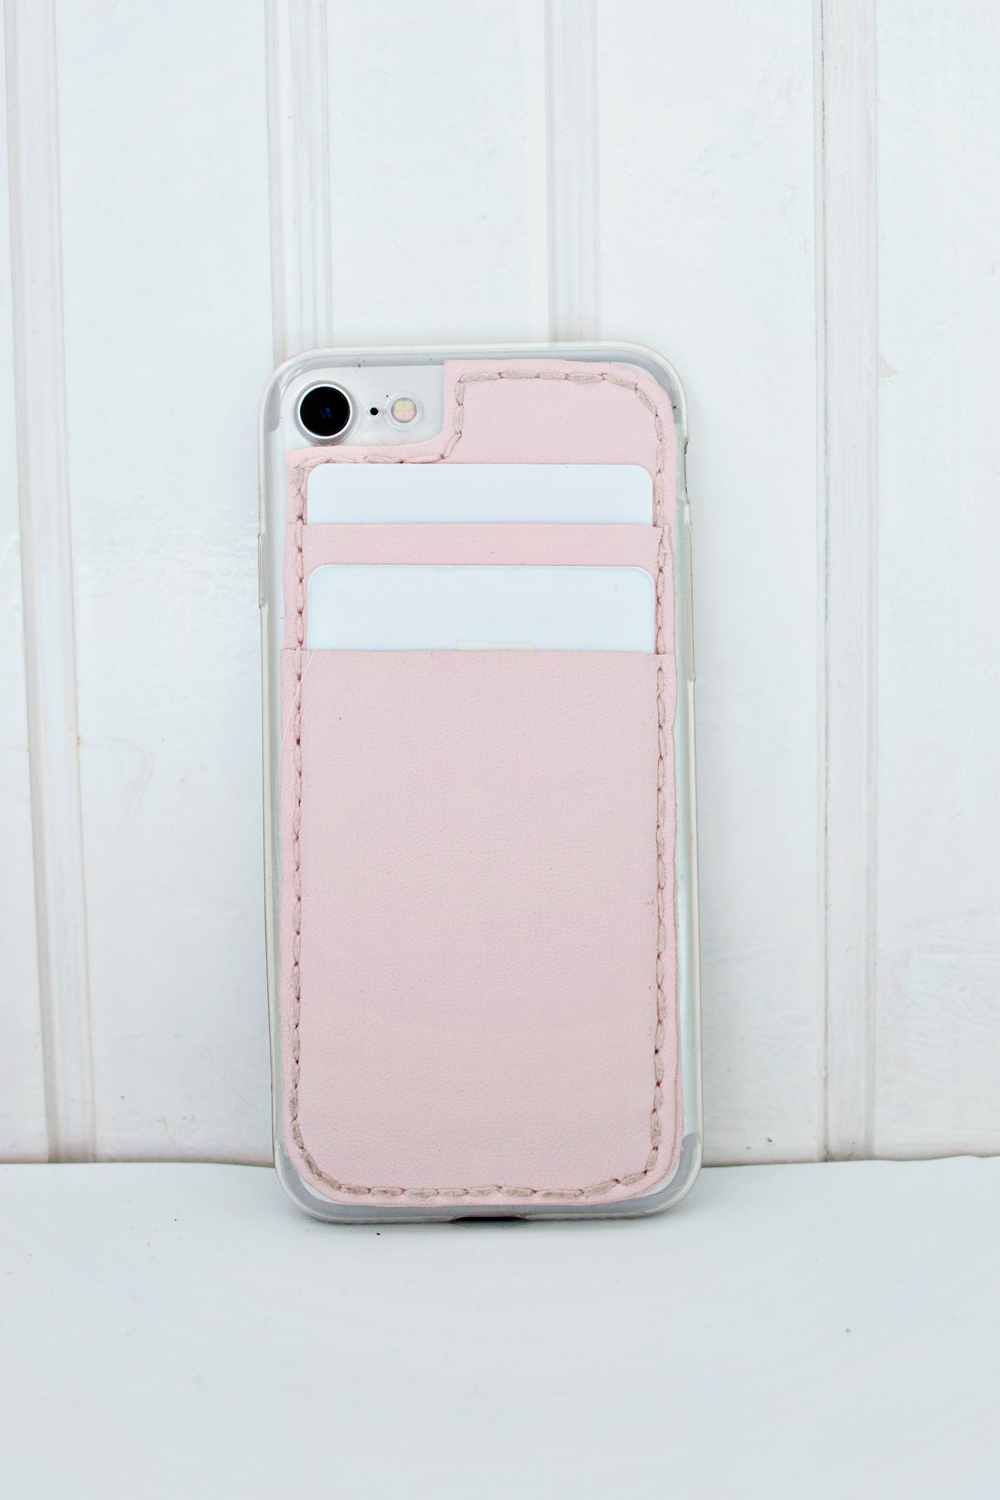
– It needs to hold at least 2 cards (my bank card and my public transport pass)
– The front of the case needs to stick out higher than the front of the phone (this way, when I drop my phone, the chances are that the glass won’t break very easily)
– It has to look nice :))
– Oh, and I don’t want it to be one of those booklet phone cases, because I had one of those and ended up keeping it folded open all of the time anyway.
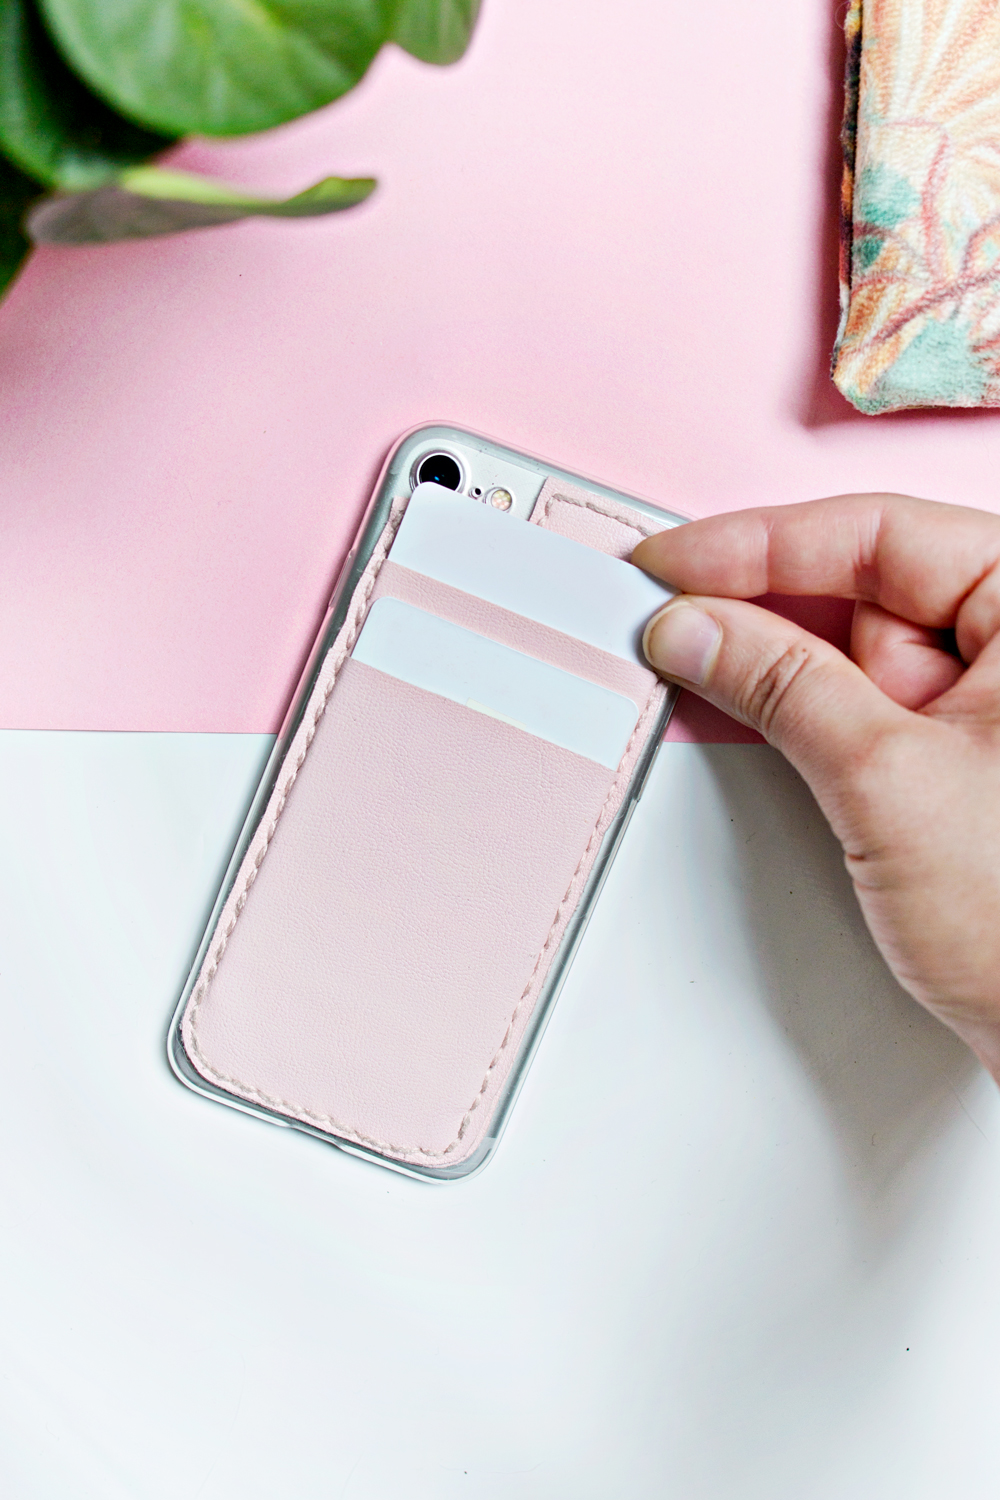
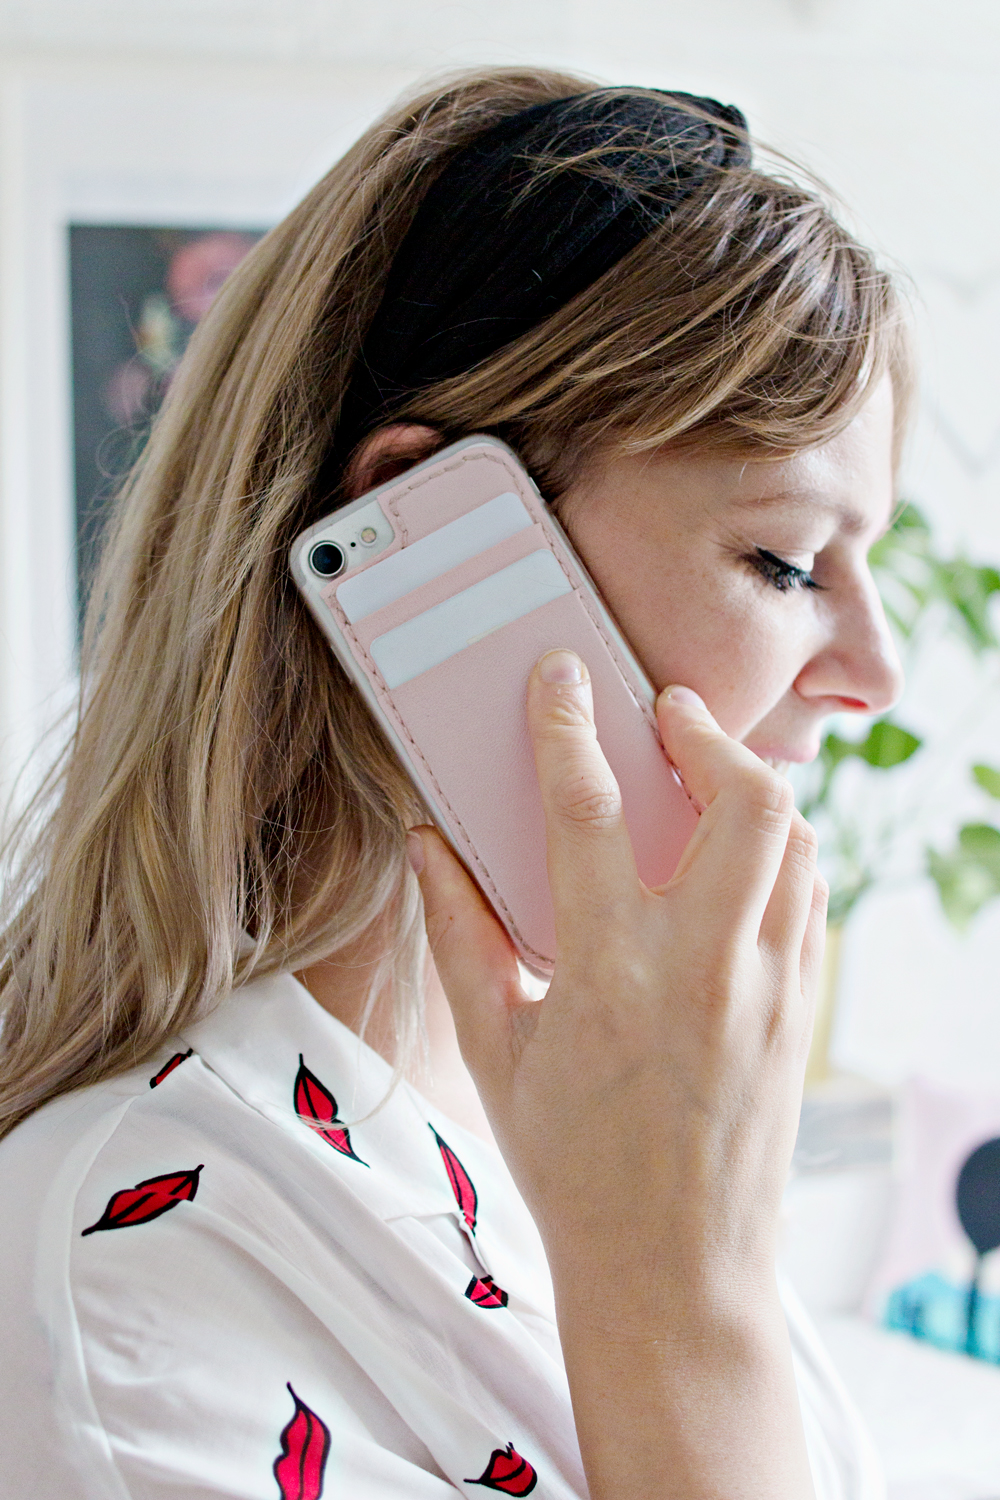
The reason for my stubborn search for a phone case that holds at least two cards is simple: when I travel here in Holland, you can check in and out of the train and bus by holding your travel card in front of a sensor. When you have it attached to your phone, it makes it so much easier to “check-in” and to “check-out”. And since carrying around cash has become a rarity here as well, it makes sense to keep my bank card attached to my phone, leaving my wallet at home and more room in my purse!
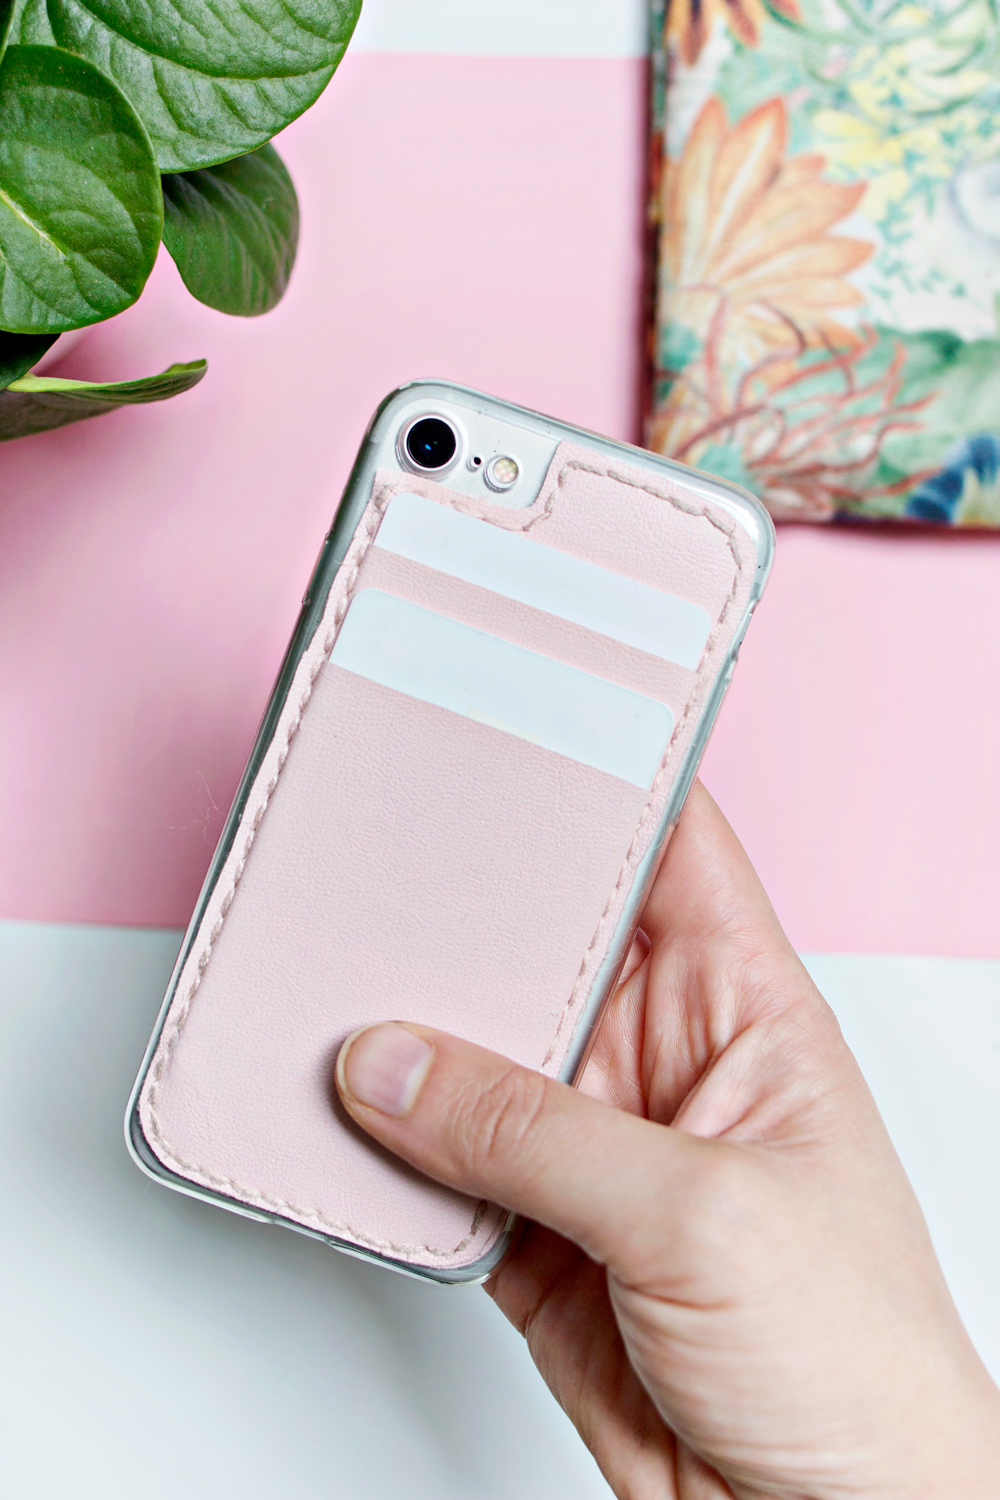
And, oh my did I find the perfect solution: restyling a plain transparent silicone phone case, with the help of faux leather and a simple back stitch!
Yes, it really is that easy! Who knew that you can combine these two materials with just a simple sewing technique?!
I made this case last month, because I wanted to try it out first and see if the stitching would hold up, and it definitely did! Not only does my iphone case still look exactly the same, it also let’s me “check-in” to the public transportation by simply holding the phone case (with the card still in the sleeve) against the sensor. This is such a time saving and convenient feature! (every Dutch person will know what I am talking about;)
Are you ready to make your version of this:
Card Holder Phone Case DIY
Supplies
Transparent Silicone Phone Case
Embroidery Thread
(Faux) Leather
Pencil or Chalk
Ruler
Needle
Scissors
CLothes Pins (or anything else to keep the leather in place during the embroidery steps)
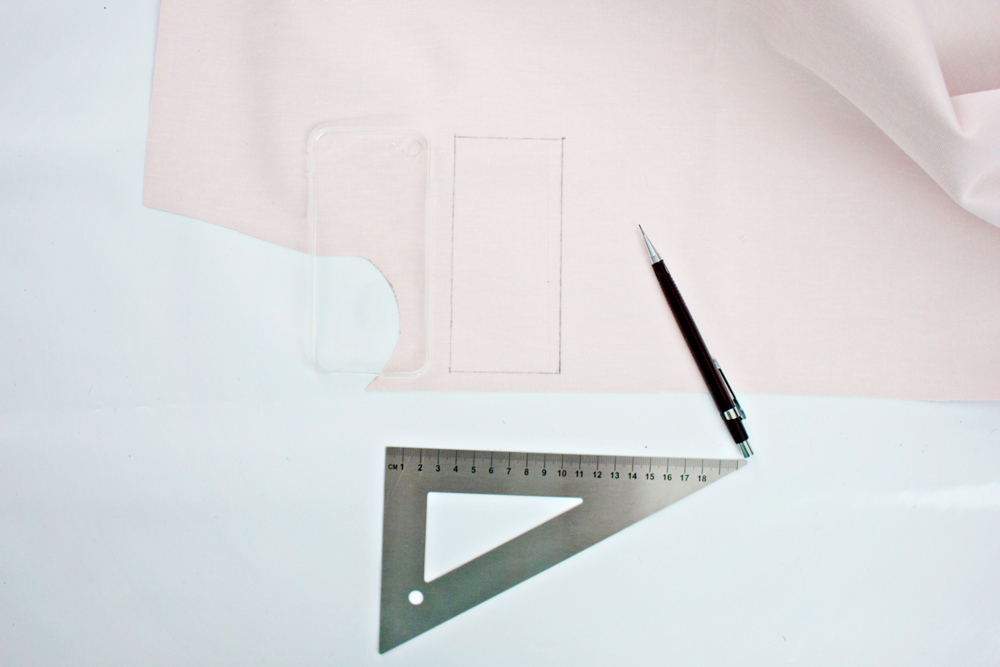
STEP 1
– Place the fabric, right side down on a flat surface.
– Place your phone case on top of the fabric.
– Measure the side length of the phone case. Subtract a few millimeters from the measurements and draw a line in the measured size onto the back of the fabric with your pencil or chalk.
– Measure the bottom of the phone case. Subtract a few millimeters from the measurements and draw a line in the measured size onto the back of the fabric, connecting to the other drawn line.
– Repeat drawing these lines to create a rectangular shape as shown in the photo above.
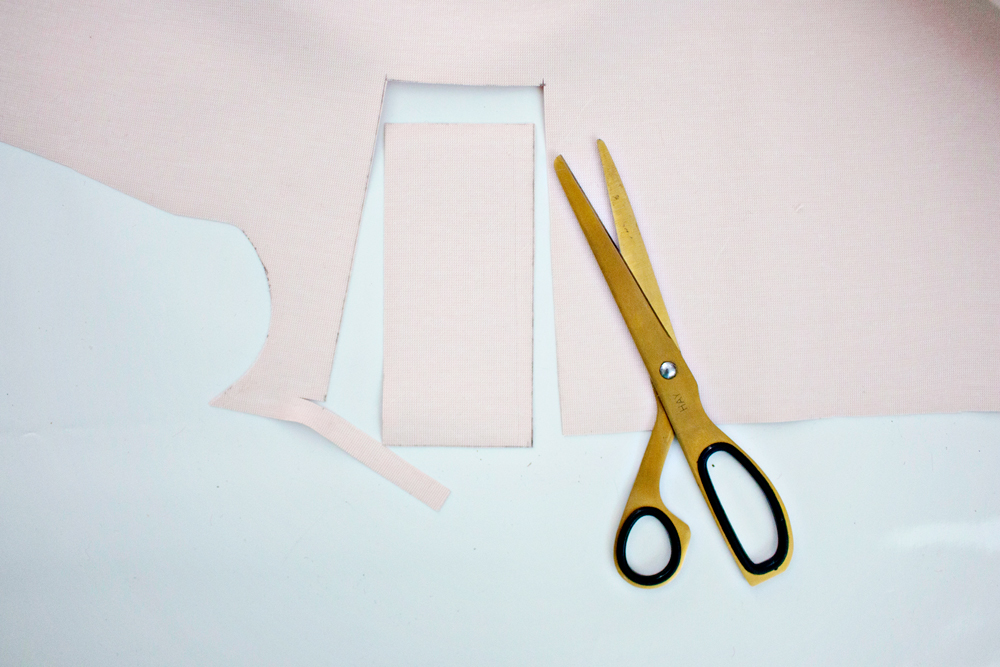
STEP 2
– Cut the rectangular shape out of the fabric with your scissors.
STEP 3
– Place the cut-out shape (right side down) on a flat surface.
– Place your phone case on top in the centre.
– Follow the shape of the rounded corners of the phone case with your pencil onto the back of the fabric.
– Cut the rounded shape out of the fabric with your scissors.
STEP 4
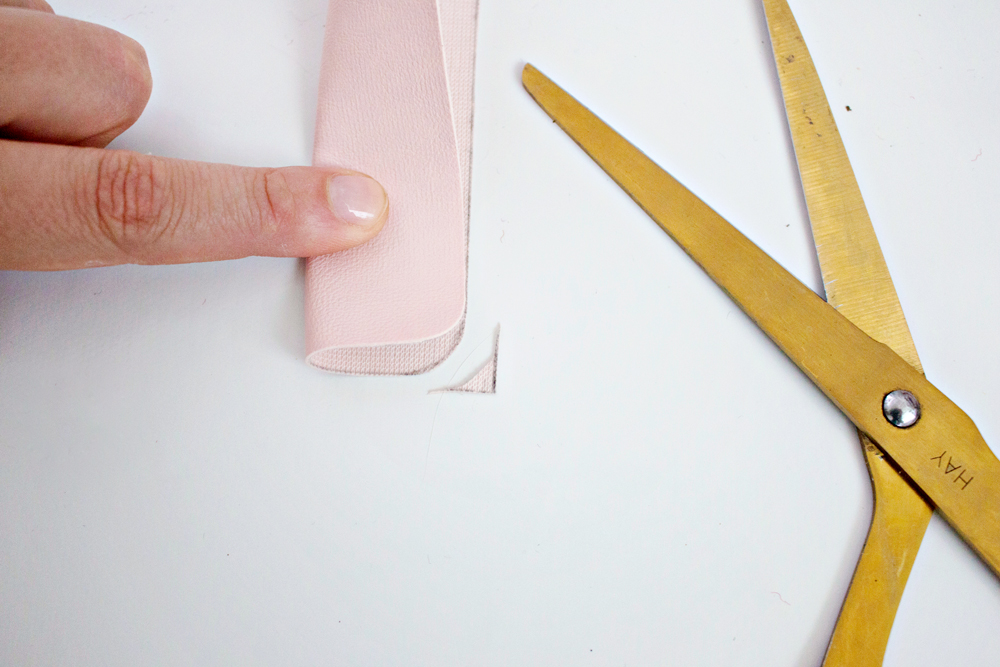
– Fold the fabric horizontally down the middle. (wrong sides towards each other)
– Place the bottom corners on top of each other and match the rounded shape on the other bottom corner. Cut the shape out of the fabric.
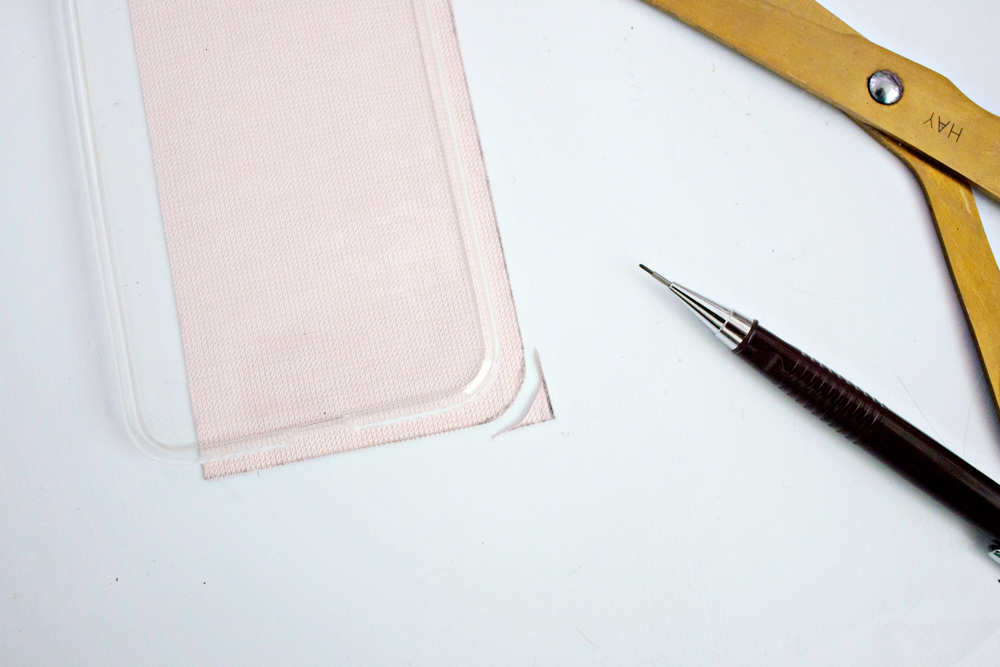
– Fold the fabric vertically down the middle. (wrong sides towards each other)
– Place the bottom-right and top-right corners on top of each other and match the rounded shape. Cut the shape out of the fabric.
STEP 5
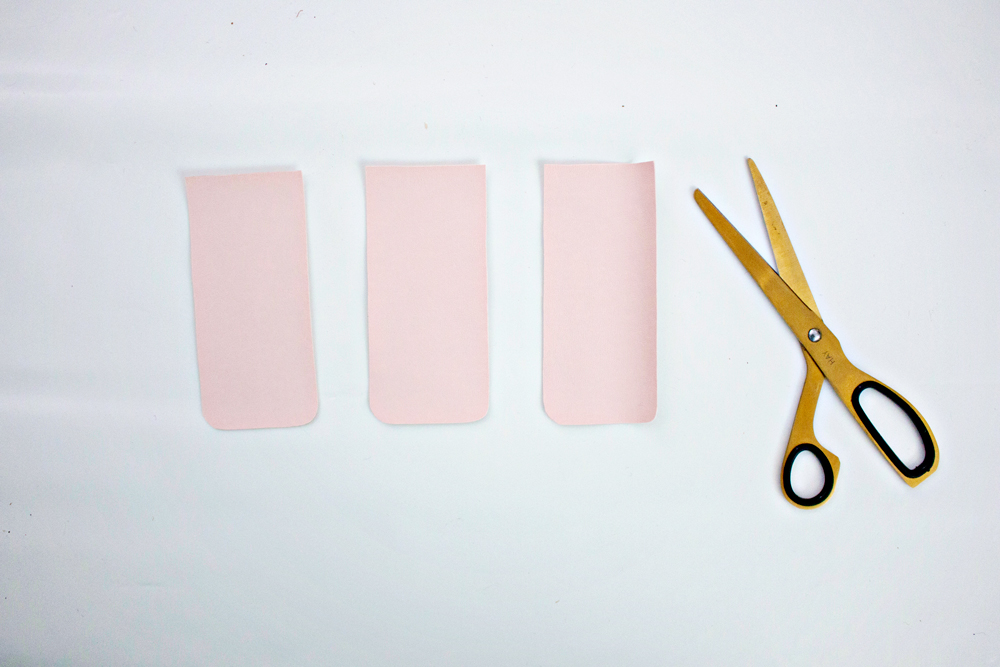
– Place another large piece of fabric on a flat surface (right side down)
– Place your leather shape from the precious steps on top.
– Trace and cut out the shape twice.
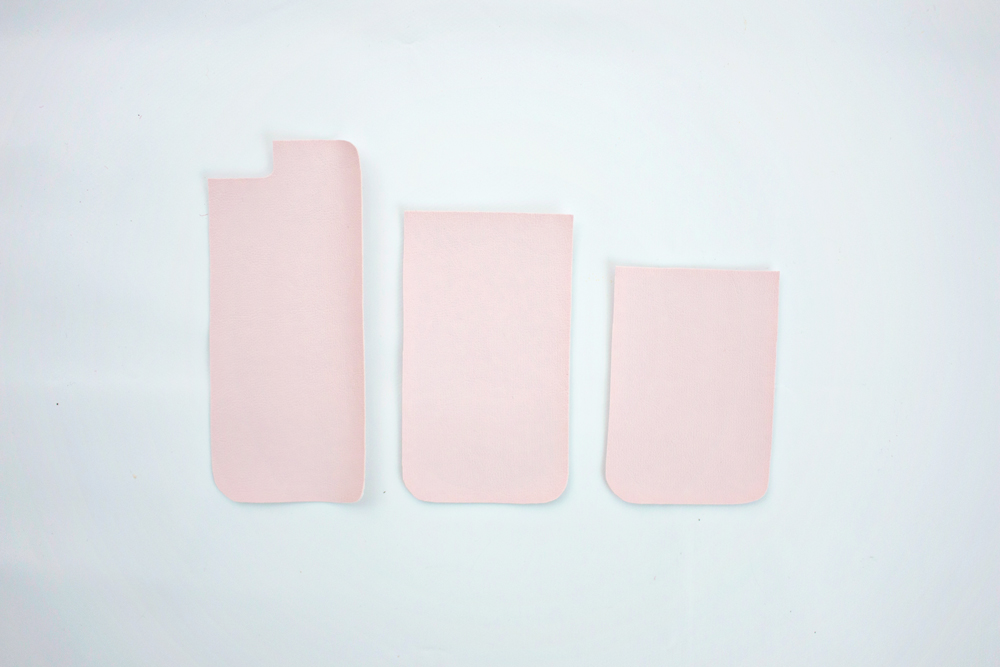
– You should have three identical pieces of fabric.
STEP 6
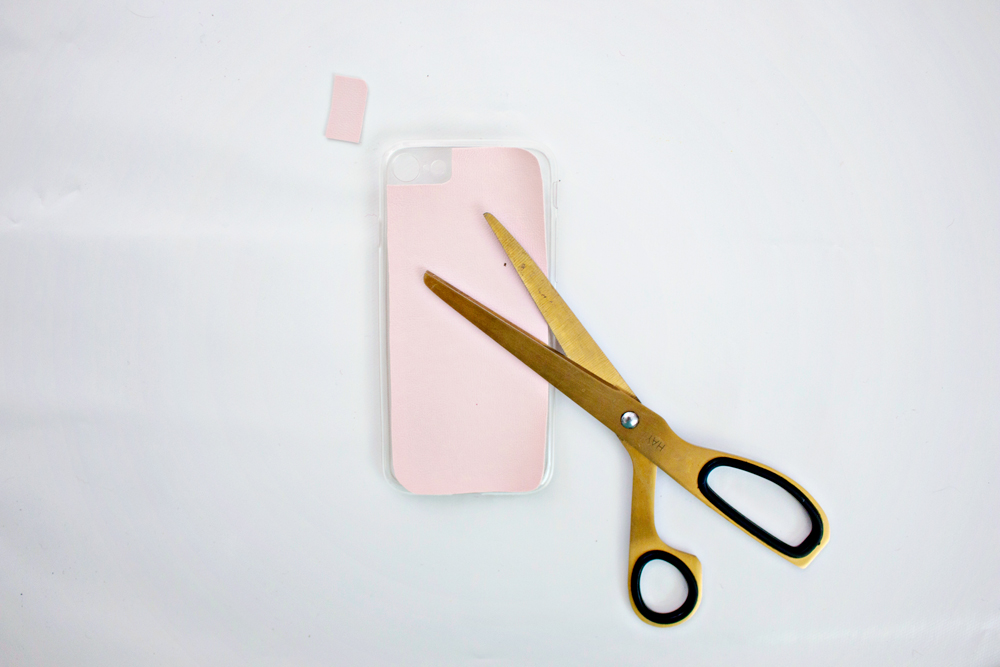
– Place one of the pieces (right side up) on top of the back of the silicone phone case.
– Cut out the corner that covers your camera, as shown in the photo above.
STEP 7
The piece with your camera cut-out will be the back piece. The other two pieces will hold your cards.
– Cut both of them in the desired height. One slightly shorter than the other.
STEP 8
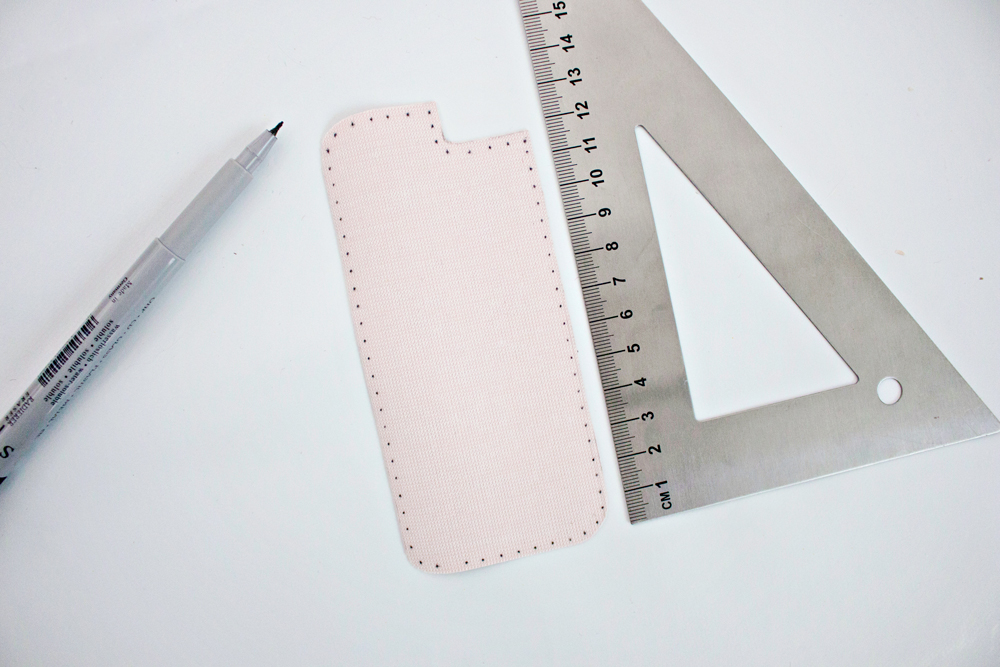
– Take your largest piece (the one with the camera cut out) and place it right side down.
– Take your ruler and measure approx. 3mm from the edge. Mark it with a dot.
– Draw tiny dots all along the outer edge, keeping them approx. 3mm from the outer edge and approx. 6mm inbetween each dot.*
* The dots will be your embroidery stitch points. And will be visible through the inside of the silicone cover.
STEP 9
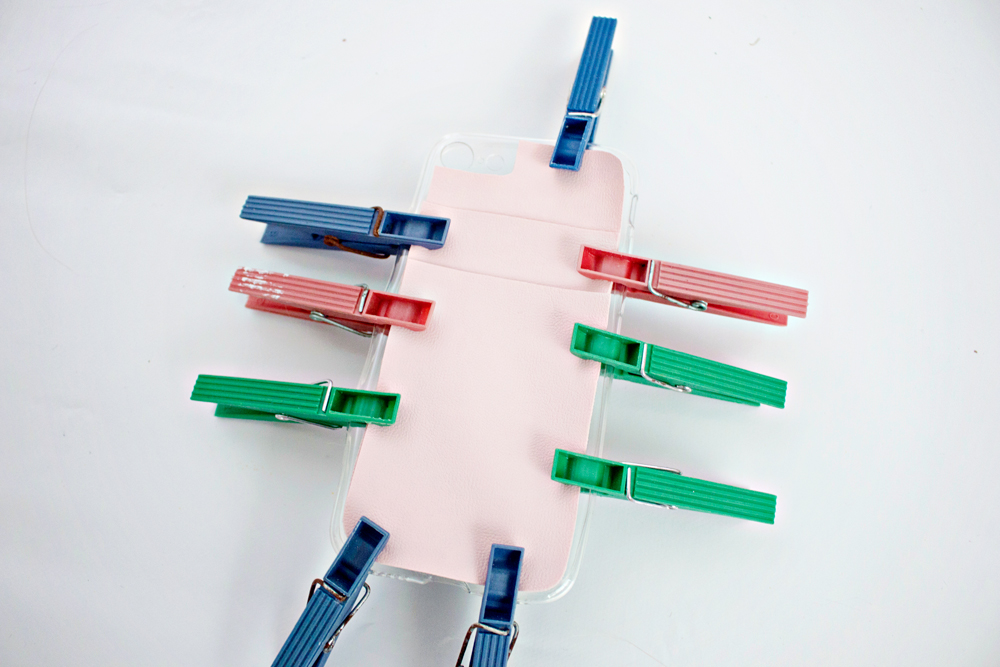
– Place your three (faux) leather pieces on top of each other (right sides up).
– Place them on top of the back of your silicone phone cover.
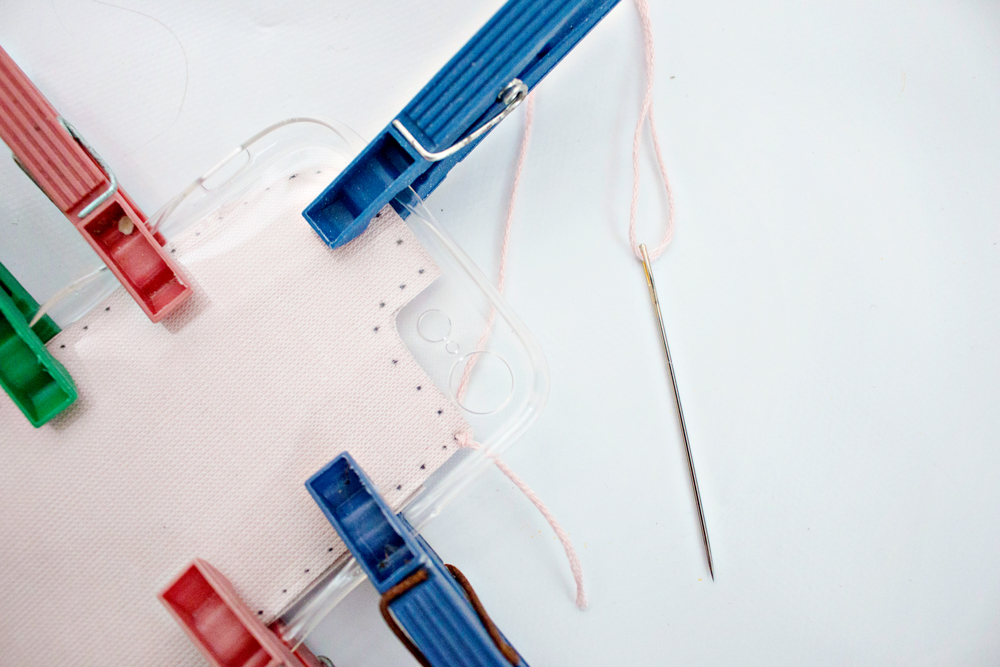
– Keep them in place with clothes pins (or something similar that won’t damage the leather).
STEP 10
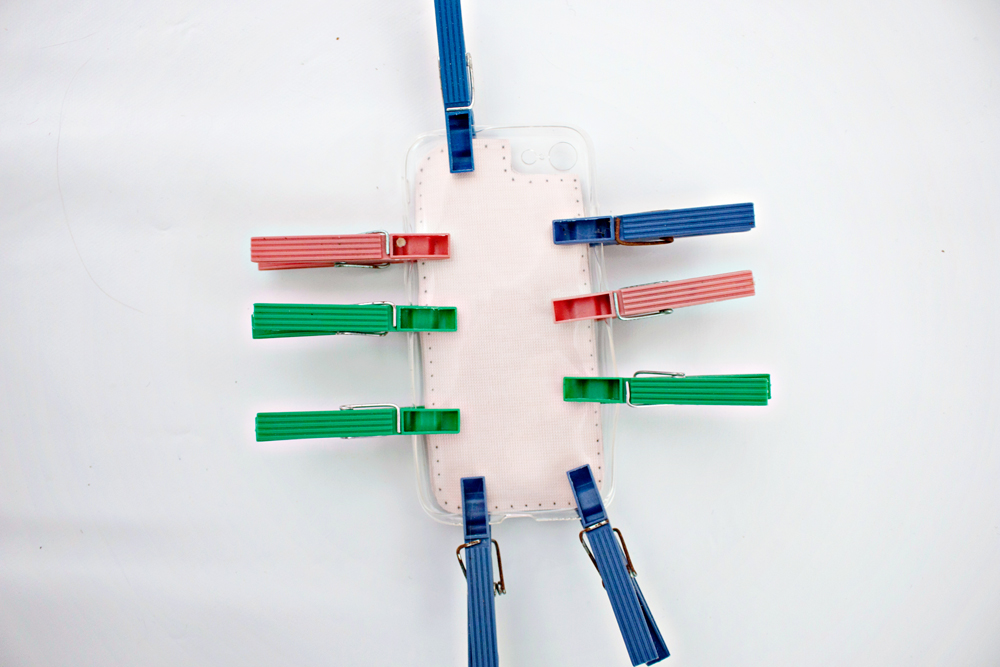
– Flip the cover, showing the inside of the phone case.
– You will now see the dots made in step 8 through the transparent case.
STEP 11
– Thread your needle with the embroidery thread and tie a small knot at the end of the thread, make sure that there is still a bit of thread at the other side of the knot (you will need this for the final step)
– Insert the needle through the wrong side of the leather ending in a marked dot (do not sew through the silicone yet!)
– Pull your thread all the way through until the knot at the end of the tread reaches the leather.
– Let the string at the end of the knot stick out.
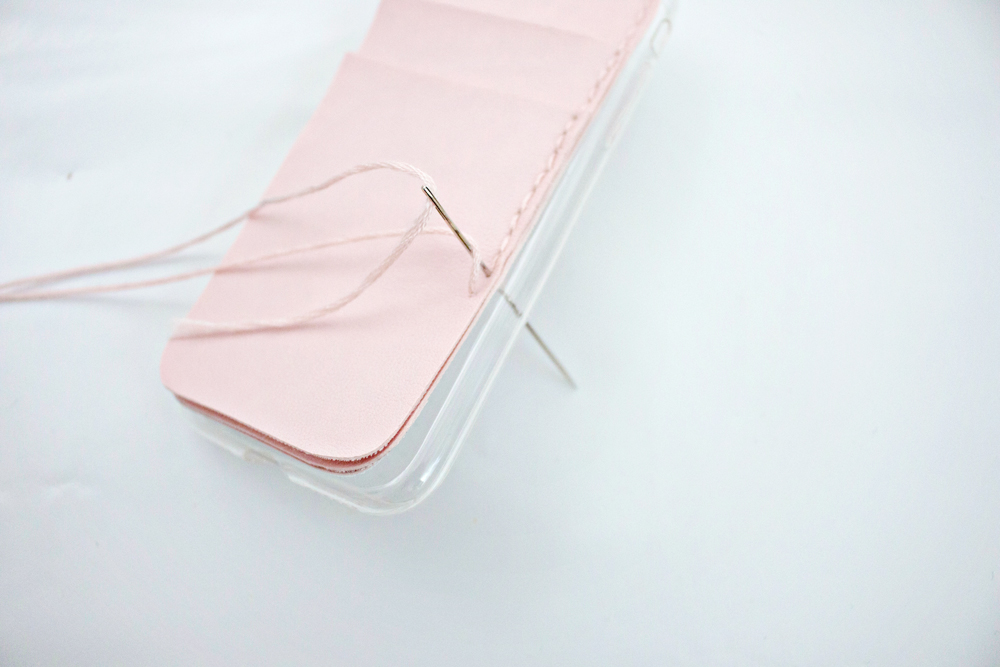
STEP 12
– Start attaching the three pieces of leather onto the silicone case, with a simple backstitch. Use your marked dots as reference points and push the needle through the case and leather each time.
STEP 13
– Once you have stitched a large part of the case, you can remove the pins and continue attaching the pieces together.
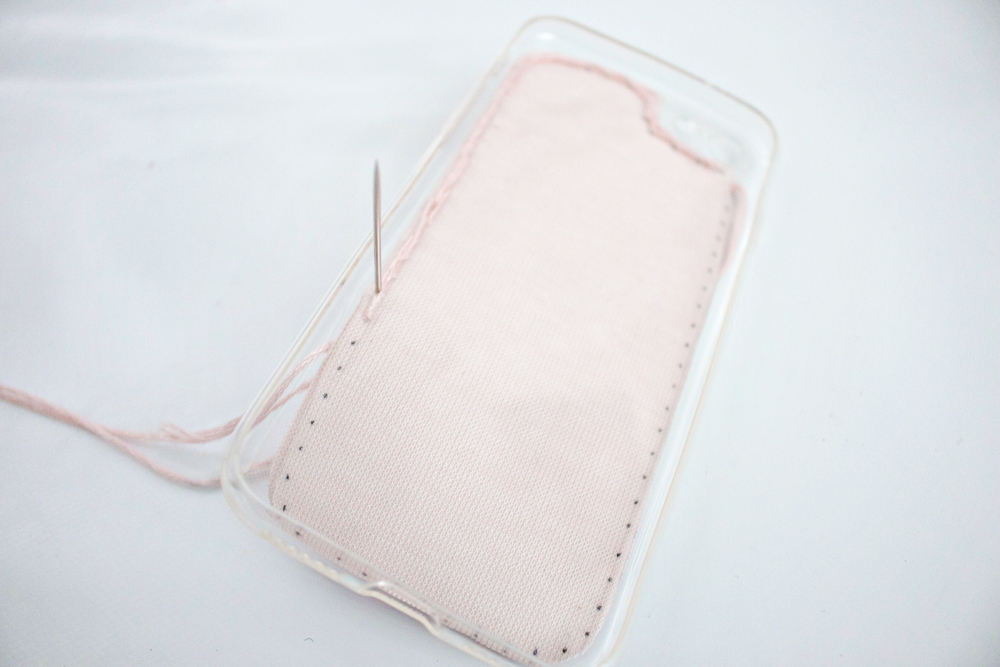
– When you have stitched all of the marked dots and reached the beginning, you can use the thread that is sticking out (step 11) and tie a knot to secure the thread.
– Cut the excess thread and use your needle to push it in between the silicone case and leather.
CREDITS
Silicone Case – www.bol.com
Lips Blouse – Bershka
Faux Leather – De Stoffenkraam
This post is an original LRS project and was not sponsored.
2 comments
I loved your DIY phone case. Especially the pink colour. Thanks
Thank you!!