Sometimes there are these projects where I just can’t believe that I get to do this as a part of my work, this is one of them!
Upcycling is my friend, but creating things from scratch also has a magical feeling to it. The first sewing project where I designed not only the sewing pattern but also the fabric pattern was my Robe Coat project. And today I am going to take it to the next level (yes, that is possible!) with a ‘Cut and Sew’ sewing project!
What is ‘Cut and Sew’ you ask?
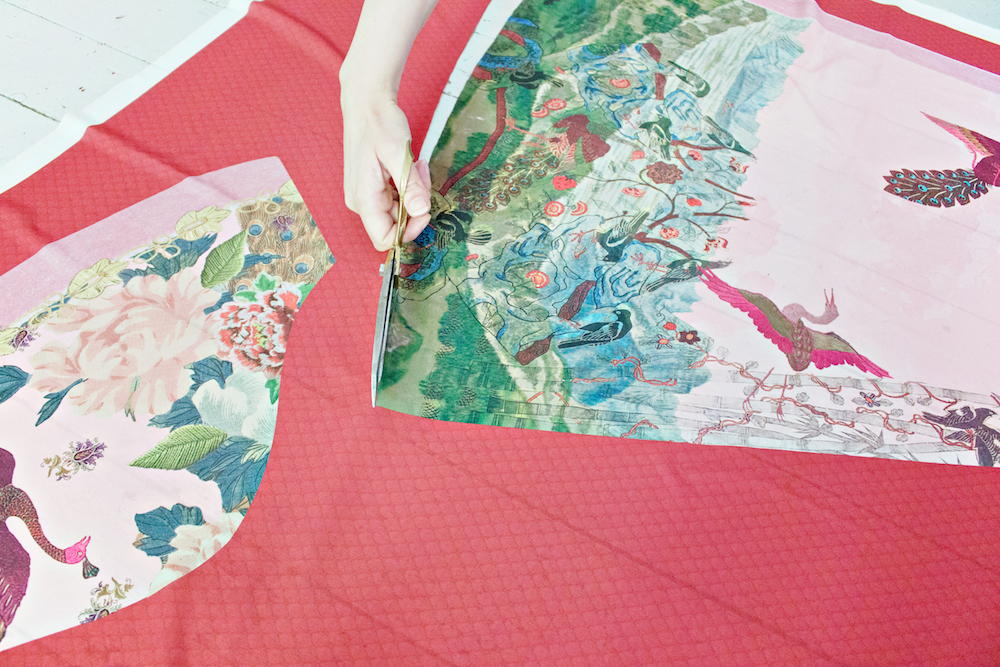
This means that you design and outline a piece of clothing during the design process. For instance, you design a life size back and front of a t-shirt, paste a photo inside this lay-out and print both pieces on fabric. All you have to do once the fabric is printed, is ‘cut out and sew’ the t-shirt together.
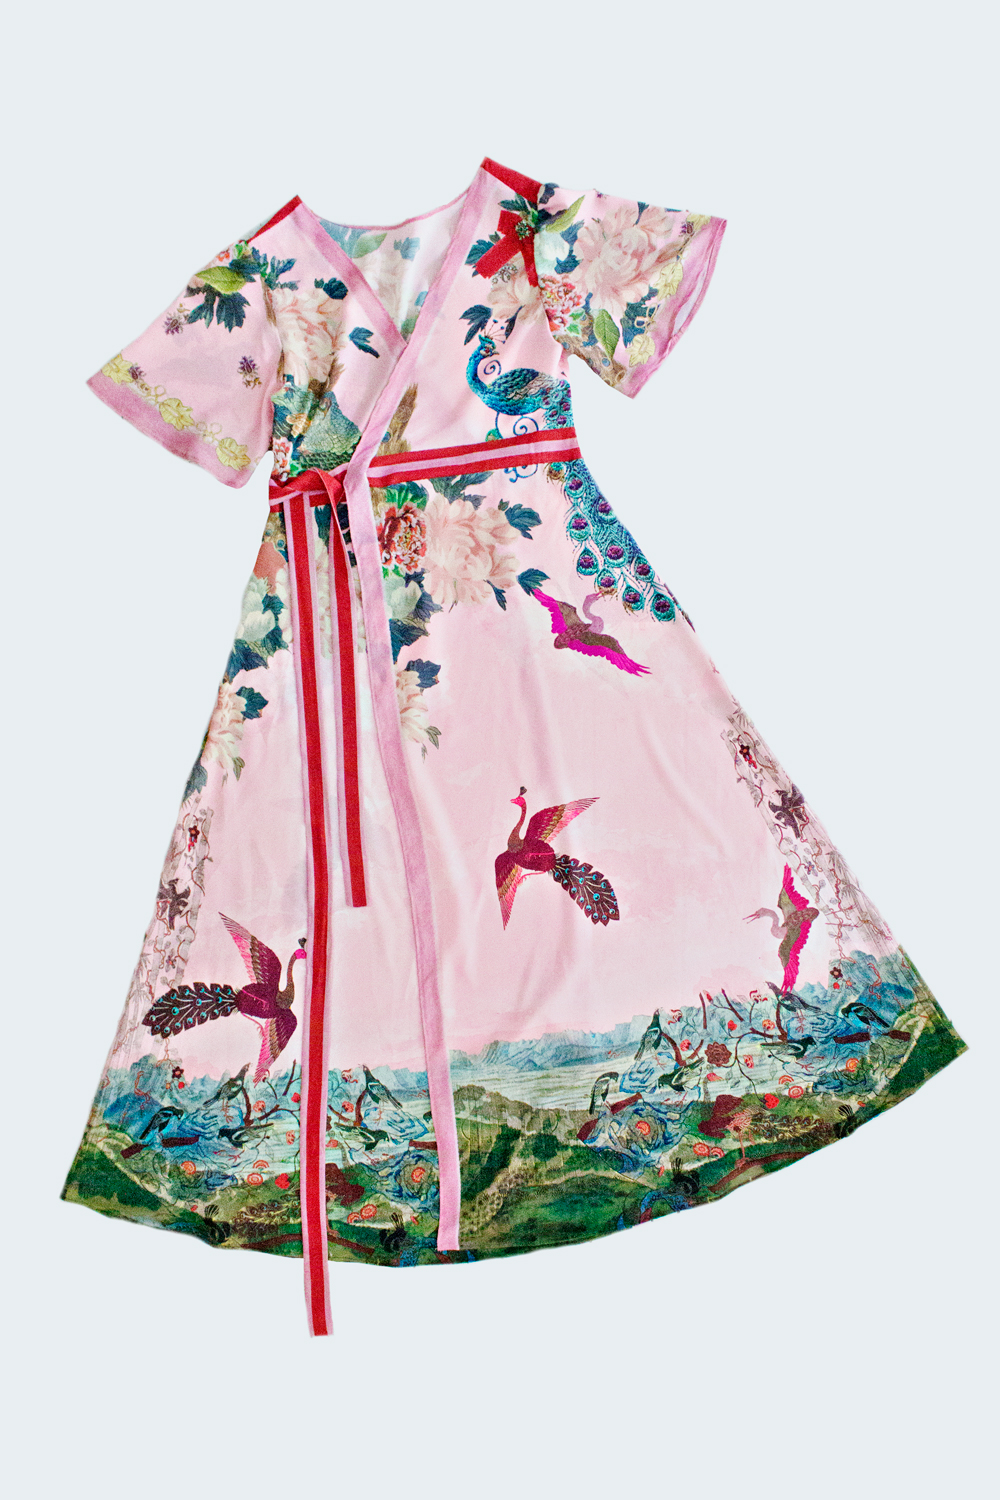
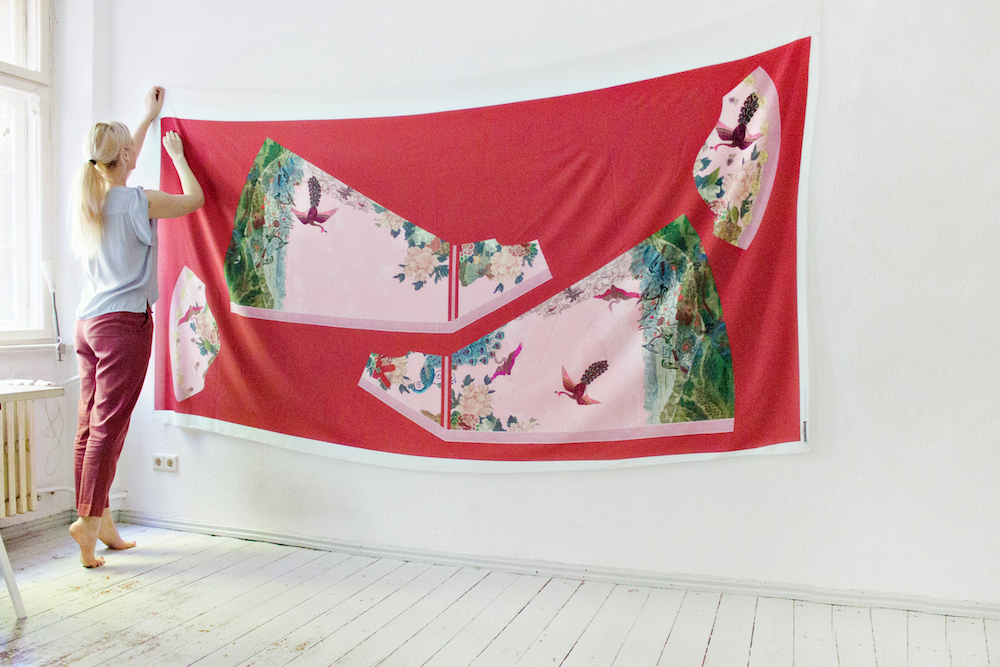
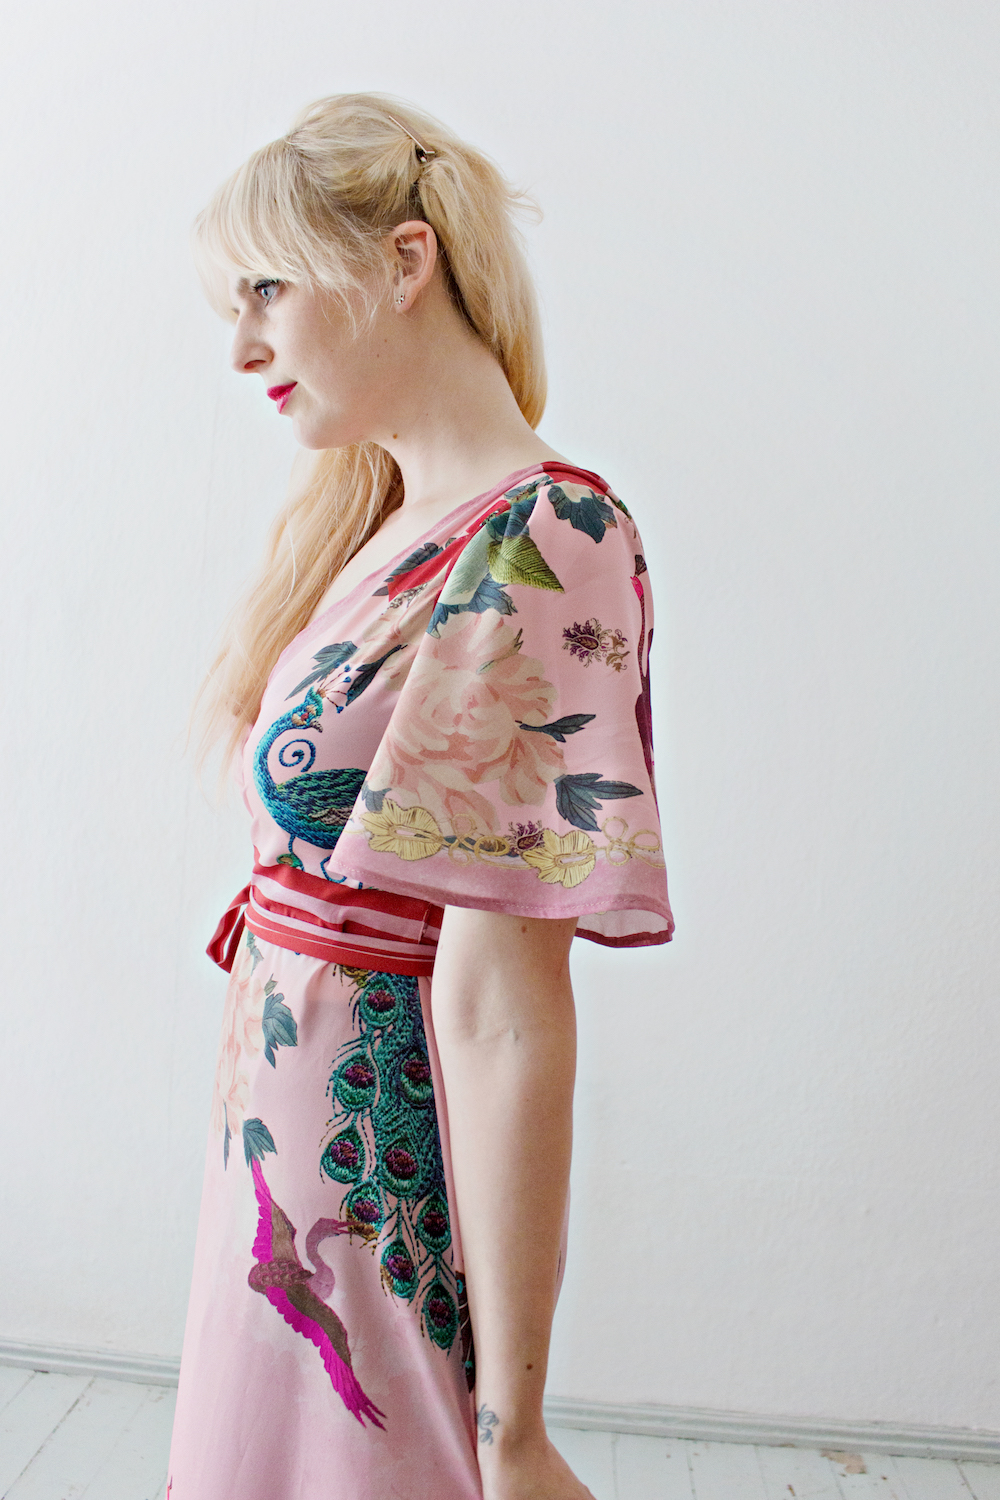
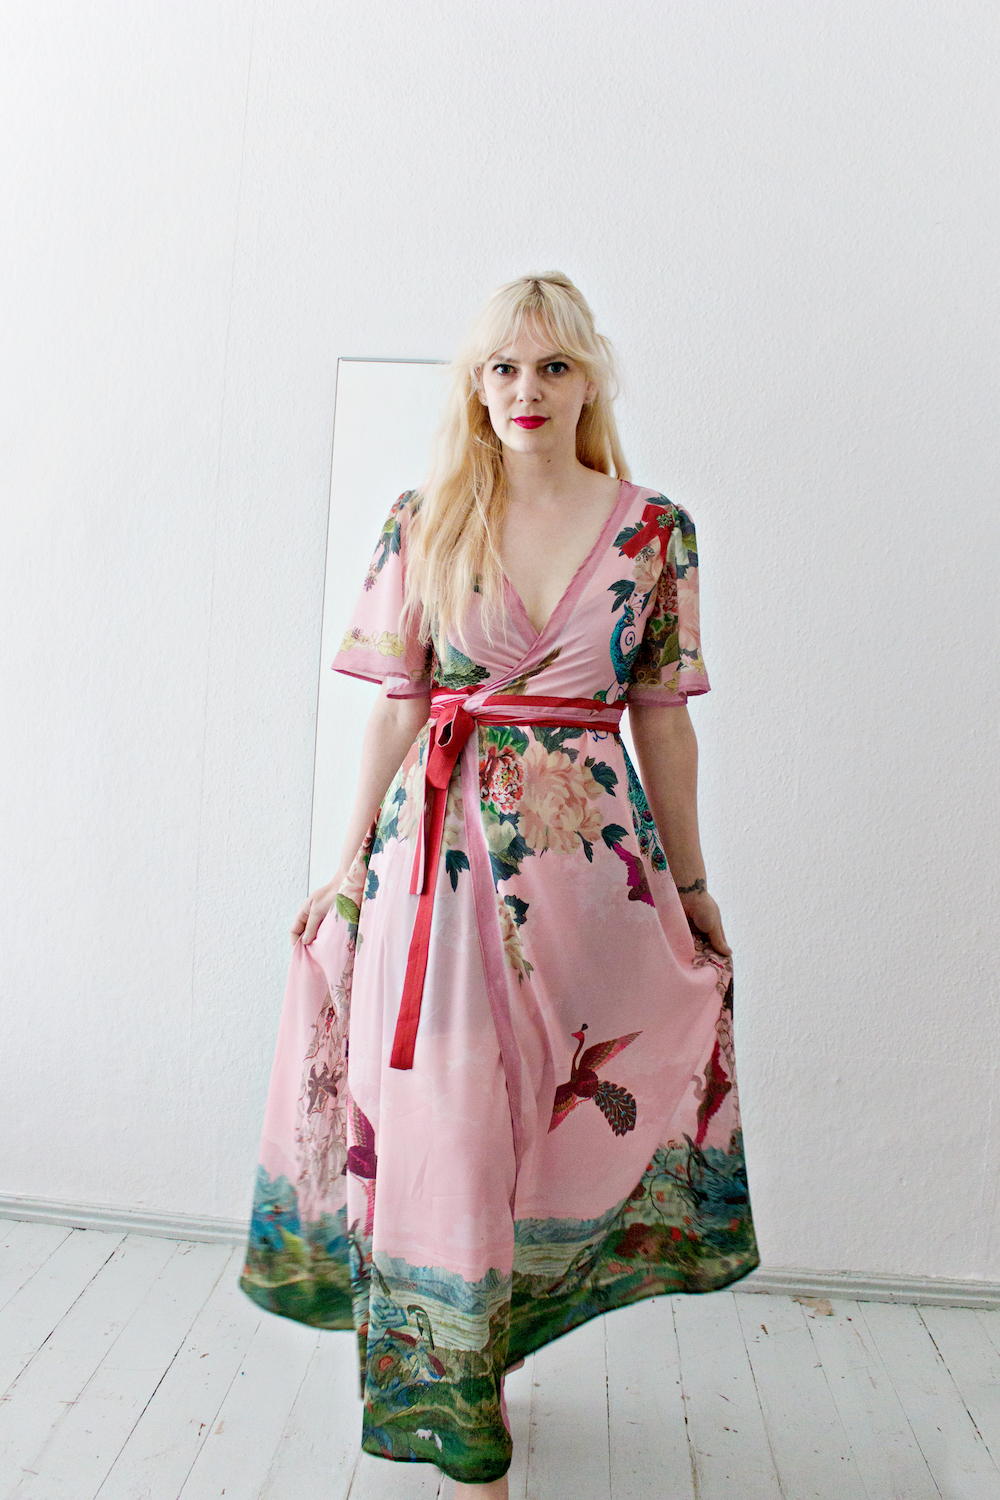
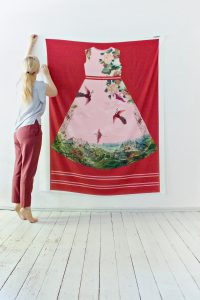 For this DIY project, I created a simple wrap dress pattern. It only has 5 pattern pieces (excluding the ribbons) so once it has been printed on fabric, you will only need to sew the 5 pieces together like a fun kimono puzzle.
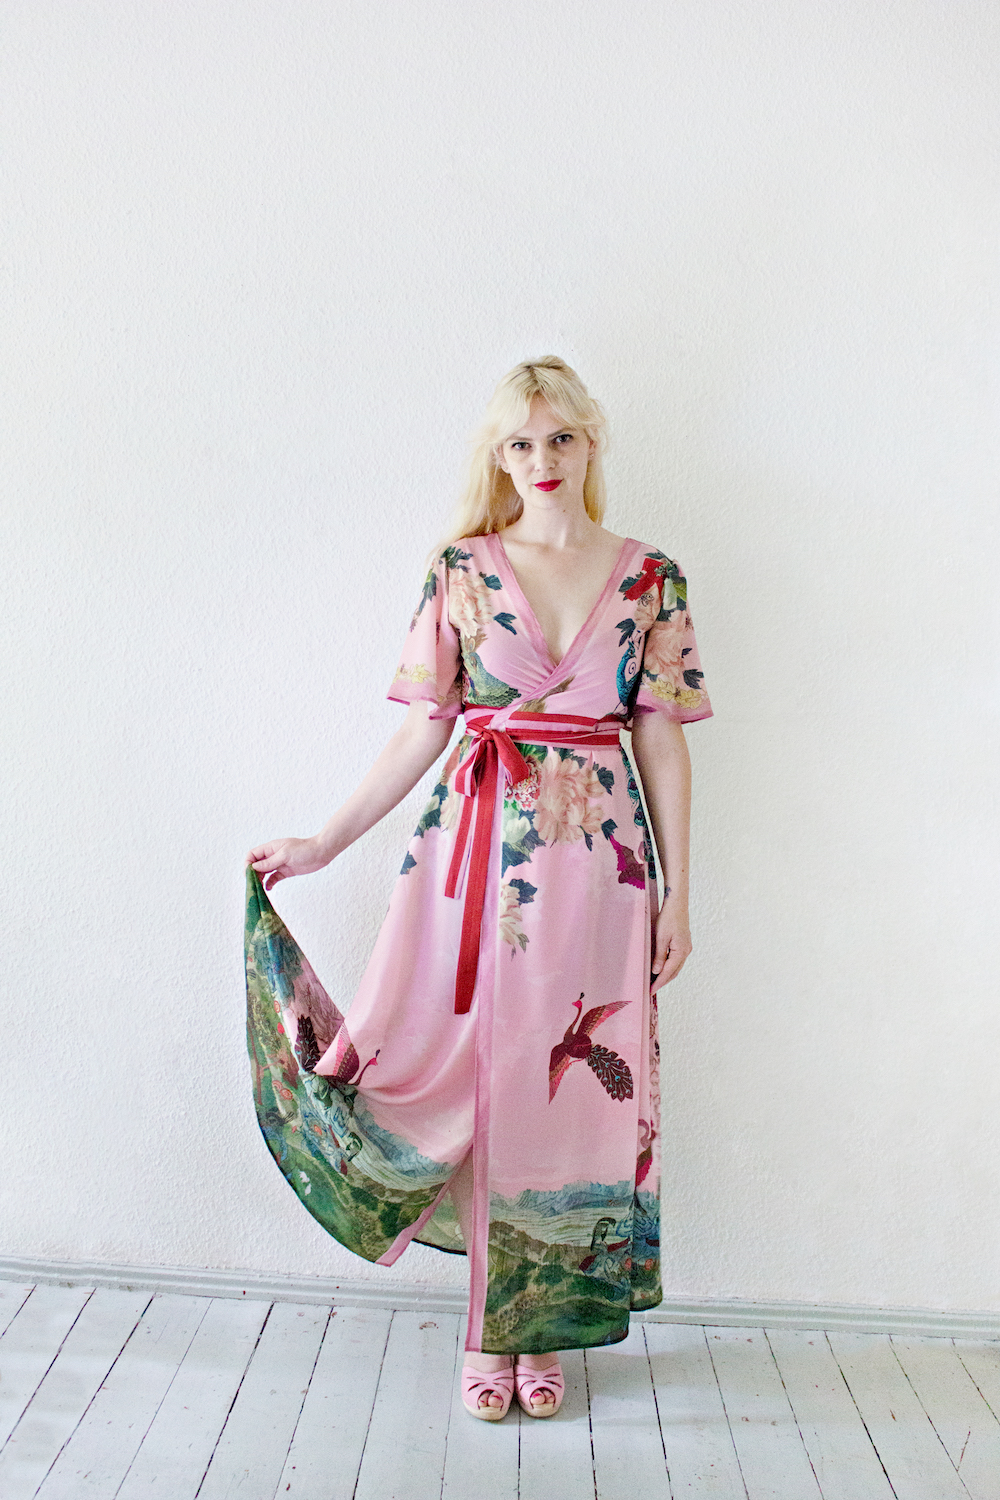
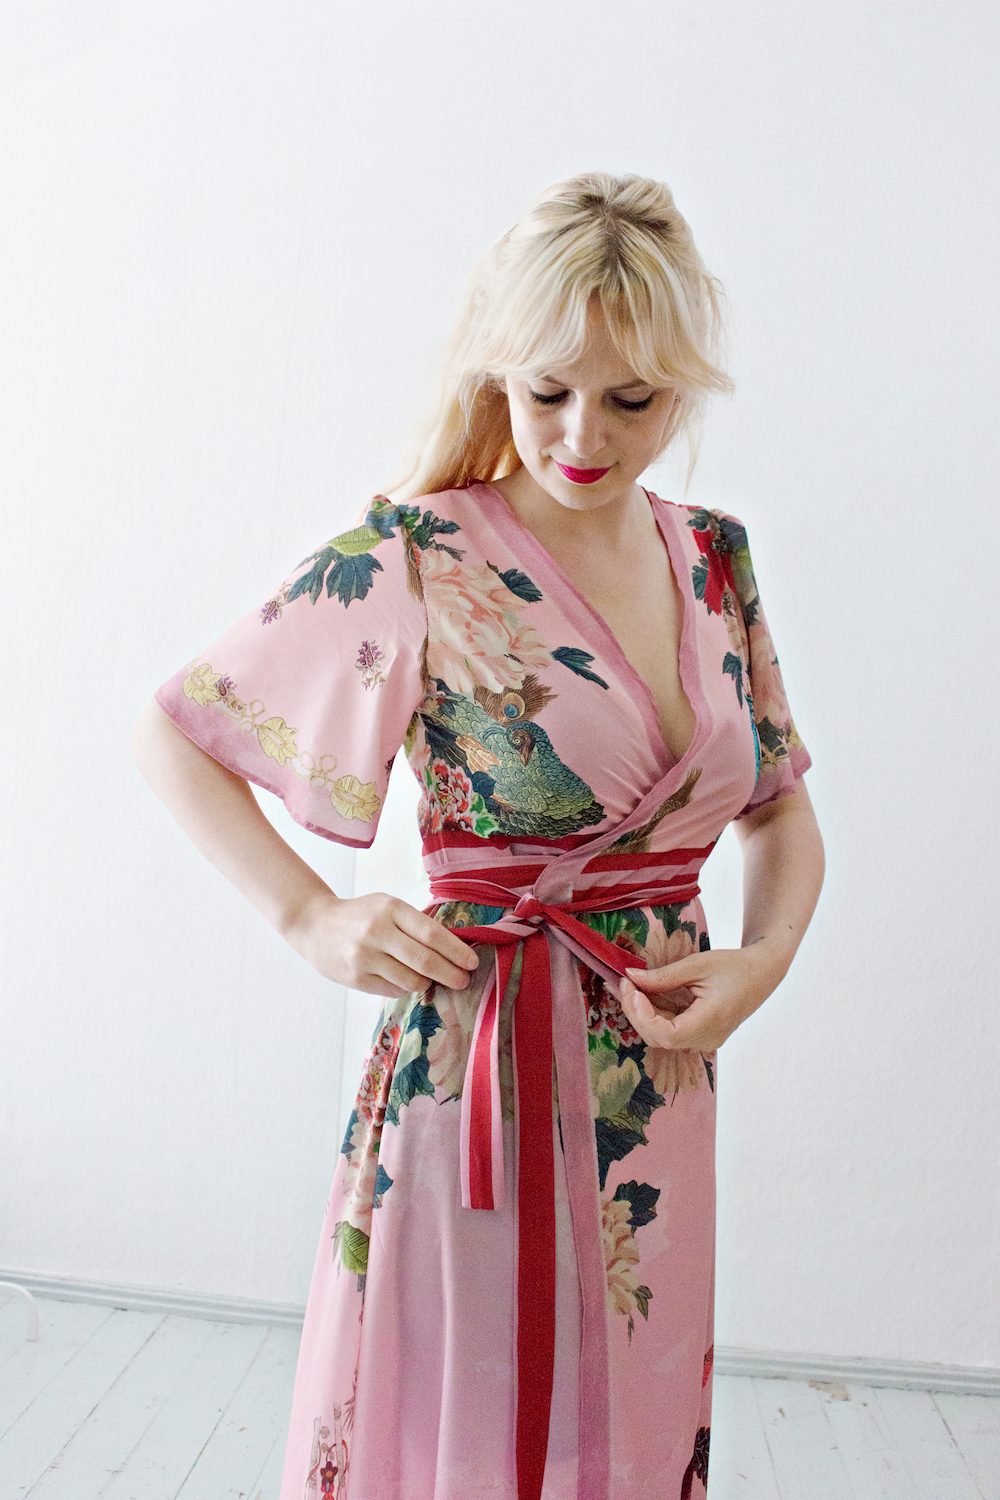
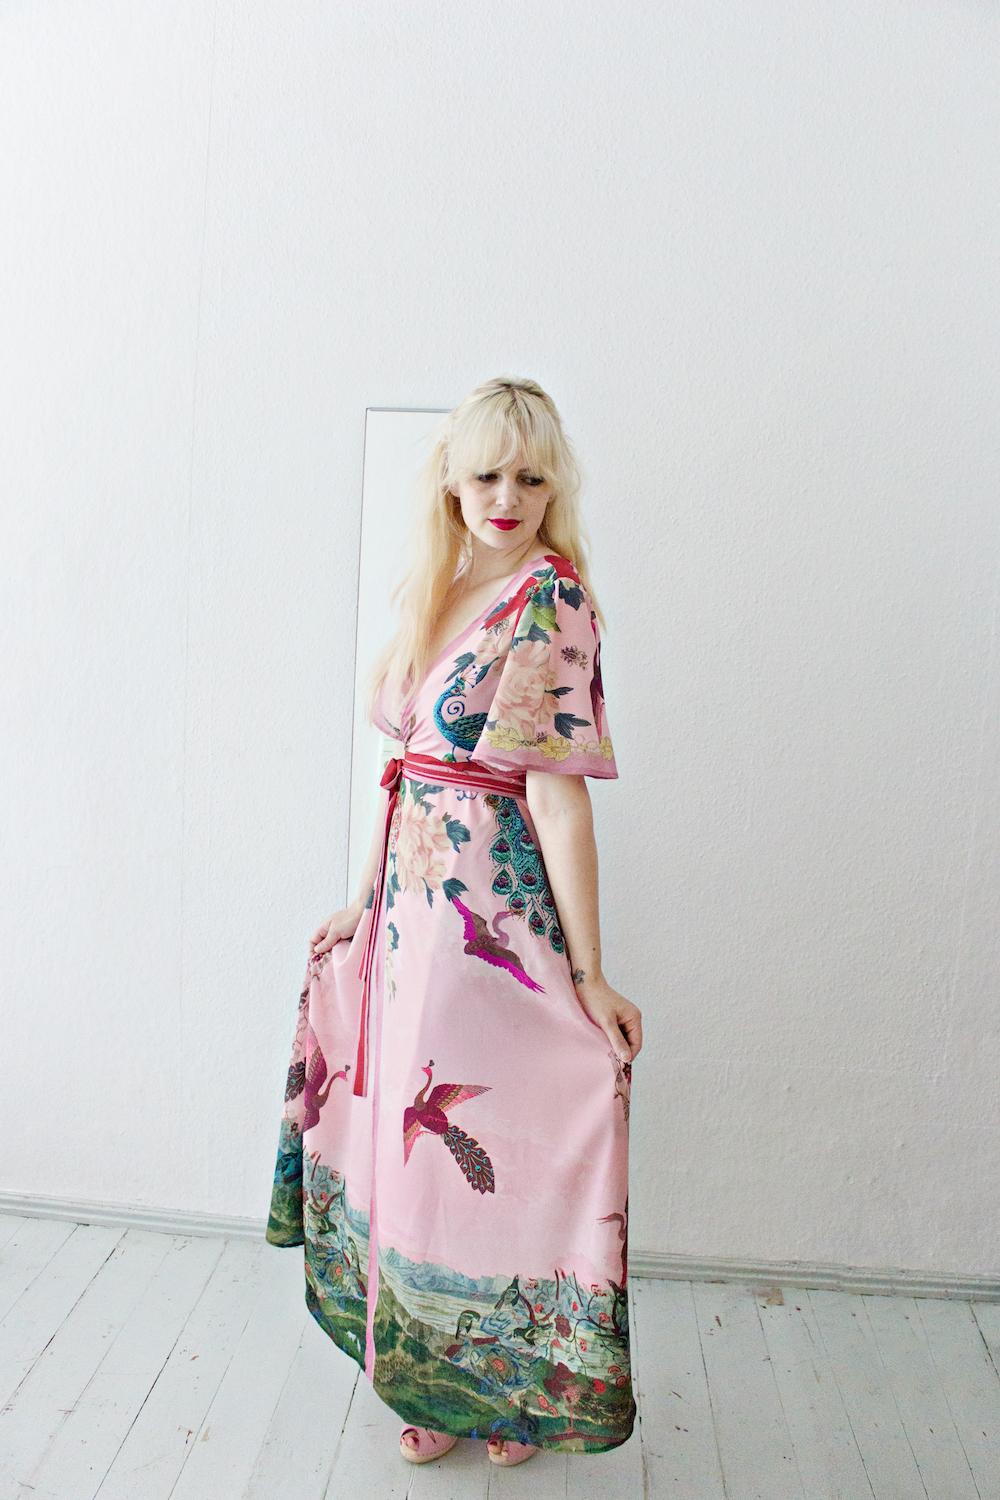
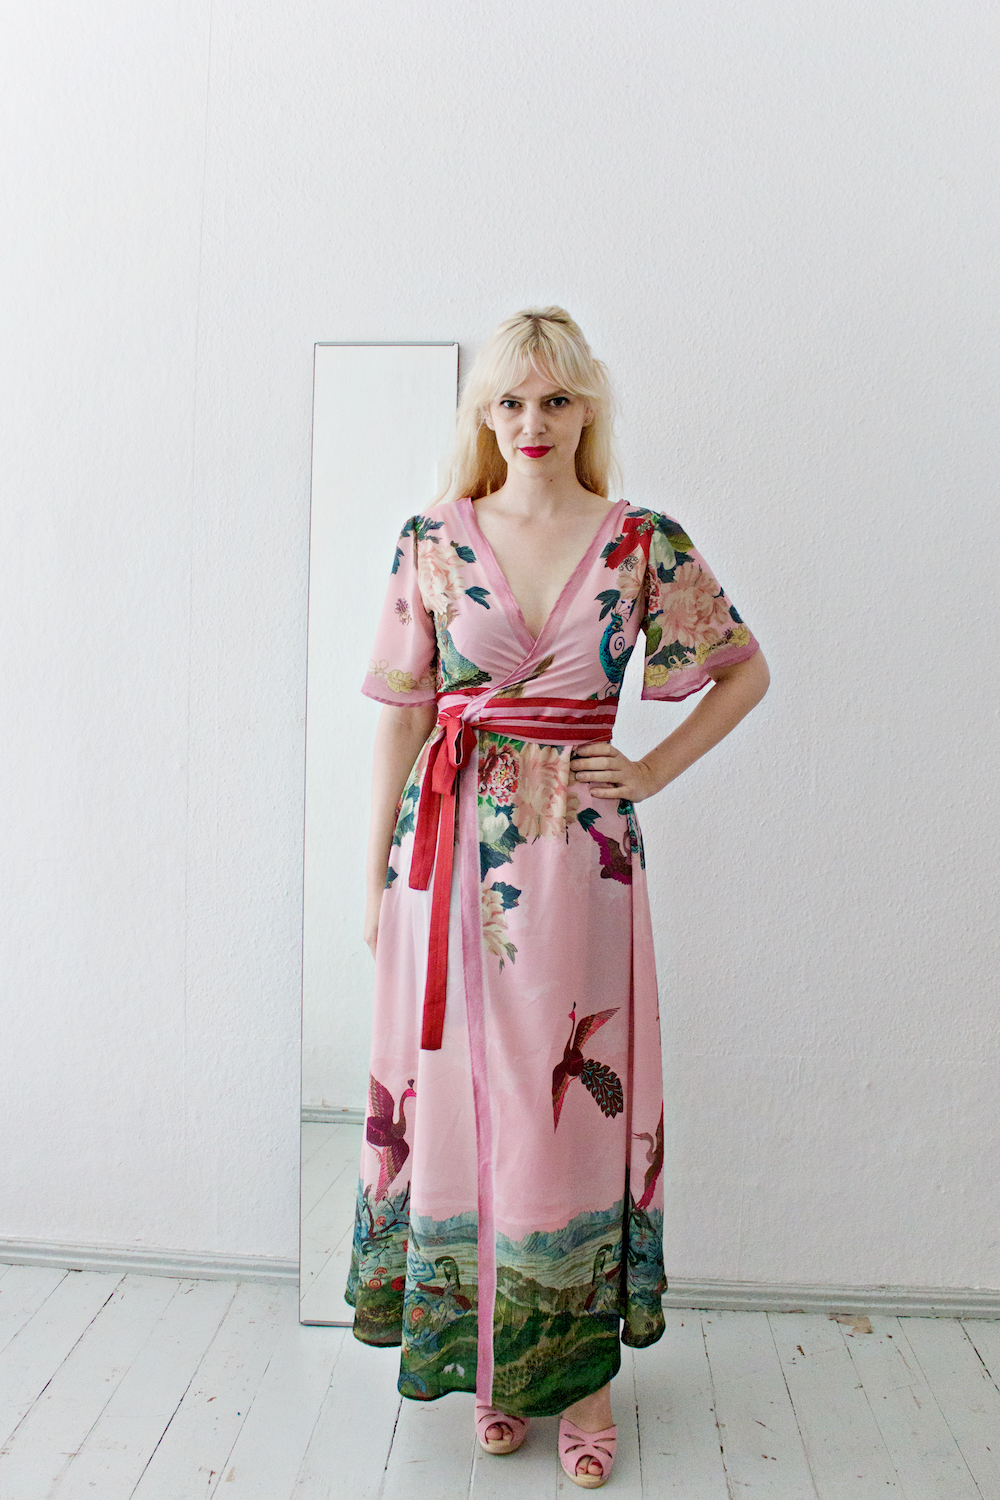
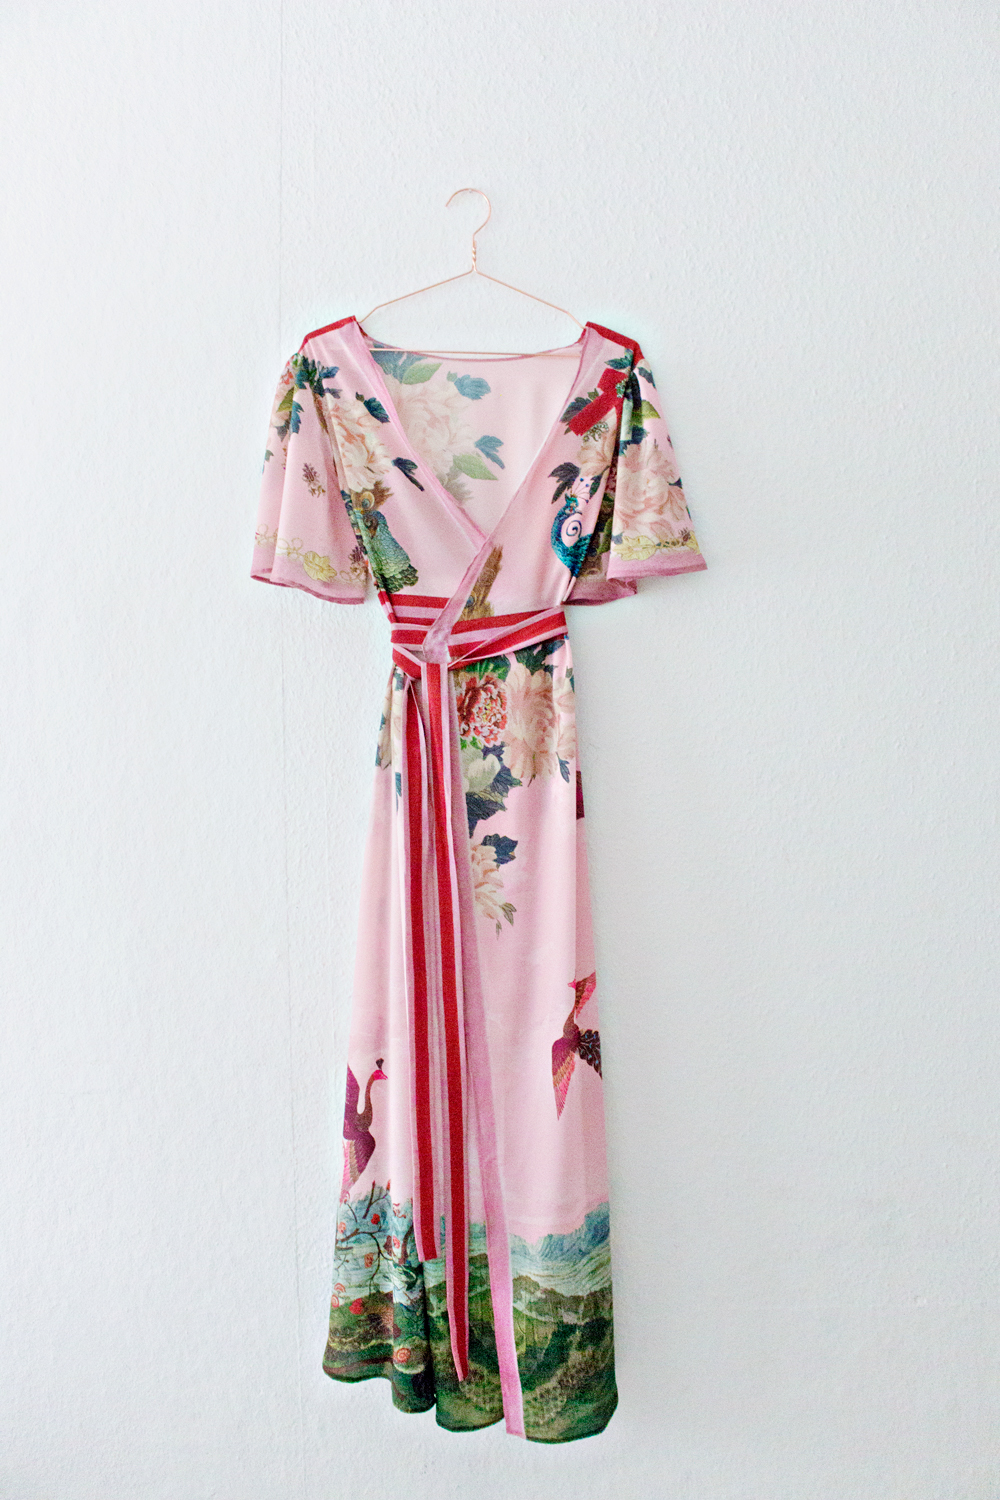
Besides it being extremely easy and practical to have the pattern pieces printed in life size instead of having to use tracing paper and chalk on fabric. It is the design which makes this way of sewing so unique. – When you buy a piece of fabric on the market or in a store, you work with a design or repeating pattern that someone else has created. But what if you want to have a fabric that you can design based on your body type and taste? If you have wider hips like I do, you can darken the sides of the dress a bit, or you can place the focus on the bottom of the dress with a landscape. Because the outline of a wrap dress is so clear, you can really design a dress on and for your body.
About the design
For this project, I went to my favourite source of visual inspiration: the Rijksmuseum website. This is a website by one of the biggest Dutch museums and they have a large amount of their artwork online, encouraging everyone to download and use them for projects like this. All of the images are high ress. and rights free.
I collected ten different artworks from around the world and used photoshop to combine them into this design. The artworks range from paintings made in Japan, to embroidery pieces from France.
I used pictures of fabric to create the illusion of a velvet trim and embroidered sleeves, while in fact every piece of the dress is made out of the same material, it looks like it is a combination of different textures.
There are many options to do this DIY project:
– Follow my full detailed tutorial (below) and order my cut and sew – wrap dress design from Spoonflower
– Request the outlines of the wrap dress, design your own fabric and order it online. (this does involve a bit of designing knowledge, the files are very big, so your computer needs to be able to handle this)
– Design another cut & sew pattern, like a T-shirt and use this tutorial as your guide for your very own project! (just make sure that the t-shirt is designed in a ‘life size’ file, we don’t want to end up with t-shirts for our barbies;)
Technical information:
– The wrap dress pattern is designed for sizes: Small, Medium and Large.
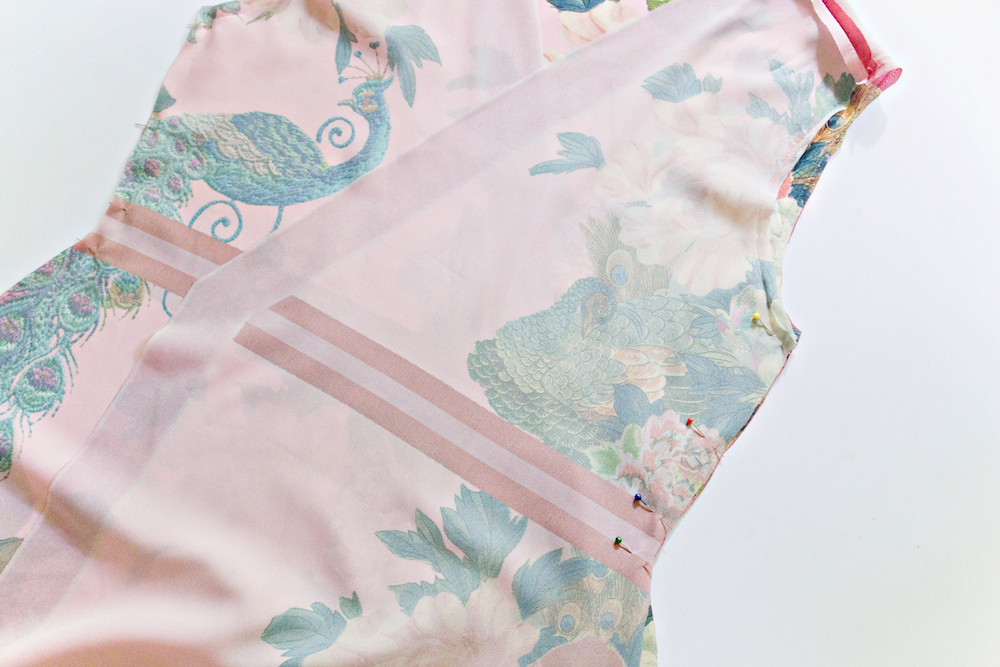
– Because everybody has different body types, you can cut the pattern pieces wider, by including pieces of the red parts (see images below) to make sure that the dress won’t be too small. I actually did this at the shoulders to show you how easy it is to alter the patterns.
– The size of the first printed piece including the: back of the dress and the two ribbons is: 52″ x 72″ (2 yards centered) at 150 dpi.
– The size of the second printed piece including the: left and right side of the front of the dress and the left and right sleeve is: 52″ x 108″ (3 yards centered) at 150dpi.
– The fabric of the dress is: poly crepe de chine and it is machine washable and very flowy and soft.
DIY

SUPPLIES
– Custom Cut & Sew Fabric – Order my design or design your own with the template.(Interested in the outline Photoshop files? Shoot me an email and I will send them to you!)
– Sewing Machine
– Scissors
– Pins
– Needle & Thread
– Iron
STEP 1
– Design your own cut & sew fabric and order it online, or order mine.
– Place the fabric with your ‘cut and sew’ design on a flat surface and cut around the pattern shapes.
– If you are not sure about the sizing, you can cut wider around the edges, pin the garment together and see how it fits ( I did this with the shoulders)

STEP 2
-Flatten or iron the fabric to prepare for the next steps.

STEP 3
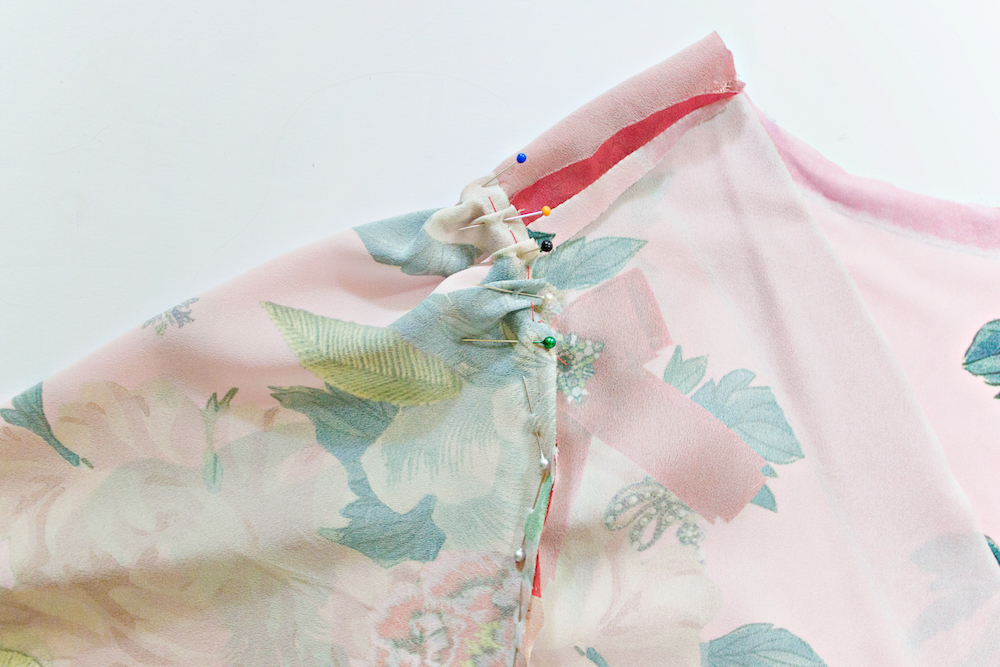
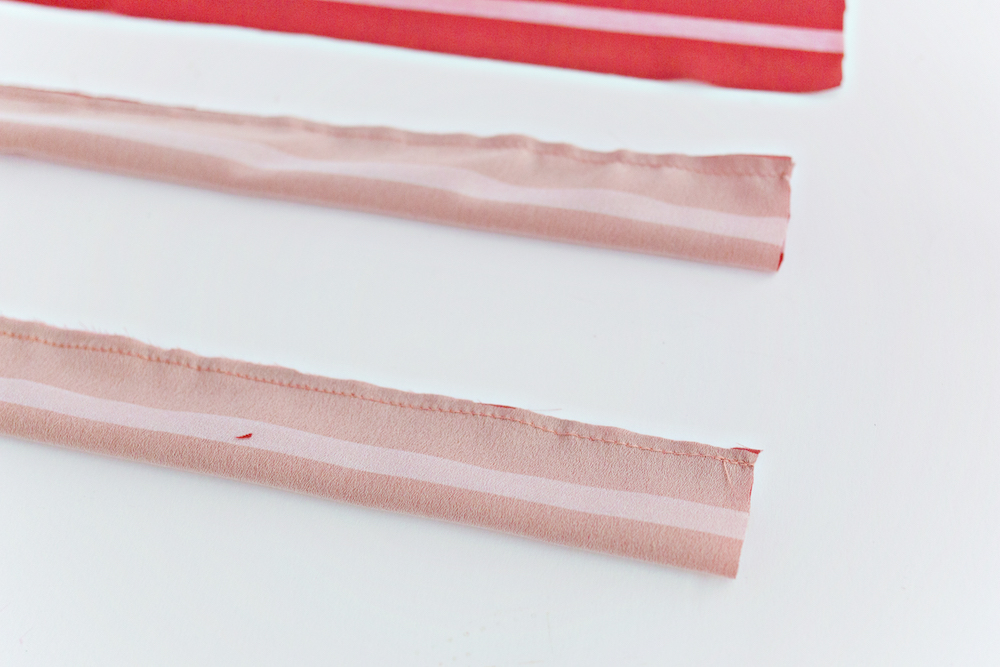
– Pin and sew the shoulder pieces* (wrong sides) together.
– Use your iron to flatten the sewn seams.
*As you can see in the picture above, I added 3 cm to the top of the shoulder when cutting the original cut-and-sew shape. I wanted to make sure that it would fit and figured I could always remove it later.
STEP 4
– Place the side parts above the waist with the right sides together on top of each other on a flat surface.
– Pin and sew the sides from the arm opening to the top of the waist line.
– Repeat this on the other side.

STEP 5
– Fold the sleeve horizontally double with the right sides inward.
– Pin and sew the side of the sleeve together.
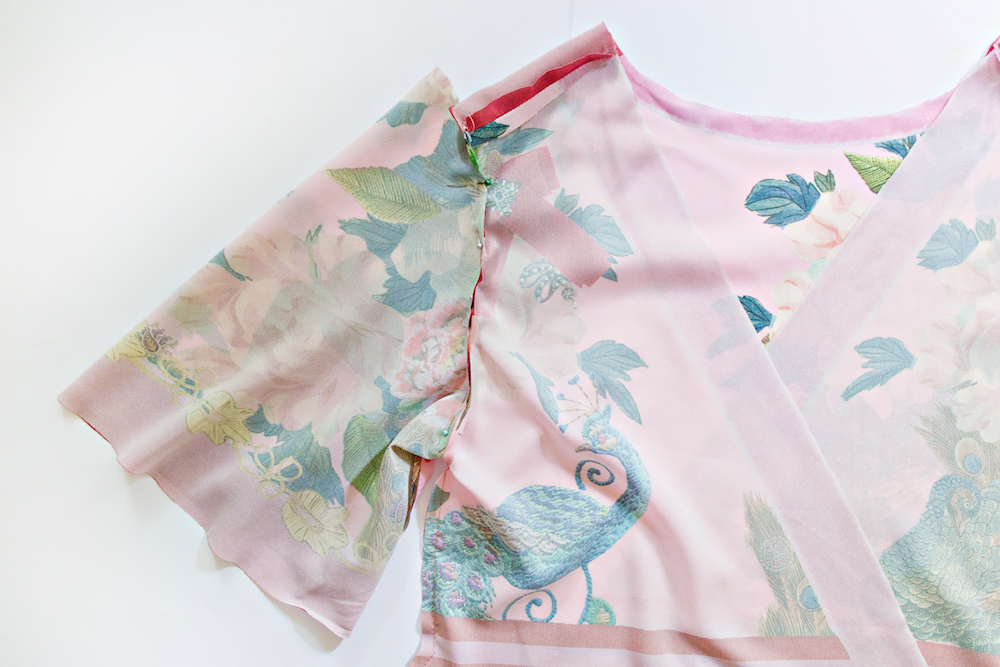
STEP 6
– Starting at the armpit, pin the sleeve inside the armhole.
– Leave about 5 cm open at the top of the shoulder.
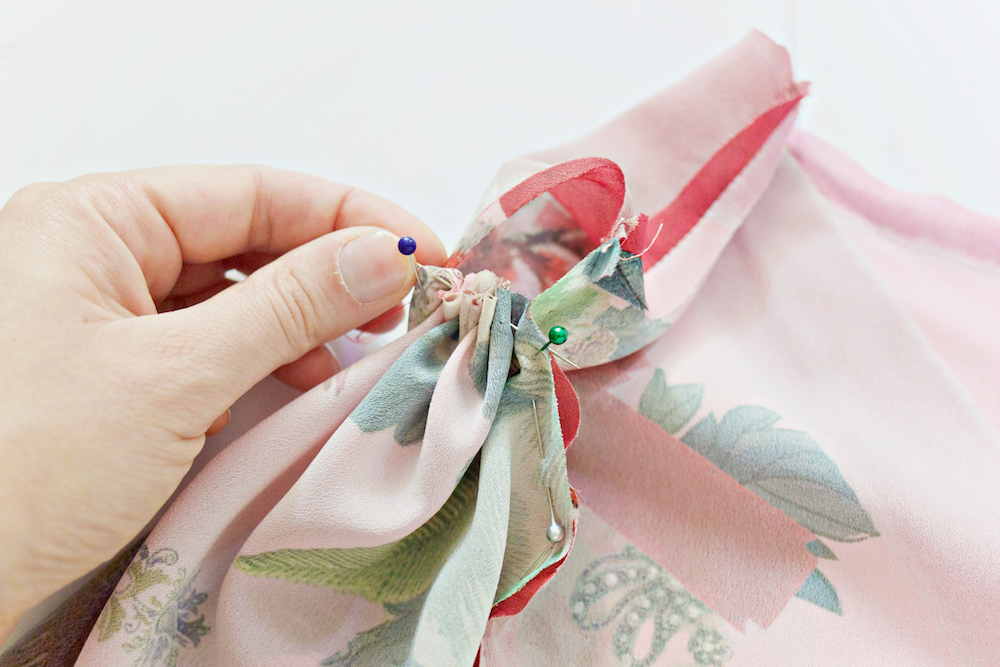
STEP 7
– Thread you needle and run it through the excess fabric at the top of the sleeve to create a ruffled line.
STEP 8
– Spread the ruffles out over the length of the shoulder opening and attach it to the shoulder with a few pins.
– Sew the pinned sleeve.
– Repeat this for the other sleeve.
STEP 9
– Fold the edge of the sleeve twice and pin it, to keep it in place. Iron and sew the edge of the sleeve.
– Repeat this for the other sleeve.
STEP 10
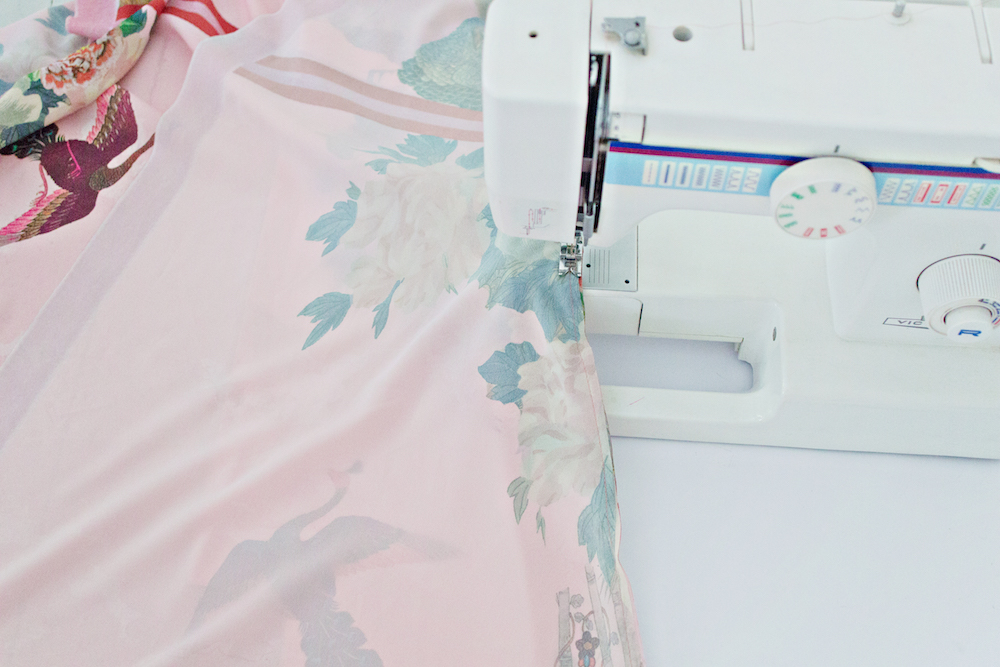
– Sew the sides of the dress from the waist to the bottom.
– Iron the seams of the dress open.

STEP 11
-Use a small pair of scissors to open the seam at the left* waistline of the dress.
– Sew along each openend line.
* You can also create the opening at the right side of the dress, whichever you prefer.
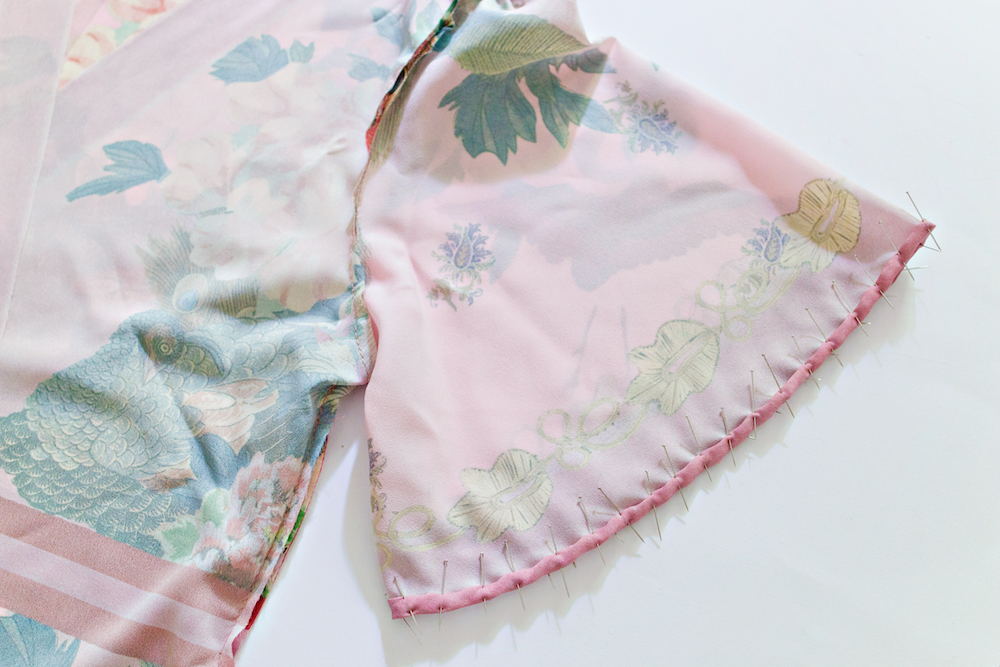
STEP 12
– Fold the fabric of the neckline double and pin it in place. Do this for the entire inside seam.
– Sew the pinned seams.
– Repeat this for the bottom of the dress.
STEP 13
– Take one of the longer ribbon pieces and fold it horizontally double with the right side turned in.
– Sew the edges together.
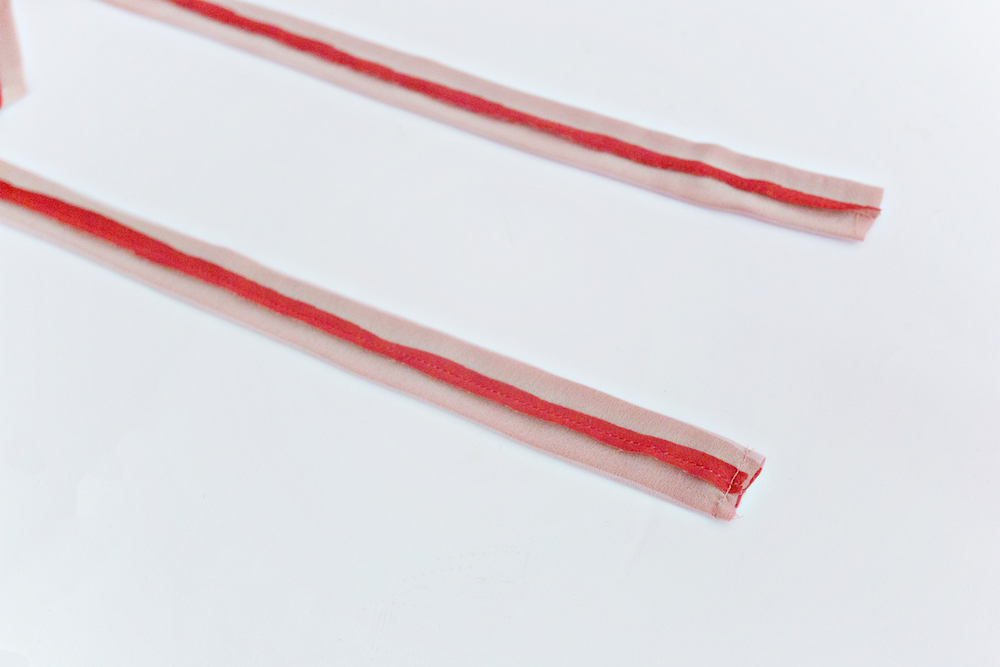
STEP 14
– Slightly move the ribbon, to get the seam to the middle of the ribbon.
– Use your iron to open up the seam and flatten it.
– Sew one end of the ribbon.
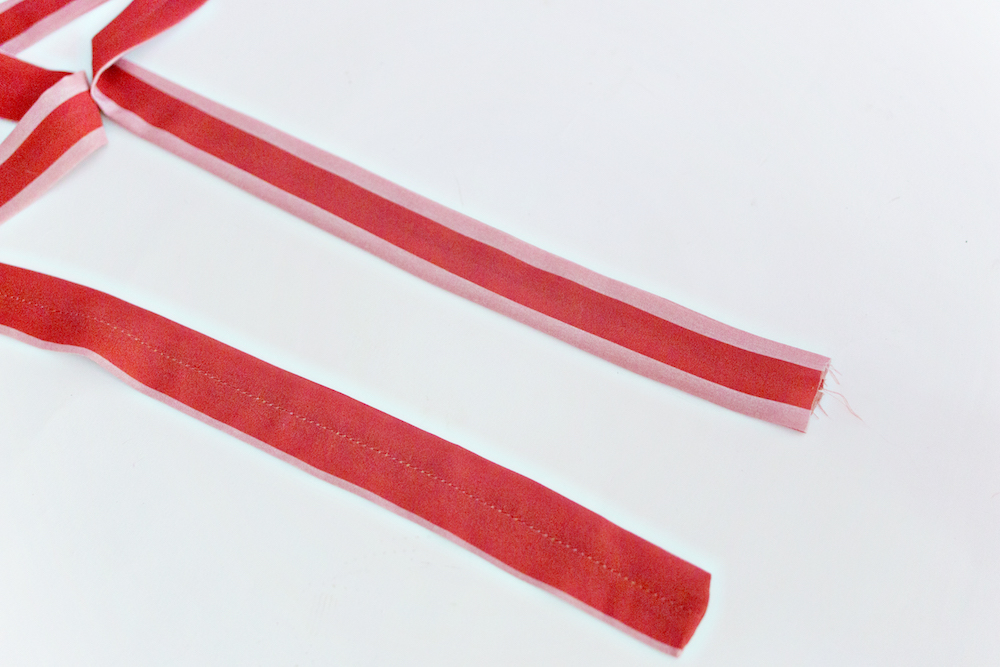
STEP 15
– Fold the ribbon inside out.
– With the seam in the middle, iron it flat.
STEP 16
– Fold the edge of the ribbon to the inside.
– Pin and sew the edge with a straight stitch.
– Repeat step 13 to 16 for the other ribbon.
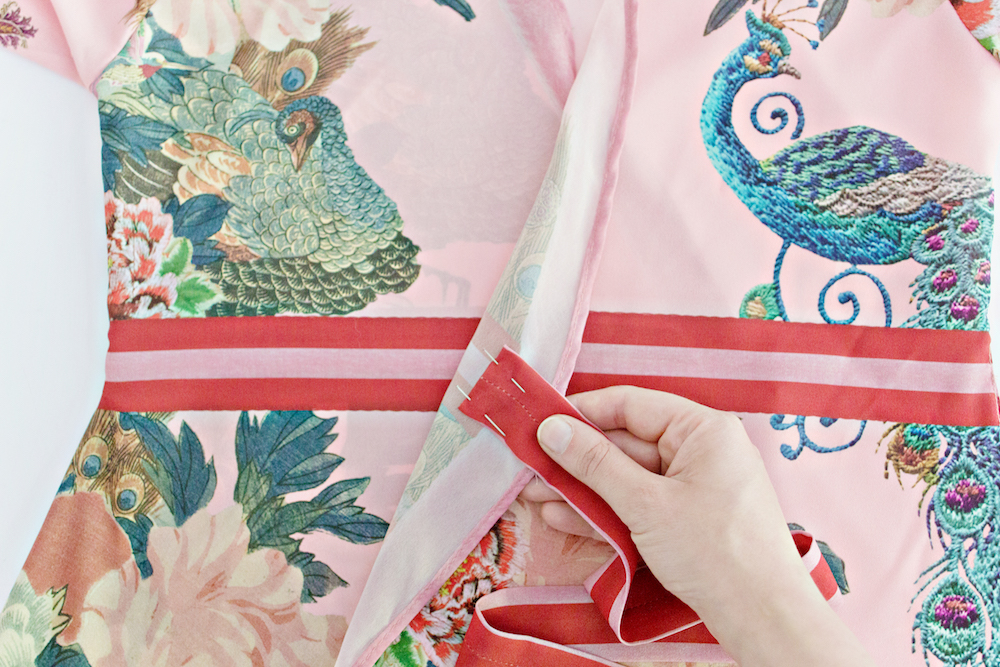
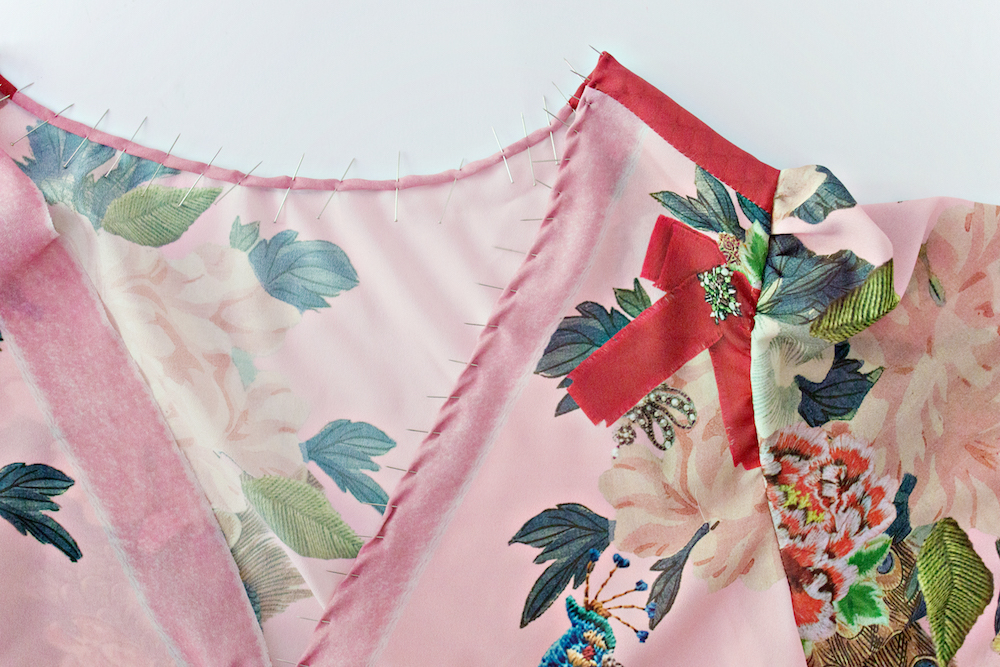
STEP 17
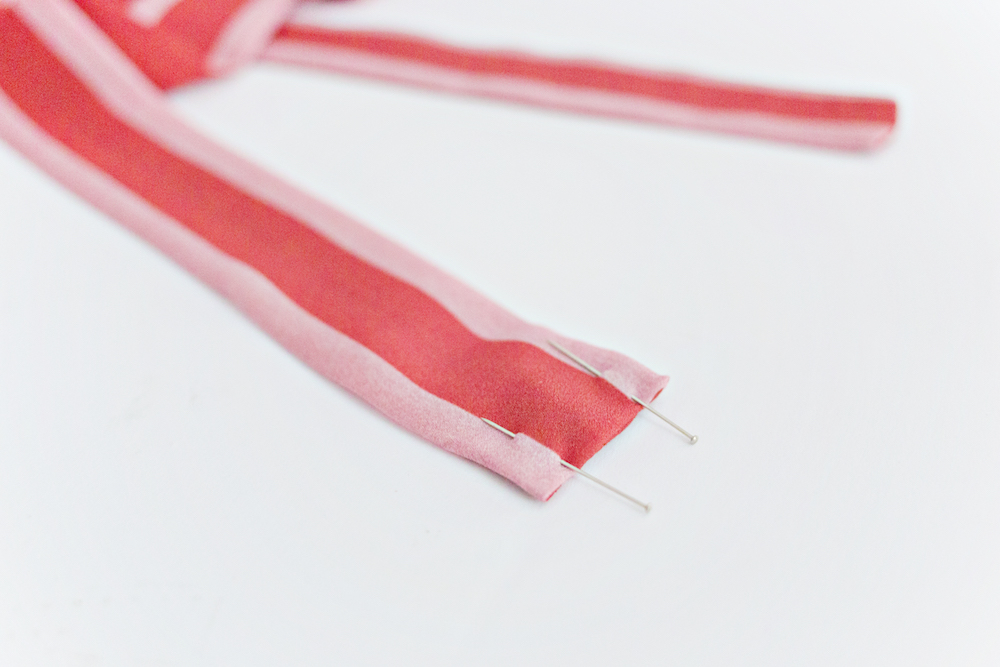
– Attach one of the ribbons to the inside of the dress, at the waistline with two pins. (with the right side of the ribbon to the wrong side of the dress).
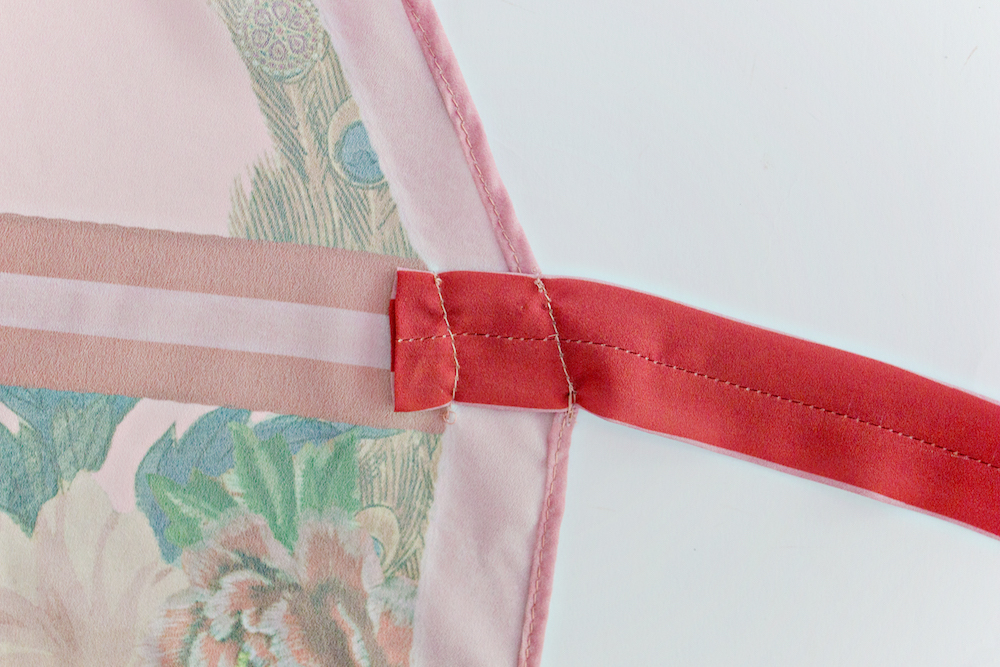
STEP 18
– Attach the ribbon by sewing two lines, following the corner line of the outer seam and the corner line of the dress pattern.
– Repeat this to the other opening of the dress.
And that is it! You will now have your very own custom wrap dress!
CREDITS
– Fabric by Spoonflower
– Shoes by Maguba
– Project by Lana Red Studio
Because this cut and sew project has a lot of information, please feel free to ask any questions in the comment section below or shoot me an email. I would love to help and guide you with your design!
16 comments
I am so excited to order this and make it. I have just discovered you and I am obsessed.
Wow, thank you so much for those kind words!
Hello. Is it possible to sew this dress in spandex jersey? Do you think it’s ok?
Hi! I think that spandex jersey could work, just as long as the fabric isn’t too heavy. It is a lot of material and the fabric that I used is extremely lightweight, which shows in the ‘flowy’ nature of the dress.
i will try because I want a dress that I can also wear during the winter… jersey is perfect for that!
I’m very excited to order the dress. I will send you a picture of my jersey dress! :)
It is fantastic! The pattern, colours & all! :)
I’m 5′ 2″ and am wondering how this would be lengthwise given that I couldn’t shorten it due to the border print at the bottom. What height is it designed for?
Hi Mary! I am 5’6″ (168cm) and didn’t remove anything from the bottom for my length. So you will probably need to shorten it a bit (10cm). This means that you will loose a small portion of the greenery section at the bottom. Lana x
Hi. I just happened on this post today. I am a true petite, being very short from the hips to shoulder. This means that a missed cut garment usually curves on where my body is curving out and vice versa. Can you make adjustments to your pattern to account for this? I’m enough of a seamstress to take the Measurements. But I love the idea of cut and sew.
Hi Liza,
Thank you for your comment. Could you send me an email with your request? And maybe we can come up with a new version of the pattern together.
My email is: info@lanaredstudio.com
Lana x
Oops. I just realized that I mistyped my email in the last comment.
This dress is so beautiful! I have been looking for something similar for ages so would love to try make it! Not exactly sure about the measurements though. Can I order templates?
Thanks,
Emma
Hi Emma, thank you so much for your interest in the dress! I just send you an email with the pattern outline and details. Please let me know if you have any questions. Lana x
Good afternoon, am so excited that you give out this wrap dress, but there is this question i want to ask, i make a wrap dress, and after the sewing before putting the sleeves, it shows a gap beside my armpit, that is 2inch open up wide, what cause that..
Hi, and great to hear that you are excited about the wrap dress project! Could you send me an email with your question to info@lanaredstudio.com and I will try to be of as much help as possible :)
Hi I would love to try this! Such a beautiful design and style :)
This dress looks fantastic!!! The print, the form, everything!!! I would love to have the pattern to use in an eco printed fabric that I have – which have been waiting for me to find the perfect pattern, and I think I did ;) –