LRS
  • START HERE
  • DIY
    • SEWING & STYLE
    • HOME DECOR
    • JEWELRY
    • TECH DIY
    • ANIMAL
    • ROUNDUPS
    • CHRISTMAS CRAFTS
  • FASHION
    • NAIL DESIGN
    • HAIR
    • MAKE-UP
    • OUTFITS
    • FASHION INSPIRATION
    • TIPS & ADVICE
  • RECIPES
    • BREAKFAST
    • DESSERTS
    • TREATS
    • SAVORY
  • TRAVEL
    • TRAVEL
    • BERLIN GUIDE
  • INSPIRED
    • ART
    • BLOGGING
    • PERSONAL
  • ABOUT
    • CONTACT
  • SHOP
  • START HERE
  • ABOUT
  • CONTACT
  • SHOP
L A N A R E D S T U D I O
  • CRAFTS

    SEWING & STYLE

    HOME DECOR

    JEWELRY

    ROUNDUPS

    TECH DIY

    CHRISTMAS CRAFTS

    ANIMAL

    UPCYCLING

    HOME DECOR

    UPCYCLING DIY | Decoupage Lampshade, with paper napkins

    TECH DIY

    DIY | Card Holder Phone Case

    JEWELRY

    JEWELRY DIY | Polymer Clay Flower Earrings

  • FASHION

    OUTFITS

    HAIR

    MAKE UP

    NAIL DESIGN

    FASHION INSPIRATION

    TIPS & ADVICE

    HAIR STYLES

    HAIR DIY VIDEO | Braided Scarf Hairstyle

    NAIL DESIGN

    NAIL DIY | It's a Glittery Sharpie Christmas

    Outfits

    OUTFIT | Autumn, Me & My Tripod

  • RECIPES

    DESSERTS

    SAVORY

    TREATS

    BREAKFAST

    BREAKFAST

    RECIPE | Sugar Free - Banana Bread

    TREATS

    RECIPE | Courgette Chips

    SAVORY

    RECIPE | Sweet Potato & Goat's Cheese Tart

  • INSPIRED

    ART

    BLOGGING

    PERSONAL

    BLOGGING

    HOW TO | 10 PRACTICAL Tips Every Blogger Should Learn

    PERSONAL

    PERSONAL | Grief and other things

    ART

    DIY | Double Exposure Photography

  • TRAVEL

    Berlin

    TRAVEL | BERLIN GUIDE

    Travel

    LIVING ABROAD | How to Make Your Temporary Home Feel Like Home

    explore

    TRAVEL

    BERLIN GUIDE

  • Sewing & Style

DIY | Pom Poms

Total
282
Shares
0
0
282
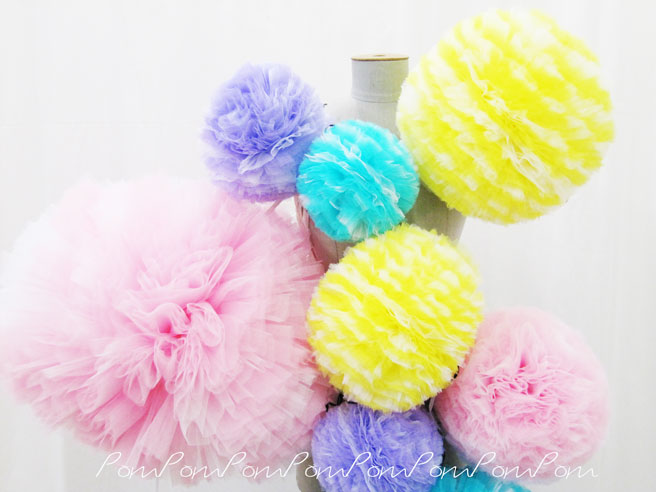
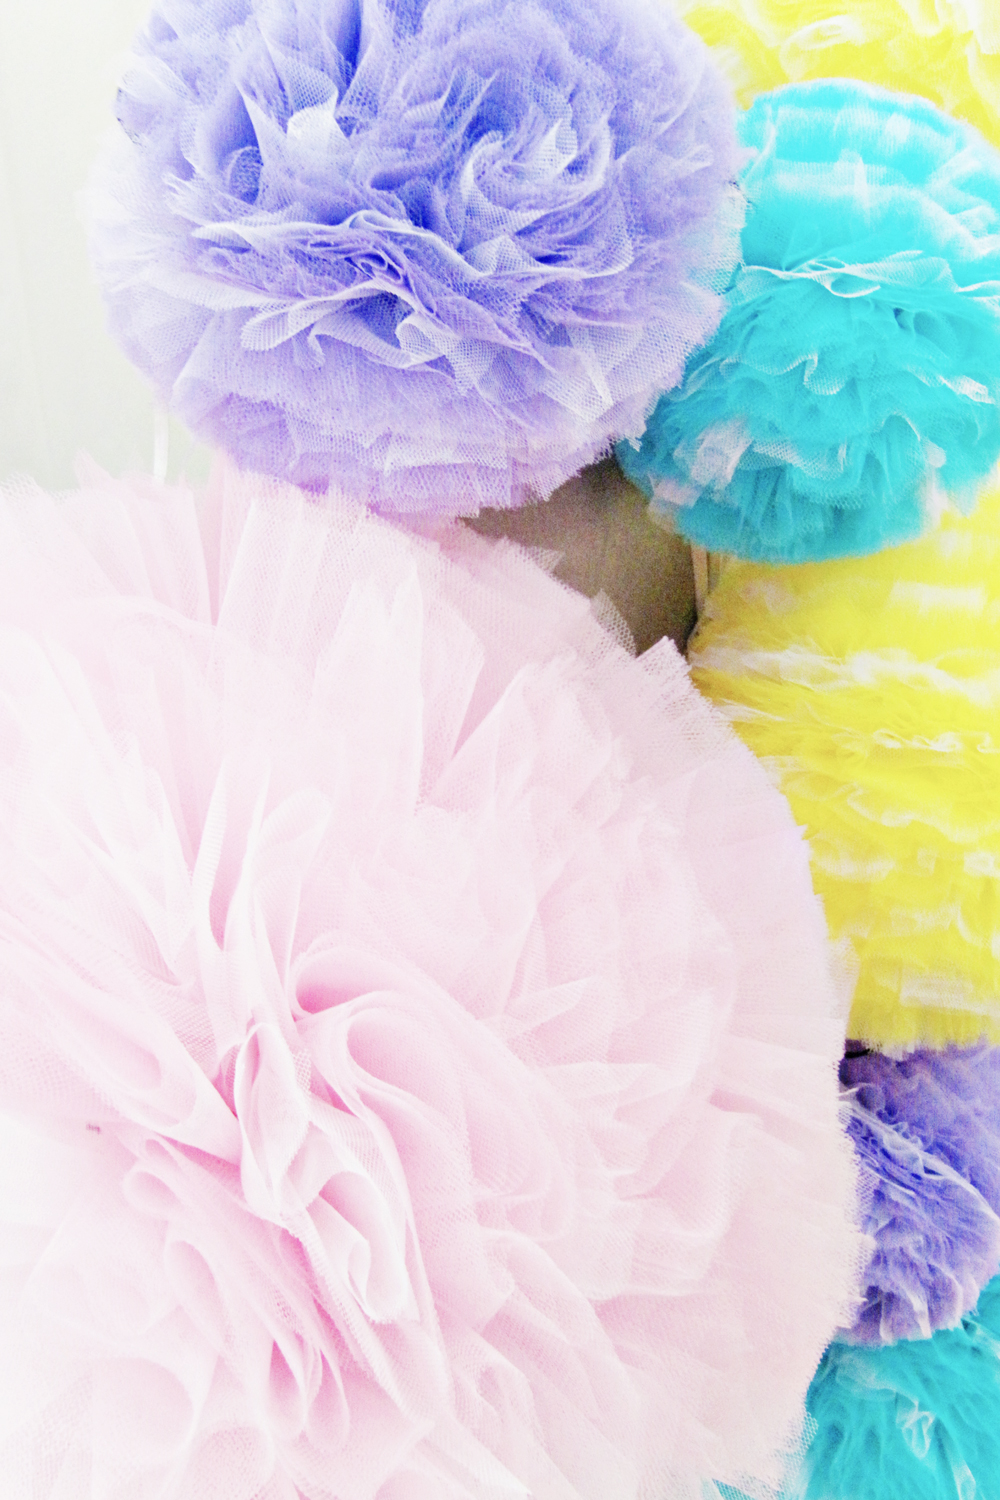
I am currently working for the fabulous designer Miek Uittenhout as an intern. And one of the fun things that I did while working for her was making a huge pompom skirt. 
 
Making the pompoms for the skirt was so easy that I kept thinking of all the different ways to incorporate the round pretty things in my home or wardrobe.
 
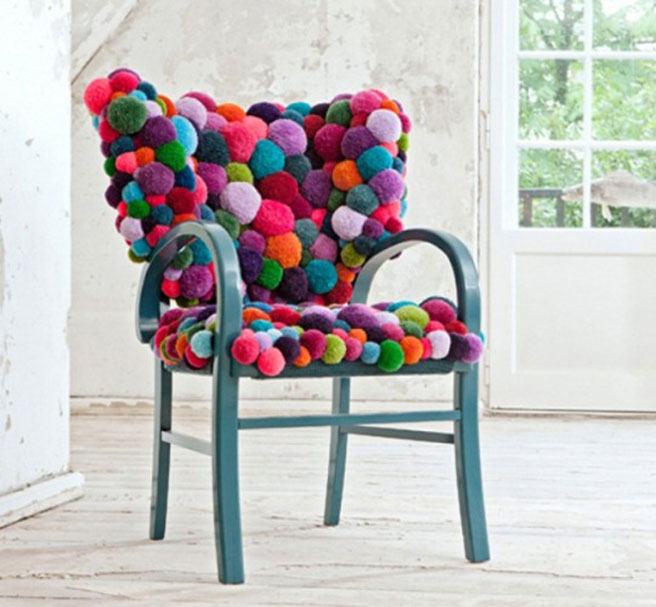
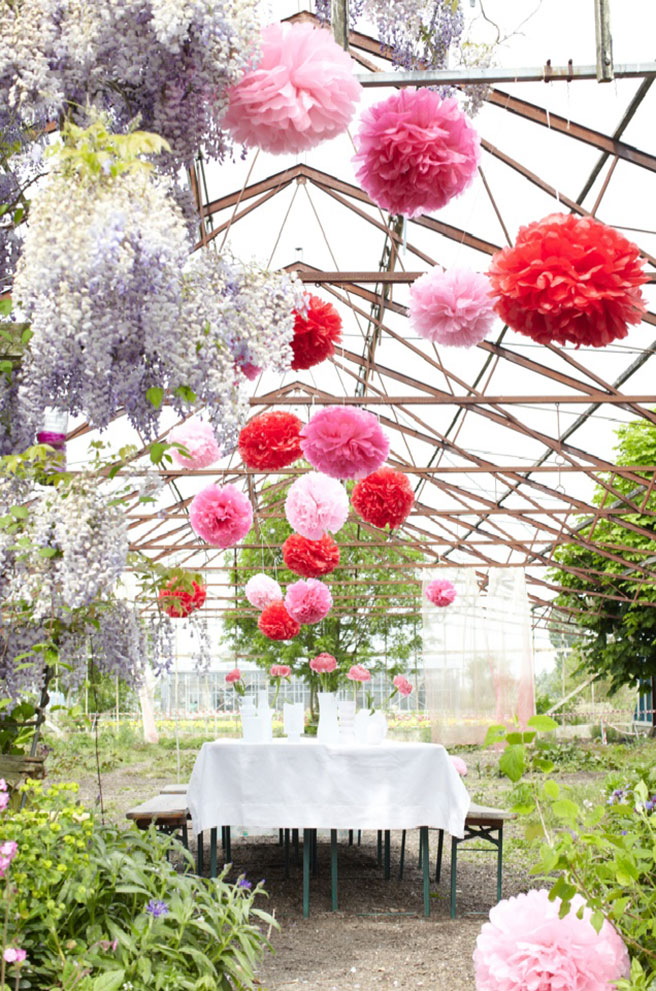
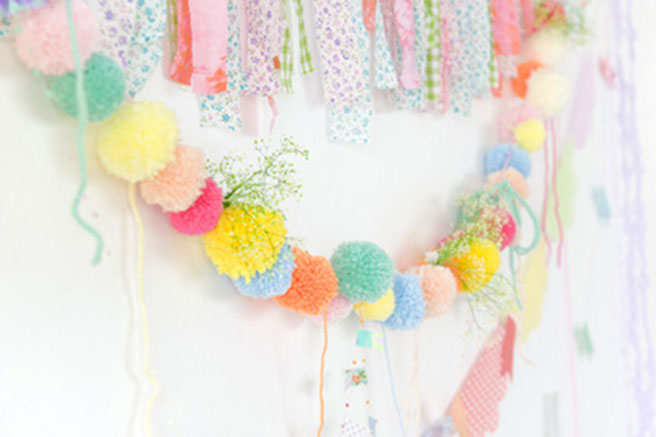
So I found some images that seem perfect as a pompom project! 
 
Here’s a tutorial on how to create your own pompom’s and after that a few crafty ideas to use them:)
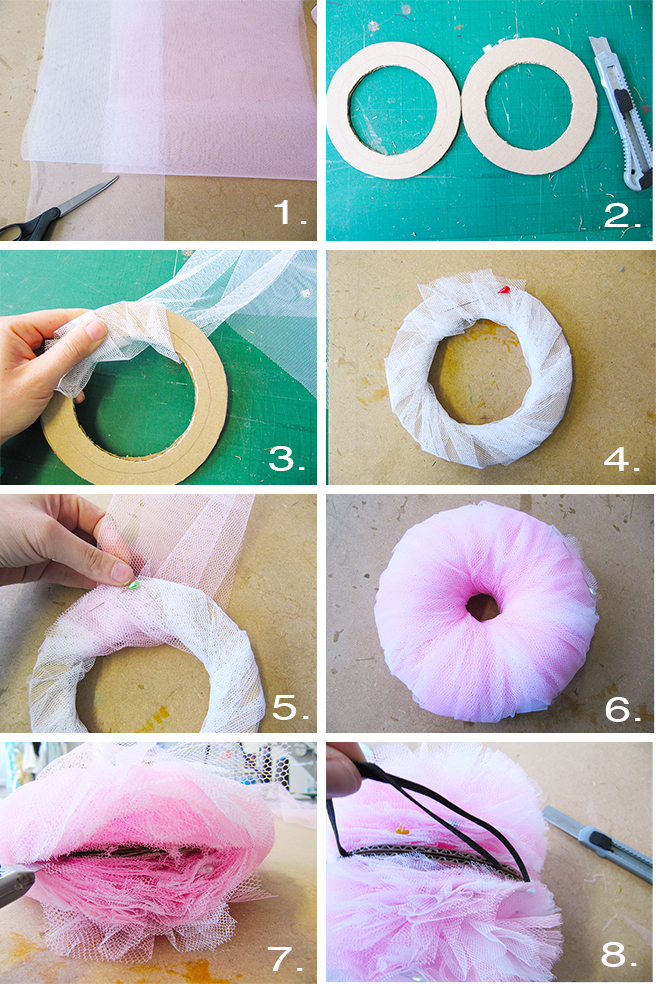
1. Cut the tule in small long strips. I used two different colors: pink and white.
2. Get a piece of cardboard and cut two circles with a hole inside. The width of the cardboard will decide how big you pompom is going to be. Also make sure that the hole isn’t to big! (and also not to small, because you will want to be able to pull the tule trough).
3. Place the two cardboard pieces on each other. And start wrapping the tule around the cardboard, like in the picture.
4. Finish the whole circle with the same color. Try to make the thickness of the tule even around the entire circle.
5. Take your second color and starting wrapping it around over the first color.
6. Repeat these steps until the hole in the middle is to small to pull the tule through.
7. Get a knife or some scissors and cut the tule through the middle, holding you scissors in between the two cardboards.
8. Take a piece of string and wrap it in between the two pieces of cardboard. Pull it as tight as you can. Then remove the cardboard.
 
All done!
 
* The size really depends on the size of your outer circle versus the inner circle. So you can experiment with different circles.
** The tight you wrap the tule around the cardboard, the more will fit in there and the fuller the pompom will be.
DIY | Pom Poms
 
 
1 | 2 | 3 | 4
Total
282
Shares
Share 0
Tweet 0
Pin it 282
Previous Article
  • Desserts
  • Recipes
  • Treats

RECIPE | Cookie Dough Cupcake

View Post
Next Article
  • Personal

Follow Lana Red on Bloglovin’

View Post

Sign Up for the LRS Newsletter

Be the first to receive lots of crafty news!

4 comments
  1. truebluemeandyou says:
    16th March 2013 at 12:28 am

    I just got asked twice about what to do with extra tulle – so this tutorial came at a perfect time. I like how you can adjust the size of the pompom by the size of the cardboard ring. I posted the top finished photo and a link back to you on my Tumblr blog.

    Reply
    1. Lana Red says:
      20th March 2013 at 5:19 pm

      What a coincidence that people where asking about tulle!

      Thank you for reblogging!

      xx

      Reply
  2. Monica @ mon makes things says:
    17th March 2013 at 7:09 pm

    I love this! I’ve been making yarn pom poms obsessively for weeks now, and am so excited to try out tulle! Great tutorial. :)

    And that pom pom chair you shared is so fab!!
    ♥♥Monica
    monmakesthings

    Reply
    1. Lana Red says:
      20th March 2013 at 5:20 pm

      How great that you where also making pom poms!

      And I also really love that chair! :)

      Reply

Leave a Reply Cancel reply

Your email address will not be published. Required fields are marked *

THE LRS NEWSLETTER
  • JEWELRY DIY | Polymer Clay Flower Earrings
  • DIY Decoupage Lampshade
    UPCYCLING DIY | Decoupage Lampshade, with paper napkins
  • JEWELRY DIY | Beaded daisy flower for Necklaces, Earrings and Bracelets
    JEWELRY DIY | Beaded daisy flower for Necklaces, Earrings and Bracelets

Sign Up for the LRS Newsletter

Let's be friends!

  • Privacy Policy

Input your search keywords and press Enter.