LRS
  • START HERE
  • DIY
    • SEWING & STYLE
    • HOME DECOR
    • JEWELRY
    • TECH DIY
    • ANIMAL
    • ROUNDUPS
    • CHRISTMAS CRAFTS
  • FASHION
    • NAIL DESIGN
    • HAIR
    • MAKE-UP
    • OUTFITS
    • FASHION INSPIRATION
    • TIPS & ADVICE
  • RECIPES
    • BREAKFAST
    • DESSERTS
    • TREATS
    • SAVORY
  • TRAVEL
    • TRAVEL
    • BERLIN GUIDE
  • INSPIRED
    • ART
    • BLOGGING
    • PERSONAL
  • ABOUT
    • CONTACT
  • SHOP
  • START HERE
  • ABOUT
  • CONTACT
  • SHOP
L A N A R E D S T U D I O
  • CRAFTS

    SEWING & STYLE

    HOME DECOR

    JEWELRY

    ROUNDUPS

    TECH DIY

    CHRISTMAS CRAFTS

    ANIMAL

    UPCYCLING

    HOME DECOR

    UPCYCLING DIY | Decoupage Lampshade, with paper napkins

    TECH DIY

    DIY | Card Holder Phone Case

    JEWELRY

    JEWELRY DIY | Polymer Clay Flower Earrings

  • FASHION

    OUTFITS

    HAIR

    MAKE UP

    NAIL DESIGN

    FASHION INSPIRATION

    TIPS & ADVICE

    HAIR STYLES

    HAIR DIY VIDEO | Braided Scarf Hairstyle

    NAIL DESIGN

    NAIL DIY | It's a Glittery Sharpie Christmas

    Outfits

    OUTFIT | Autumn, Me & My Tripod

  • RECIPES

    DESSERTS

    SAVORY

    TREATS

    BREAKFAST

    BREAKFAST

    RECIPE | Sugar Free - Banana Bread

    TREATS

    RECIPE | Courgette Chips

    SAVORY

    RECIPE | Sweet Potato & Goat's Cheese Tart

  • INSPIRED

    ART

    BLOGGING

    PERSONAL

    BLOGGING

    HOW TO | 10 PRACTICAL Tips Every Blogger Should Learn

    PERSONAL

    PERSONAL | Grief and other things

    ART

    DIY | Double Exposure Photography

  • TRAVEL

    Berlin

    TRAVEL | BERLIN GUIDE

    Travel

    LIVING ABROAD | How to Make Your Temporary Home Feel Like Home

    explore

    TRAVEL

    BERLIN GUIDE

  • Home Decor
  • Upcycling

DIY | From Picture Frame To Dry Erase Board

Total
33
Shares
0
0
33
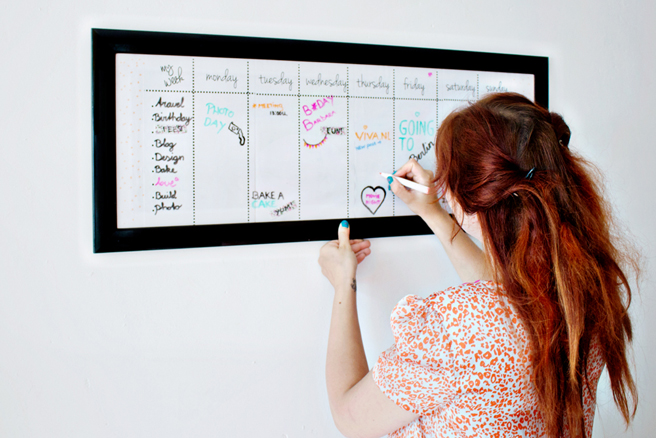
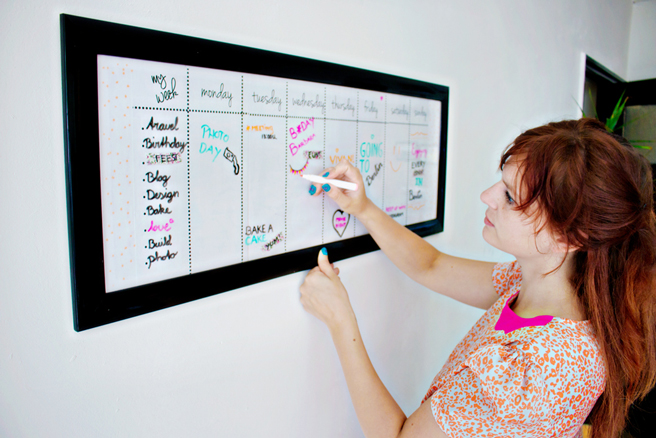
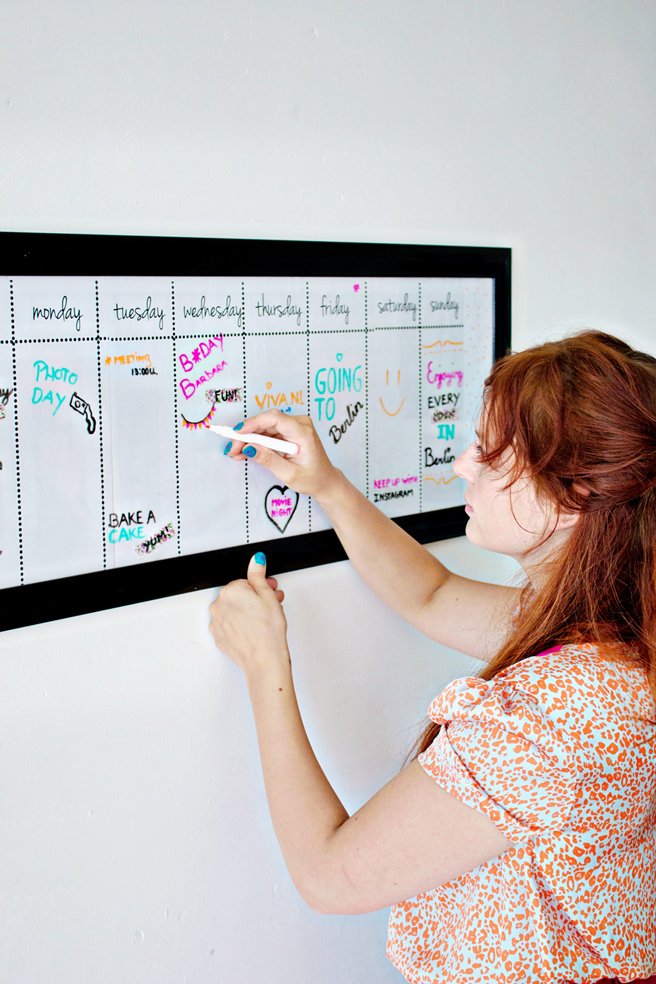
A calendar or planner that matches your interior? Yes, it’s possible! Use an old (or new) picture frame and transform it into an erasable planner. Ideal for busy households, planfreaks and scatterbrains like me:)
DIY:
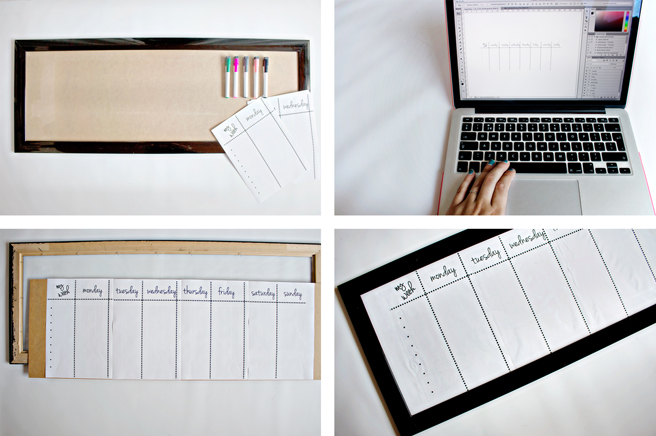
1. Supplies: Picture Frame (in a size that is suitable for your planner) | Paper (for printing or to draw on) | Whiteboard Markers
2. Decide what kind of planner your would like or need, a year- month- or weekcalender? 
Design a template in Word, Pages or Photoshop. ( A lot of programs also offer free calendar templates) 
Calculate how many A4 sized pieces of paper fit in the frame and divide the design over those pieces of paper.
Not much of a computerwizz? No Problem! You can also draw the design yourself! Stencils and a ruler will help you to make a fun and professional design.
3. Divide the printed or drawn pages over the backboard of the frame. You can use a tiny bit of glue to attach the paper to the backboard to keep them in place.
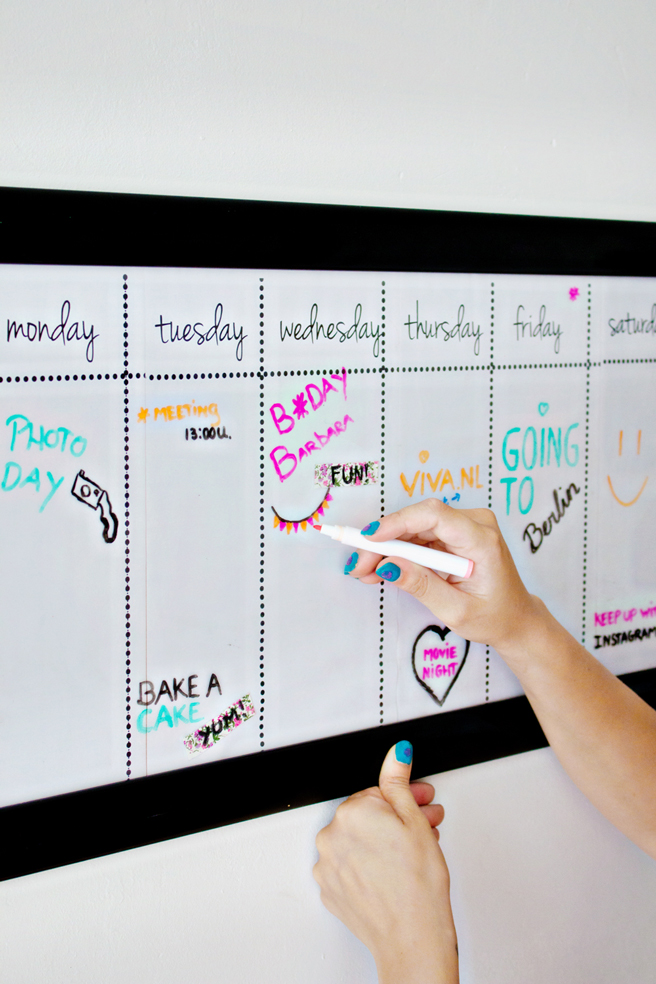
4. Place the glass, paper and backboard back in the frame. Now you can write on the glass with your whiteboard markers, using the paper behind the glass as guidelines. Let’s do some planning!**
 
 
** Use different colored markers that match your interior.
** Change the design of the printed or drawn paper for each month, year, etc.
 
 
You can also find this tutorial in Dutch on Viva.nl


Total
33
Shares
Share 0
Tweet 0
Pin it 33
Previous Article
  • Beauty
  • Nail

NAIL DIY | Velvet Nail Art

View Post
Next Article
  • Breakfast
  • Recipes

RECIPE | Breakfast Smoothie

View Post

Sign Up for the LRS Newsletter

Be the first to receive lots of crafty news!

9 comments
  1. Babytreese says:
    6th August 2014 at 5:09 pm

    Erasable?? Do we change the paper every week?

    Reply
    1. Lana Red says:
      6th August 2014 at 5:13 pm

      Hi! You can write on the glass with your whiteboard/dry-erase markers. The paper functions only as a background behind the glass. xx

      Reply
  2. Babytreese says:
    7th August 2014 at 5:59 am

    Ahhh. .. now I get it! Cute! Thanks for the clarification!

    Reply
    1. Lana Red says:
      18th August 2014 at 10:45 am

      You’re welcome! Please let me know if you have more questions!xx

      Reply
  3. Katie says:
    13th August 2014 at 3:24 pm

    Love this idea! When I first saw it, I thought it would be great for a college dorm room. Being in college myself, I could totally benefit from making one of these (lol). Thanks for sharing :)

    Reply
    1. Lana Red says:
      18th August 2014 at 10:48 am

      Hi Katie! Thanks for your comment! How great to hear that it could work in your dorm room! That’s a fantastic idea! xx Lana

      Reply
  4. Sally Bead Jewelry says:
    16th August 2014 at 1:49 pm

    I missed the part about the glass too. Can you update the steps saying to leave the glass in the frame, to use as the erasable surface?

    Reply
    1. Lana Red says:
      18th August 2014 at 10:47 am

      Hi! Thank you for letting me know! I am sorry that the tutorial wasn’t clear enough. I changed the text a bit and hope that it will help using the tutorial!
      Have a lovely day!xx

      Reply
  5. Pingback: Planners para llevar todo bien ordenado - B a la Moda D.I.Y

Leave a Reply Cancel reply

Your email address will not be published. Required fields are marked *

THE LRS NEWSLETTER
  • JEWELRY DIY | Polymer Clay Flower Earrings
  • DIY Decoupage Lampshade
    UPCYCLING DIY | Decoupage Lampshade, with paper napkins
  • JEWELRY DIY | Beaded daisy flower for Necklaces, Earrings and Bracelets
    JEWELRY DIY | Beaded daisy flower for Necklaces, Earrings and Bracelets

Sign Up for the LRS Newsletter

Let's be friends!

  • Privacy Policy

Input your search keywords and press Enter.