I am a big fan of kitchy, glittery, over the top christmas decorations. But over the years I came to the conclusion that I just don’t fancy them in my own home.. Apparently ( and it took me a loooong time to figure this out) I like my christmas decorations minimal, bright and most of all: DIY worthy!
Don’t get me wrong I get a very warm and fuzzy feeling whenever I enter a very traditional christmas home! But christmas just keeps creeping up on me every year, making it too late for me to make a big effort on the decorations.
So this year I decided to make something that I can repurpose when christmas is over and enjoy it all year round!
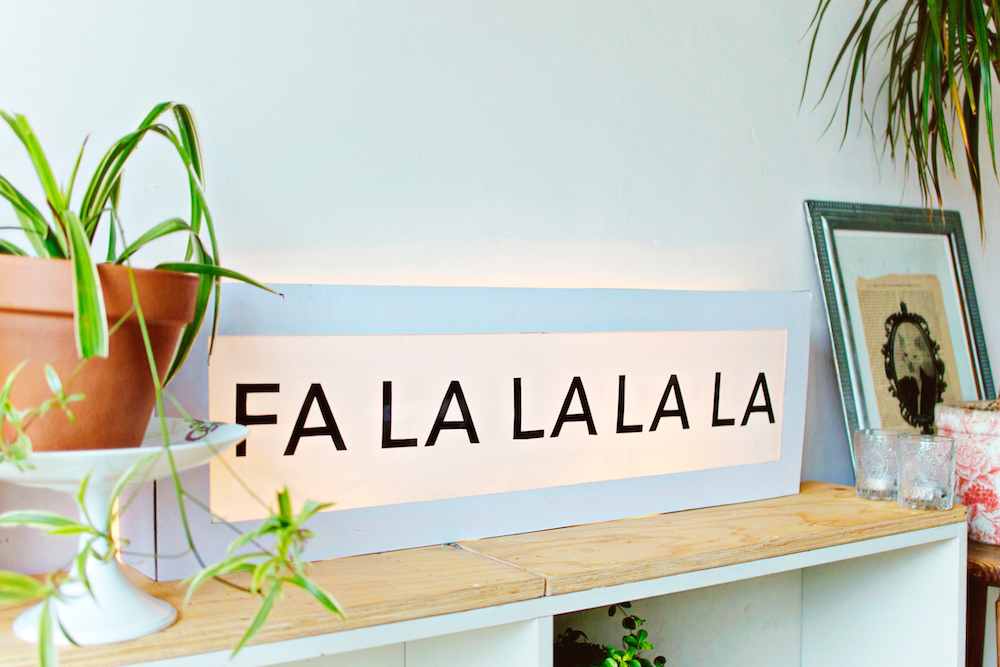
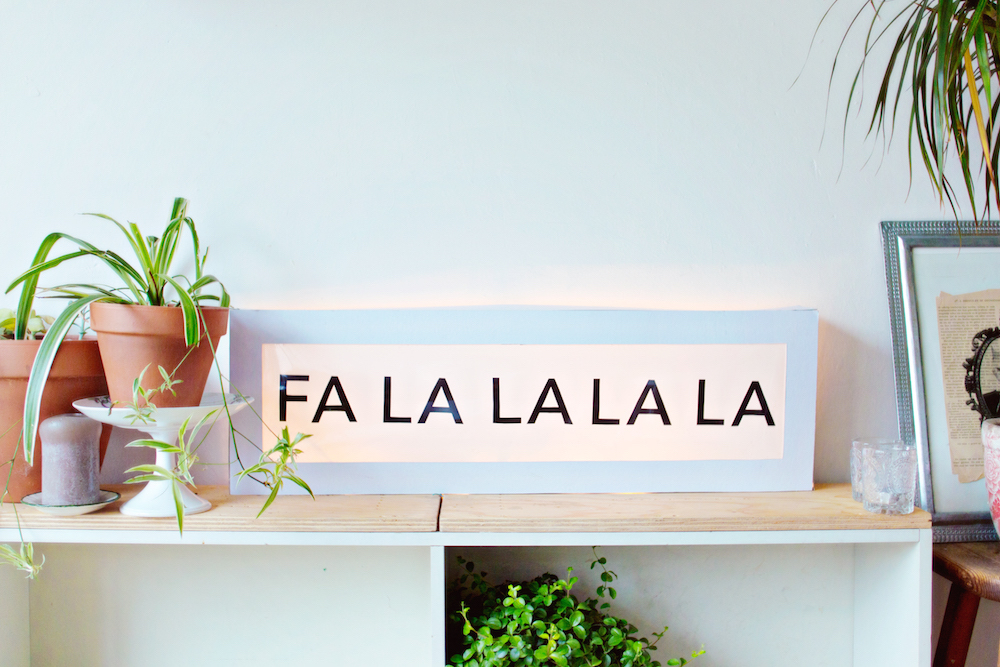
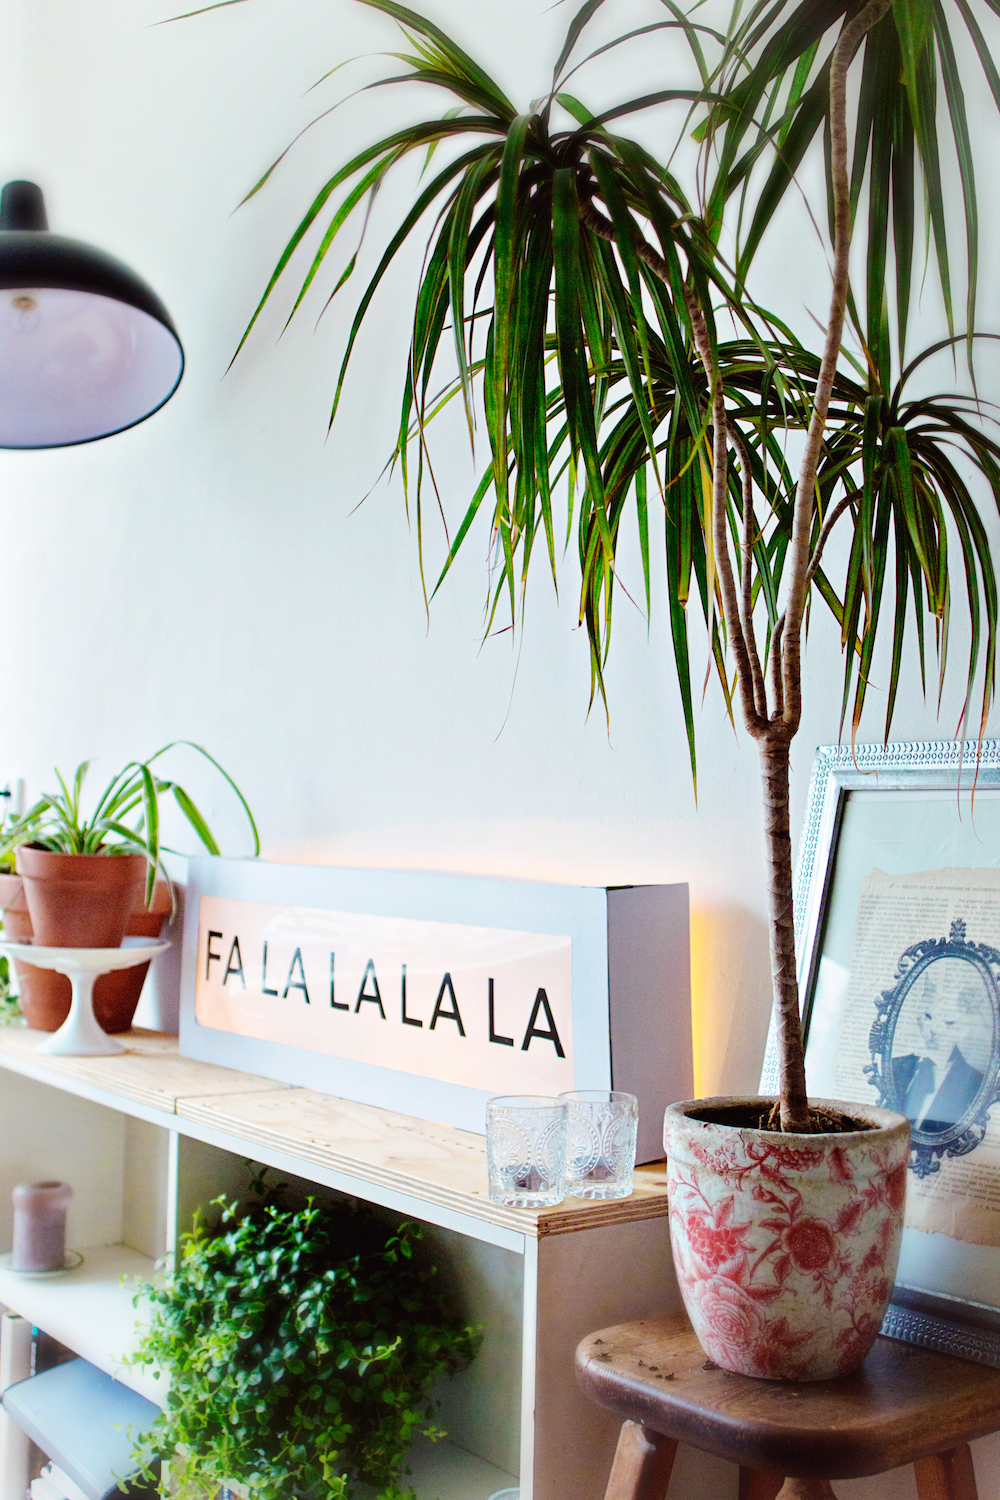
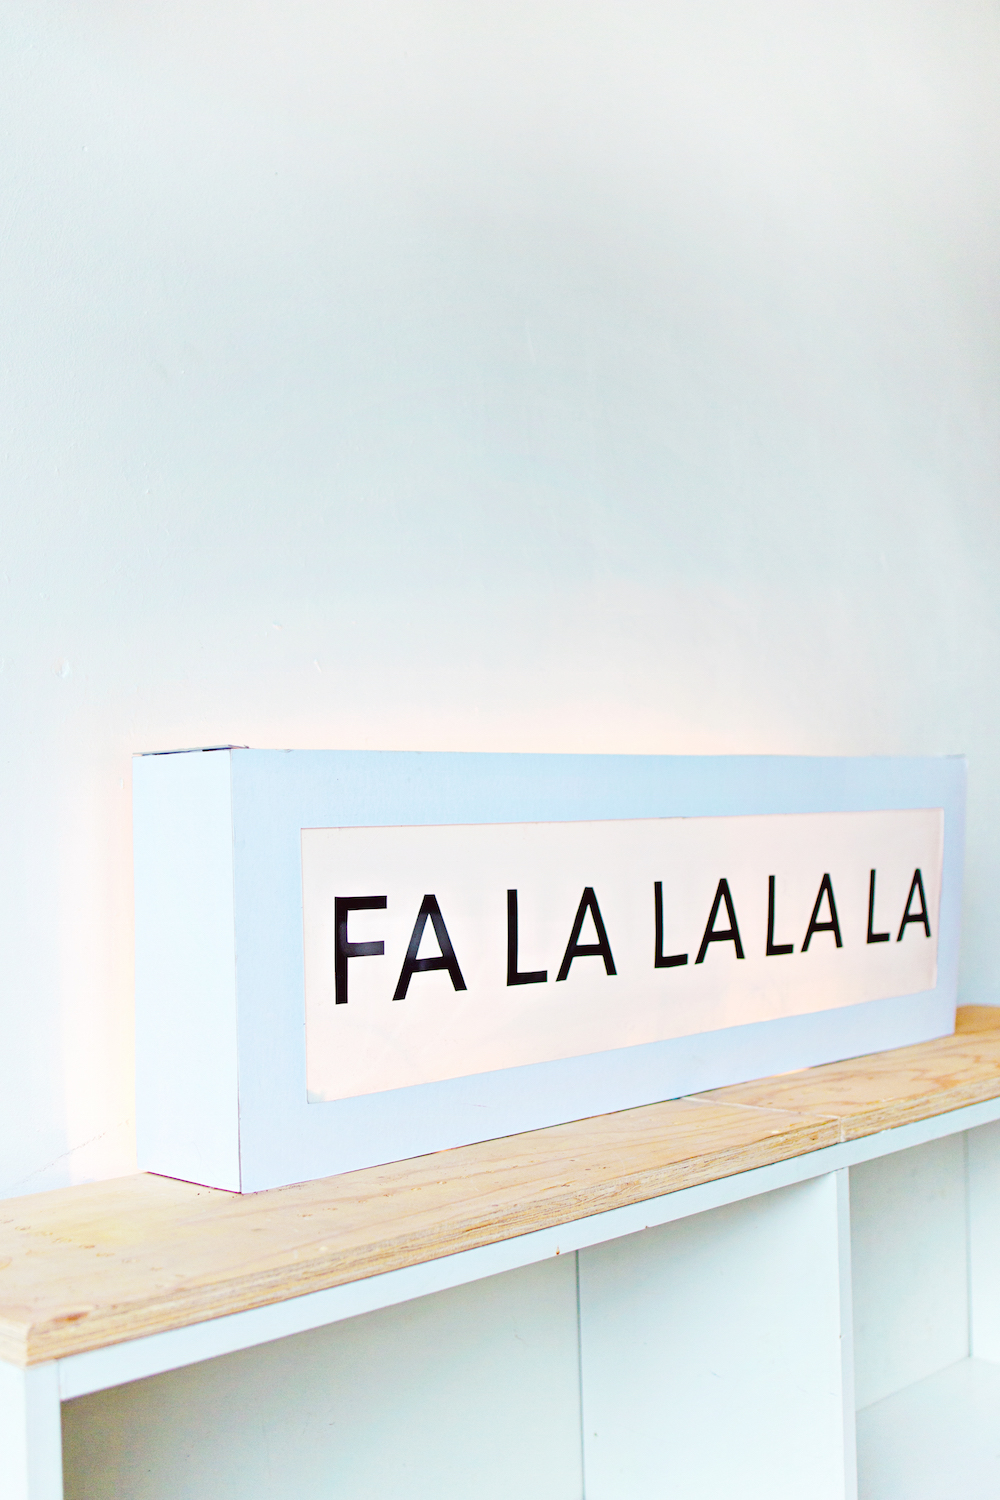
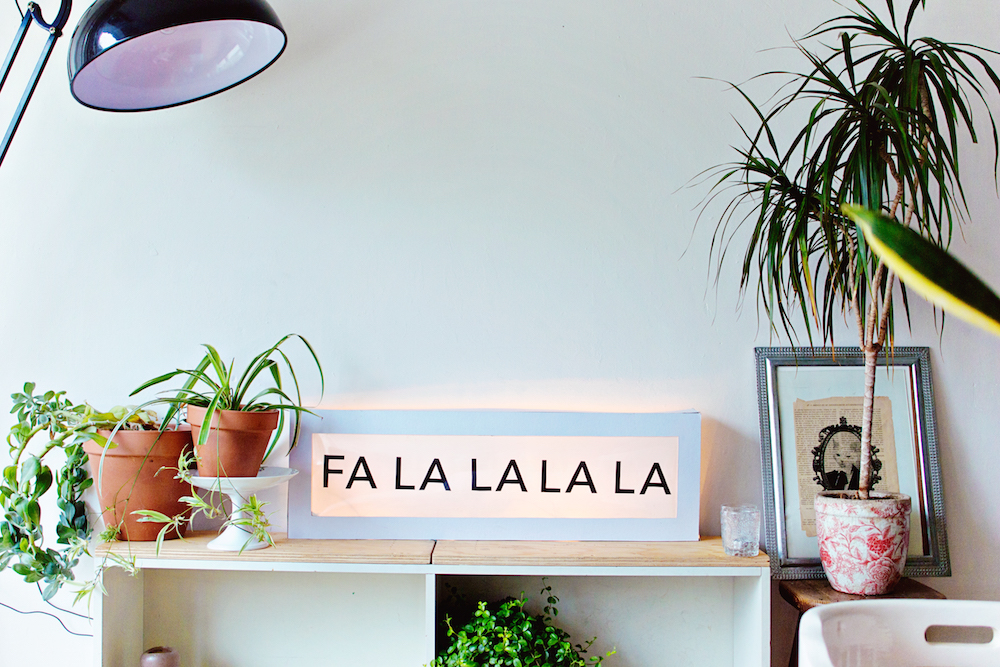
It’s a lightbox everyone! Yes! A very easy, but also very cute and personal lightbox. It might have been made out of cardboard, but that doesn’t mean that it can’t look great and store bought!
And the thing that I love the most about creating a tutorial: you can personalise it! You can use any color cardboard that you like, any size that fits your house and any quote that inspires you the most. Go all out and creative and go crazy by keeping your minimal christmas decorations all year!
Oh, and did I mention that this is a very budget friendly DIY?;)
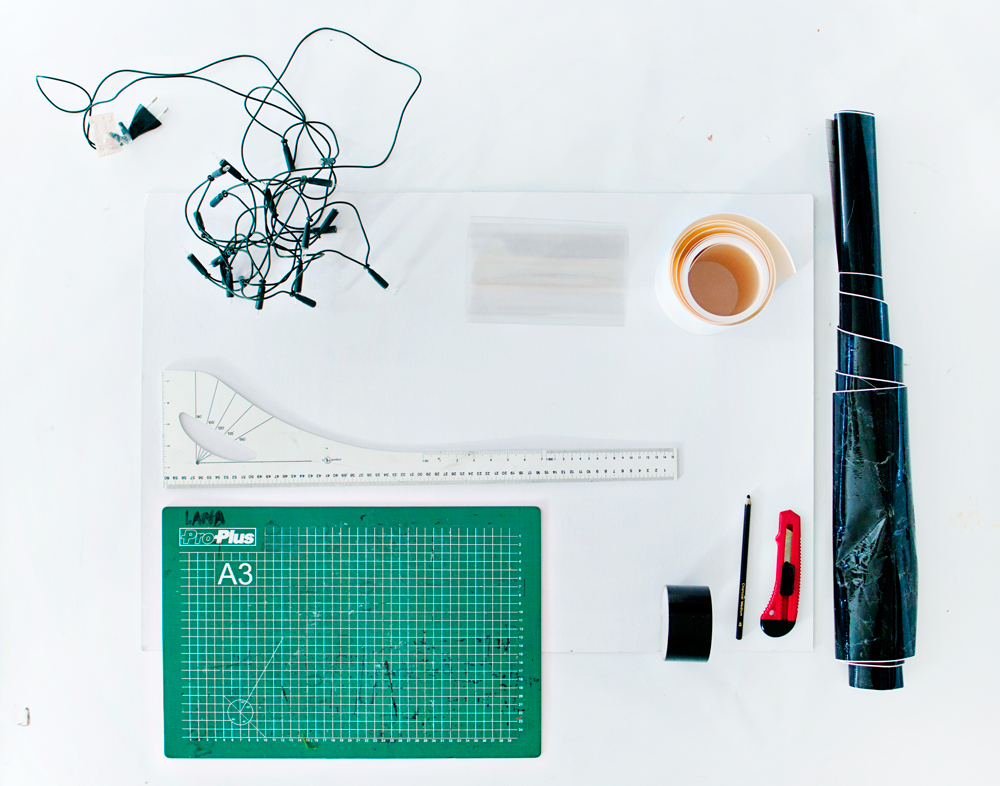
Materials:
– Cardboard
– Clear Plastic (sheets)
– White plastic (sheets)
– Pre made letter stickers or adhesive vinyl
– Tape
– Ruler, scissors, x-acto knife, cutting mat, pencil
– LED christmas lights
DIY:
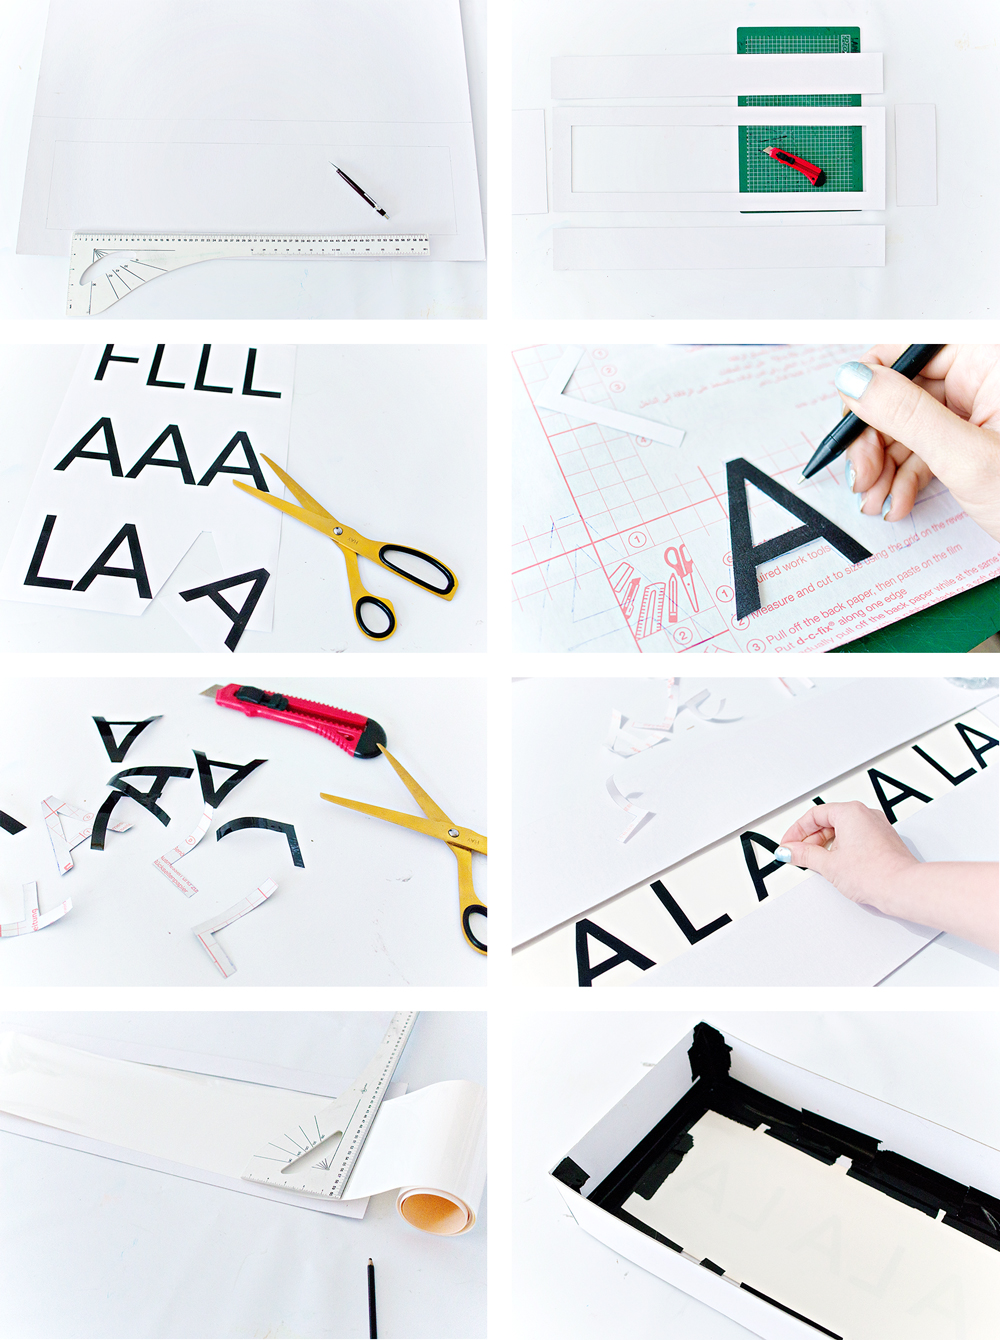
Step 1 – Decide the size of your lightbox (I looked at the size of my transparent sheets and went from there). Draw the outer and inner edges of the front of your lightbox onto the cardboard with your pencil.
Step 2 – Cut along the outer and the inner edge of the front of your lightbox. Calculate the bottom, top and side sizes of the box and cut them out of the cardboard. (This lightbox doesn’t need a back part)
Step 3 – If you don’t have any pre-made letter stickers, print or design your font in the right size. (and your choice of cute catchphrases, words or quotes!!;)
Step 4 – Trace the designed or printed letters onto the back of the adhesive vinyl (make sure you place them face down)
Step 5 – Cut the letters out of the vinyl.
Step 6 – Mark the center part of your white plastic (sheets) and place the vinyl letters onto the plastic, making sure that they are aligned and centered.
Step 7 – Cut the white and clear plastic in the width of the front opening + 2 cm enough space on each side to attach with tape.
Step 8 – Place the clear plastic on top of the white plastic.**Tape the white plastic to the back of the front cardboard piece. Tape the entire box together (or use a glue gun). Place the LED christmas lights (use LED! because we don’t want to burn the house down..) in the back of the cardboard box.
All done!!
** Use tape to attach the plastic sheets to the front of the lightbox. This way you can remove it later and change the text as many times as you like!