I already posted a sneak preview on my facebookpage about this tutorial and I finally got the chance to share it with you! I am very excited about this tutorial, because I think it’s one of my favorites so far. I’ve made many DIY’s for my blog and I have enjoyed doing each and every one of them, but this one is something that I designed myself and am actually proud of! It’s hard not to be critical about something you’ve made or designed, but this is the first time that I’m very happy with the end result without any ‘buts’ :)
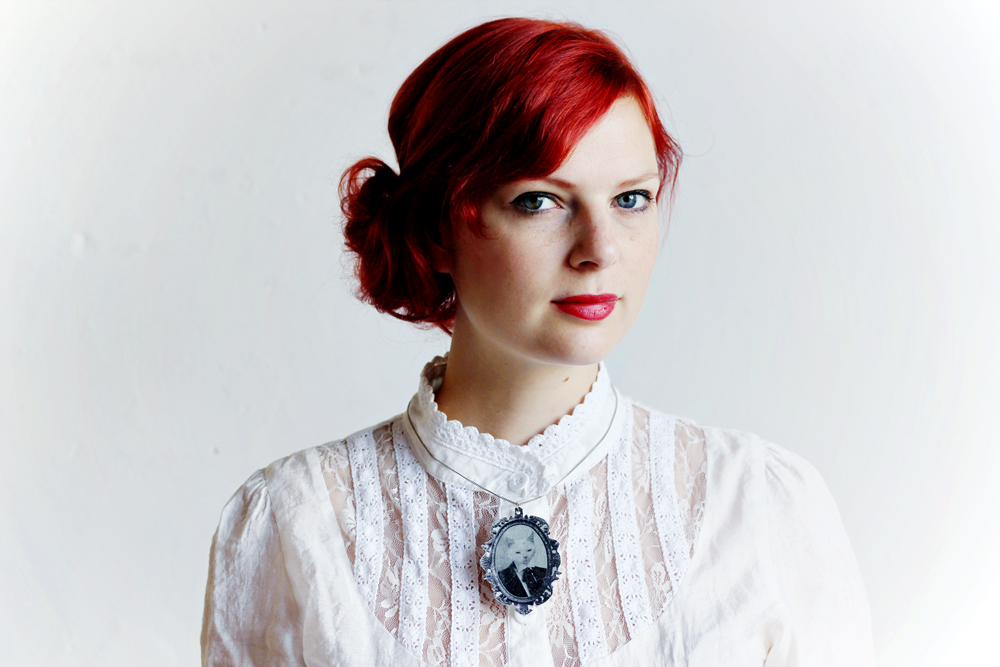
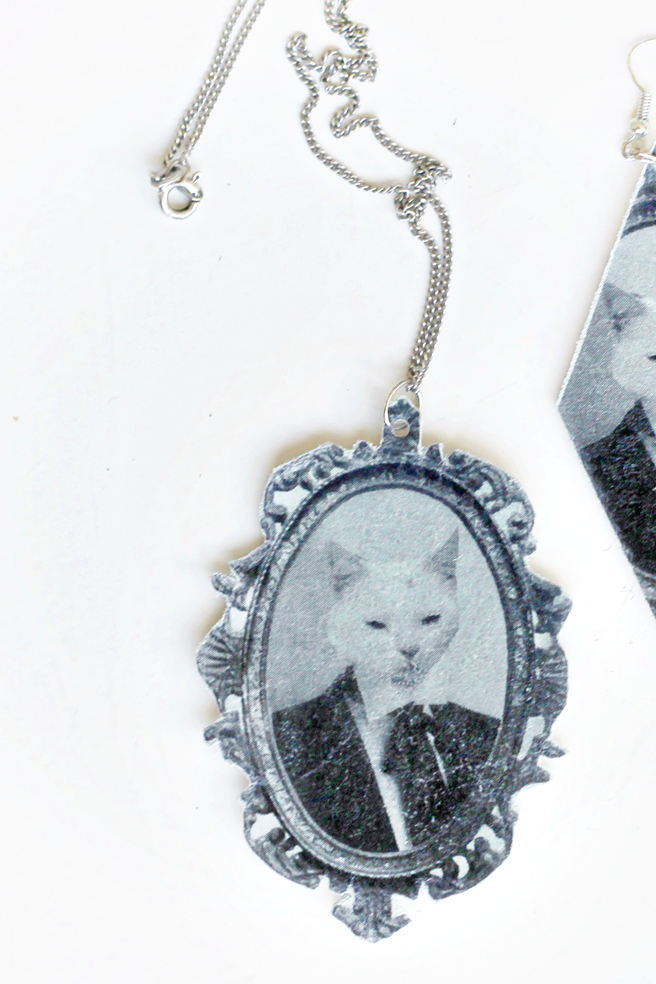
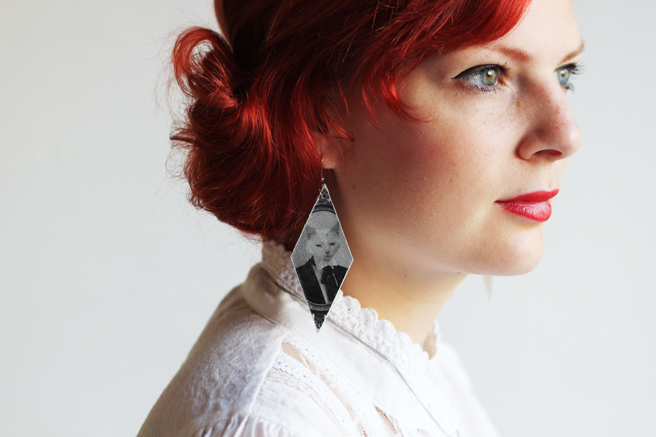
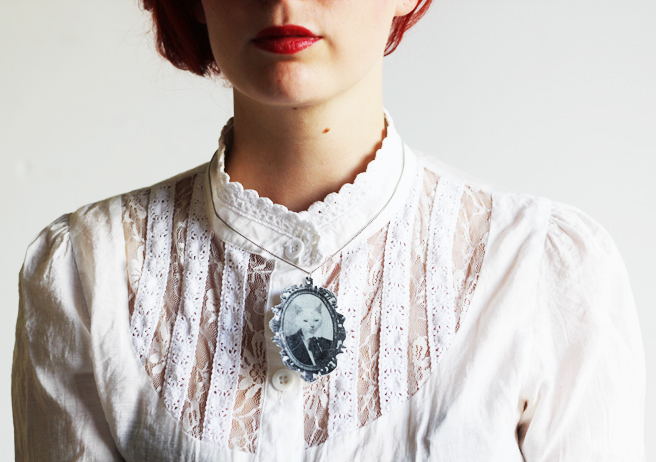
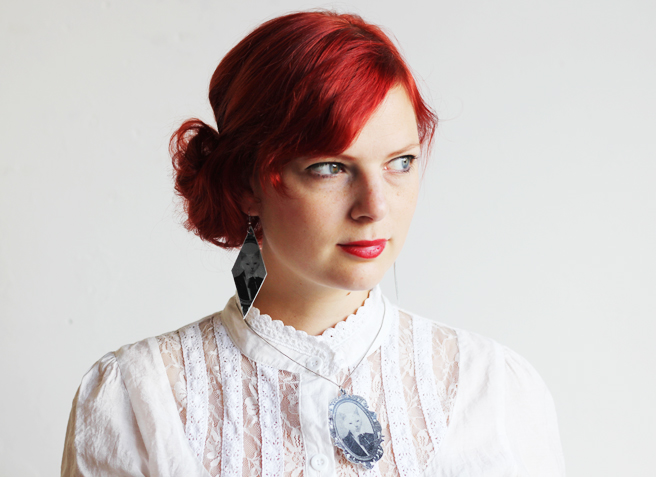
The tutorial shows you how to transfer your favorite image onto leather. I took a picture of my cats head and placed it on a picture from by boyfriend. This way, my cat is wearing his suit!
So here’s the fantastic tutorial:
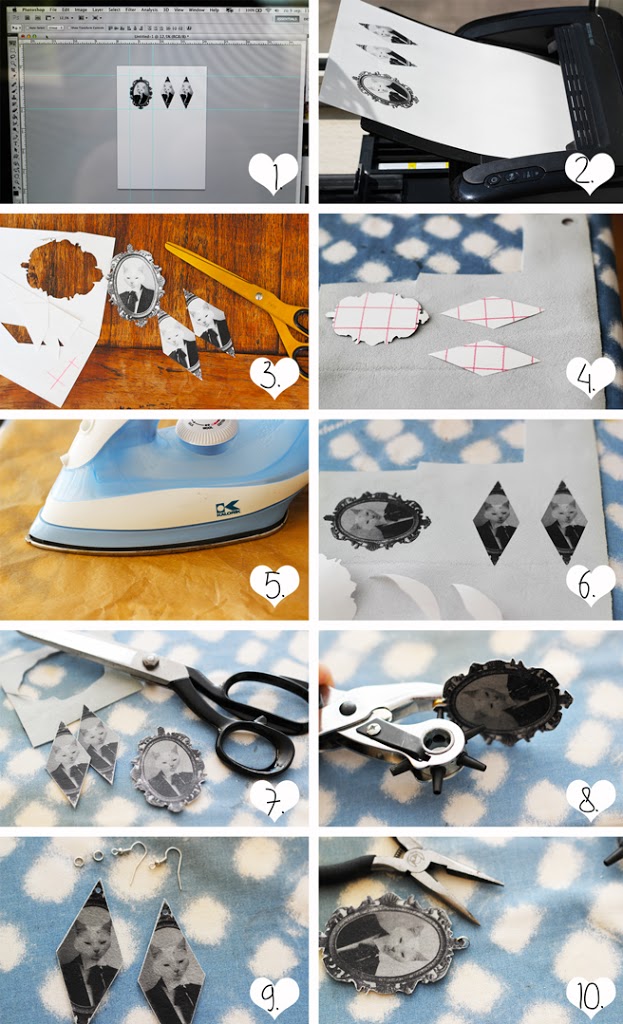
Supplies:
T-shirt transfer paper | Leather scraps | scissors | iron | baking paper | jewelry accessories | something to make a hole in the leather
1. Design your image and get it in the size you want. I put the head of one of my cats on the body of my boyfriend :)
2. Print the image on t-shirt transfer paper.
3. Cut the shapes out.
4. Place the images, face down, onto the suede side of the leather.
5. Place some baking paper over the leather and the images and place your iron on it. Make small circles with your iron for about 10 seconds. (I know the transferpaper package says to hold it on longer, but the suede will darken or shrink if it’s exposed to heat for a long time).
6. Remove the toplayer of paper from the images after it cooled down. If the paper still sticks to the leather, place the iron on the image for a couple more seconds.
7. Cut the shapes out of the leather.
8. Make a hole in the leather.
9. Apply the earring accessories.
10. Apply the necklace accessories.
All done!
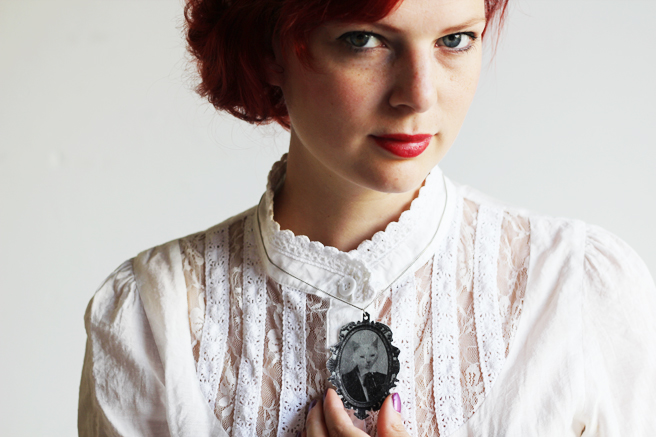
Pictures by Lana
34 comments
I love this project! It’s so simple but so creative. Thanks for sharing!
Thank you!
I love it! The pendant is so beautiful!! I really like it! Great thought and inspiration, Lana!!
Have a nice day!!!
Thank you so much, and you also have a nice day!x
Very different and lovely!
Thanx!
Super cute! And I had no idea that you could use transfer paper on leather. I just included you in my “links I like” round-up. Have a great day :-)
Thank you so much for including me in your “links I like”!
That is great. I love your look.
Vintagehoneybee.blogspot.com
Thank you so much!
Baking paper? Is this parchment?
No it’s not parchment. I’m sorry I figured that you would call it this in English.
Baking paper is the kind of paper that you use for baking things in the oven. I always use it for these kind of projects, because it protects the fabric from the heath and it has a smooth surface.
Wow! That cat looks just like mine! I’ve seen this technique used for canvas, making small black and white canvas magnets, but using the method for printing leather is an awesome idea!
How funny that your cat looks like mine :)
wow!! that’s brilliant! love these vintage-inspired accessories!! perfect companion for your formal dress
Wow! How nice! I like the pendant, especially the design! Good job! This is very beautiful! It is simple but very creative. I like the idea. Thanks for sharing this.
Wierd question: I love your hair color in this! Did you salon or box dye?
Hi Sarah!
I started dyeing my hair with henna a few months ago. But when I had this color it was still box dye. I used Fiery Red by Nutrisse Garnier Ultra Color.
I love it! The pendant is so beautiful!! I really like it :)
http://www.psdaimaandsons.com
Thank you!
I love it! The pendant is so beautiful!! I really like it!
http://www.psdaimaandsons.com
Thanks!
Did you try to treat the leather with anything to keep the image from rubbing off? Since you did it for jewelry, I’d assume it wouldn’t see too much wear and tear, but I was going to try this technique to make a wallet for my boyfriend. Any ideas?
No, I didn’t treat it with anything afterwords because I figured I would just wear it around my neck. But I get your question. The things is, that even if you put another layer of something over it, the leather will still be flexible and this can very easily create ‘wrinkles’ in the image. So I am actually not sure what to do to prevent this from happening (what a big help am I, right;)? )
The only quick and cheap option I can think of right now is to use clear nail polish over it, because that hardens it.. But I would recommend trying it out on a scrap piece of leather first.
Good luck! And please let me know how it works out!xx
The first cheap thing I would try is the spray on acrylic finish I use on greeting cards. About 3 thin coats. It is better than nothing and waterproofs it to a small point. It is also useful for keeping layers of ink from media into each other when you are working on drawing paper. It is not a stiff finish in the sense that resin is. You could resin coat it with ICE Resin, but that is much more expensive and then it is still. At that point you might as well put it in Tim Holtz’s bezels.
Hi Susan! Thank you for these wonderful tips! I will definitely try them! I actually never thought of acrylic finish, it sounds perfect :)
Is this methode only possible if the suede side of the leather, is the side you transfer the image to?
I tried to transfer it to the smooth leather side, but the transfer paper won’t really attach to that surface. Also it sometimes darkens the image or shrinks the leather because the iron has to stay on longer to attach it. So for me it only worked on the suede side.
But please feel free to try if you have the time and materials, because it would be great if someone found a way to do it! :)
xx
Awesome tutorial, gorgeous!
!this jewelelry is so beautiful! great job.. i like it..
leather more information
Love your designs, all is beautiful.
Lovely designs, looking awesome.
Came across this saved pin on my pinterest page and am going to make several versions of this hopefully for some of my Twitter friends and some in-laws as well. Few questions though, can I seal the leather image with anything to maintain it against time and wear? And can I also attach it to a more solid backing so that I may make a man’s bracelet and separate ornament out of it (can’t decide which way to go yet…). Thank you for this awesome idea!
Hi Melissa, I found your message in my spam folder, so I am very sorry for the late reply and I hope that my answers to your questions will still be helpful!
– I am not sure about sealing the image. Because the leather is flexible, the image tends to ‘crackle’ over time. Unfortunately, even with a coating there is not much that can pretend it from happening.
– About the solid backing, I would advise to use a tick piece of felt. This has also been used a lot for embroidery brooches etc. And it will keep the leather flexible, yet sturdy!
Lana x