A few weeks ago I already mentioned on Instagram that I have found a new hobby: Soldering!
I absolutely love it! I always thought that it would be too hard to do, and that it would require many expensive tools and supplies. But my Pinterest page was filling itself with many gorgeous glass pendants, lamps, terrariums and many more pretty items. It just screamed DIY, but I still figured that I would never be able to create those sturdy accessories, ‘only factories can make those’..
After googling a bit, I found the amazing simpel and inexpensive solution: Copper tape! This special product is my soldering dream come through. It simply means that you wrap the tape around the edges of glass and use it to attach pieces of glass together. (because you can solder copper together)
Now, I understand that soldering is an advanced technique, so that many of you might be a bit scared to try it, trust me I definitely was one of those people. But after practising on old pieces of glass, it turned out not be that hard at all.
The soldering tutorial that you see here is very simpel and you can alter it to your own taste by using a different flower or changing the size of the glass pendant. It is all op to you!
So here you go, the LRS first advanced DIY Project! And please my dear friends, be careful with the soldering iron, because even though it is an easy to use tool it still gets very hot and we wouldn’t want you to hurt your precious hands!
SUPPLIES
– Soldering Iron
– Flux
– Solder
– Pieces of Glass (I used the glass of a broken picture frame)
– Copper Tape 5 mm wide
– Glass Cutter (I used the old fashion one)
– Scissors
– Cutting Board, or something else to protect the surface
– Ruler
– 2 small Jump Rings
– Necklace or a Necklace Chain
– Tiny Flower
STEP 1 – Cut a triangular or square shape out of a simpel piece of paper in your desired pendant size.
Place the piece of paper on your cutting board and put the piece of glass on top.
STEP 2 – Use your glass cutter and ruler to cut the glass. Cut two pieces of glass.
**Here is a website that explains how to properly use a glass cutter in case this is your first time.
STEP 3 – Dry your flower. (use your favourite drying method, I actually tried the microwave trick for the first time) Place the flower between the two pieces of glass.
STEP 4 – Take the copper tape and tape all around the two layers of glass. (it’s a bit like the wrapping a gift technique)
**Make sure that the tape ends up smooth, any bump will show in the end result!
STEP 5 – Now comes the fun and harder part: soldering!
– Put flux on the copper tape.
– Using your solder, solder all around the pendant, covering the copper tape completely.
** In case this is your first time using a soldering iron, here is a very nice clip on how to use a soldering iron for beginners.
STEP 6 – Cut two small strips of copper tape. We will use this to attach the jump rings.
STEP 7 – Fold the small strip of copper tape through the jump rings and attach them to the top of the soldered pendant.
– Add flux and use your soldering iron and solder to attach the jump rings to the top of the pendant.
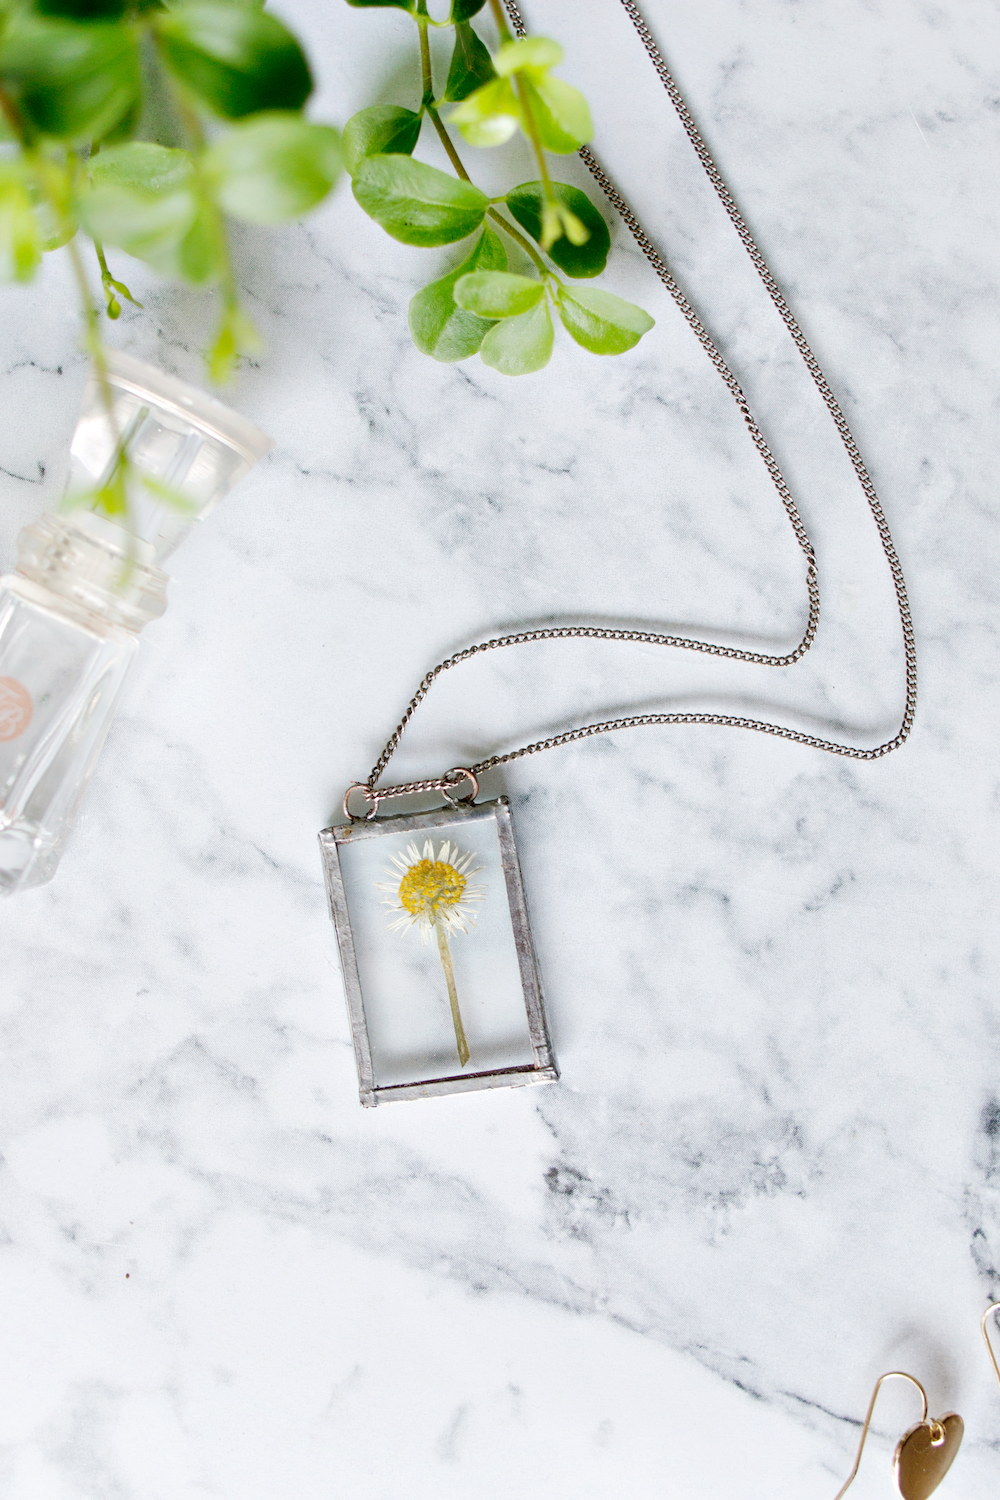
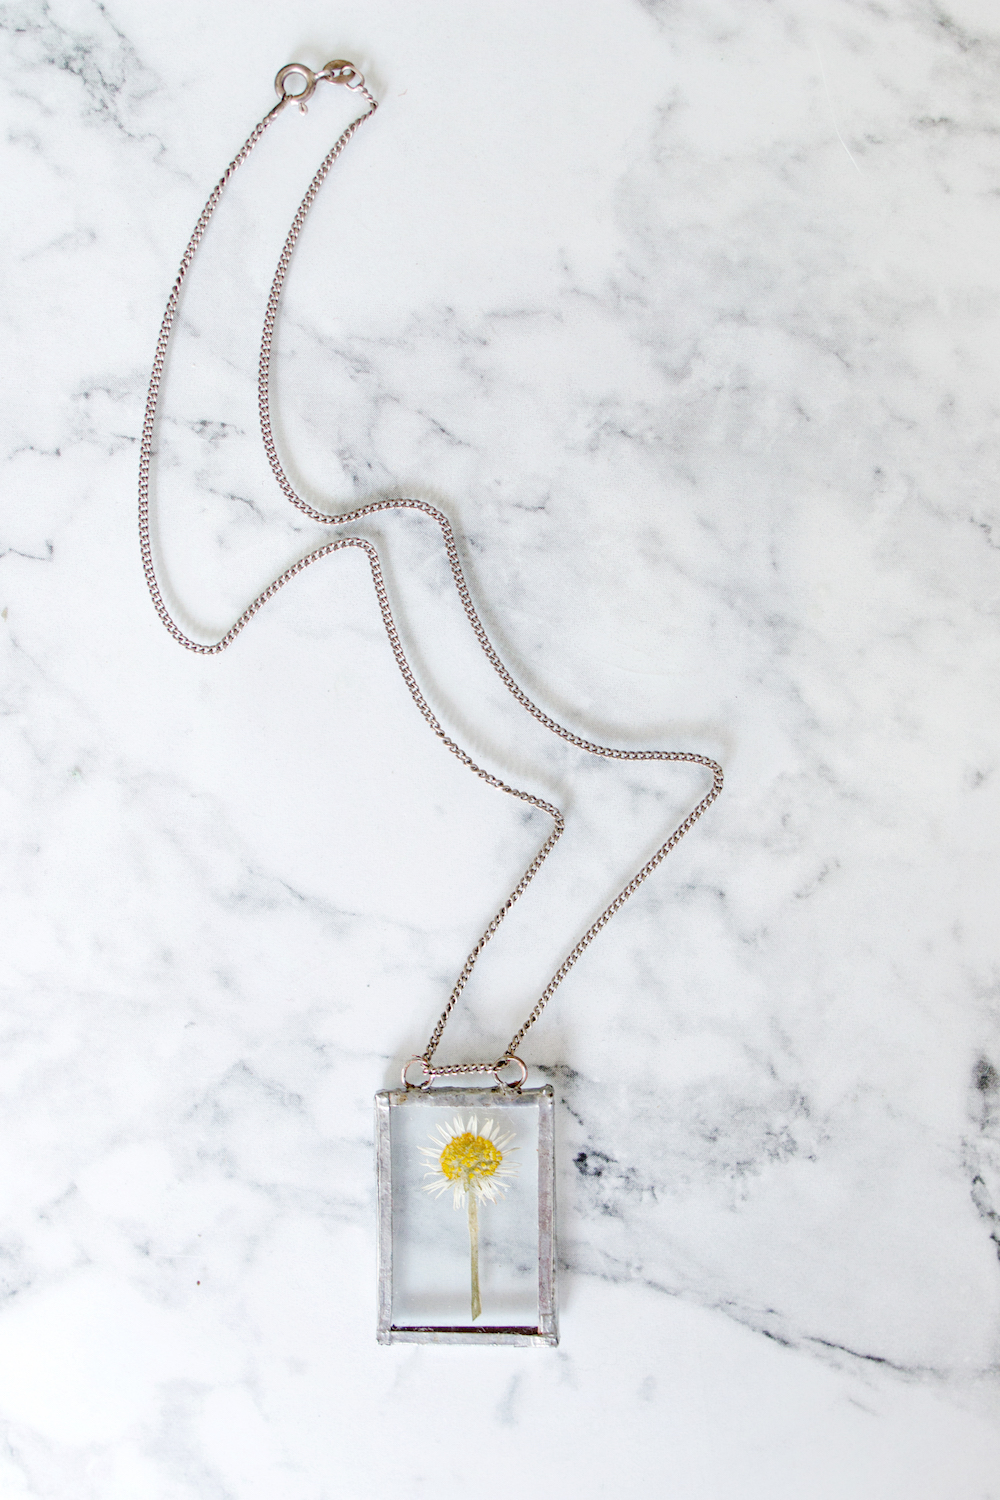
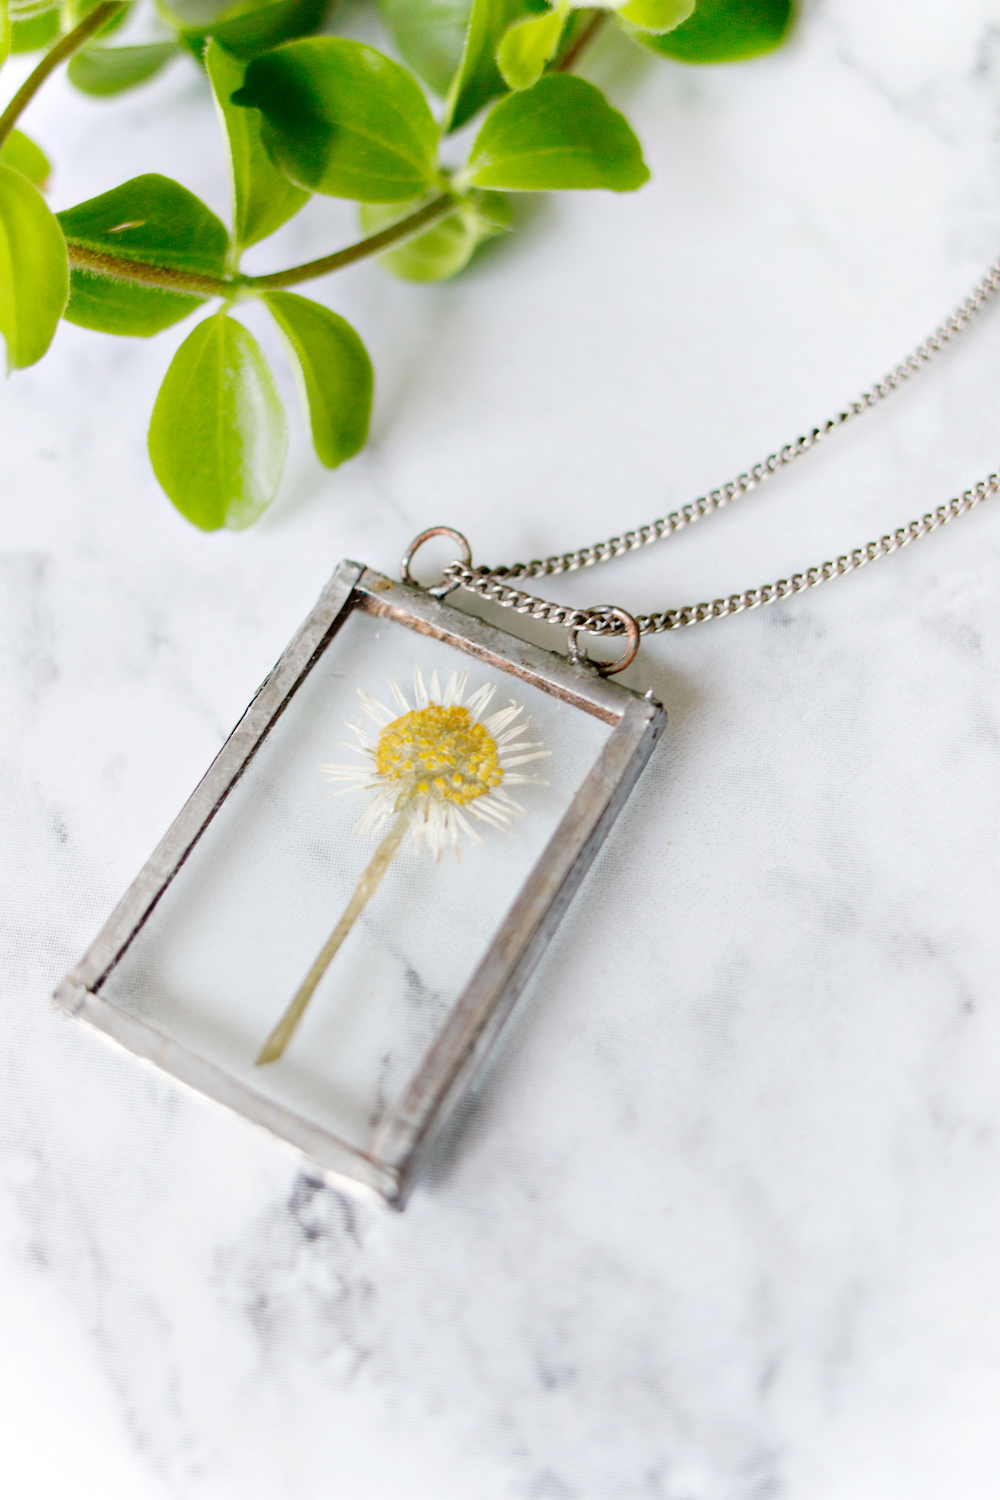
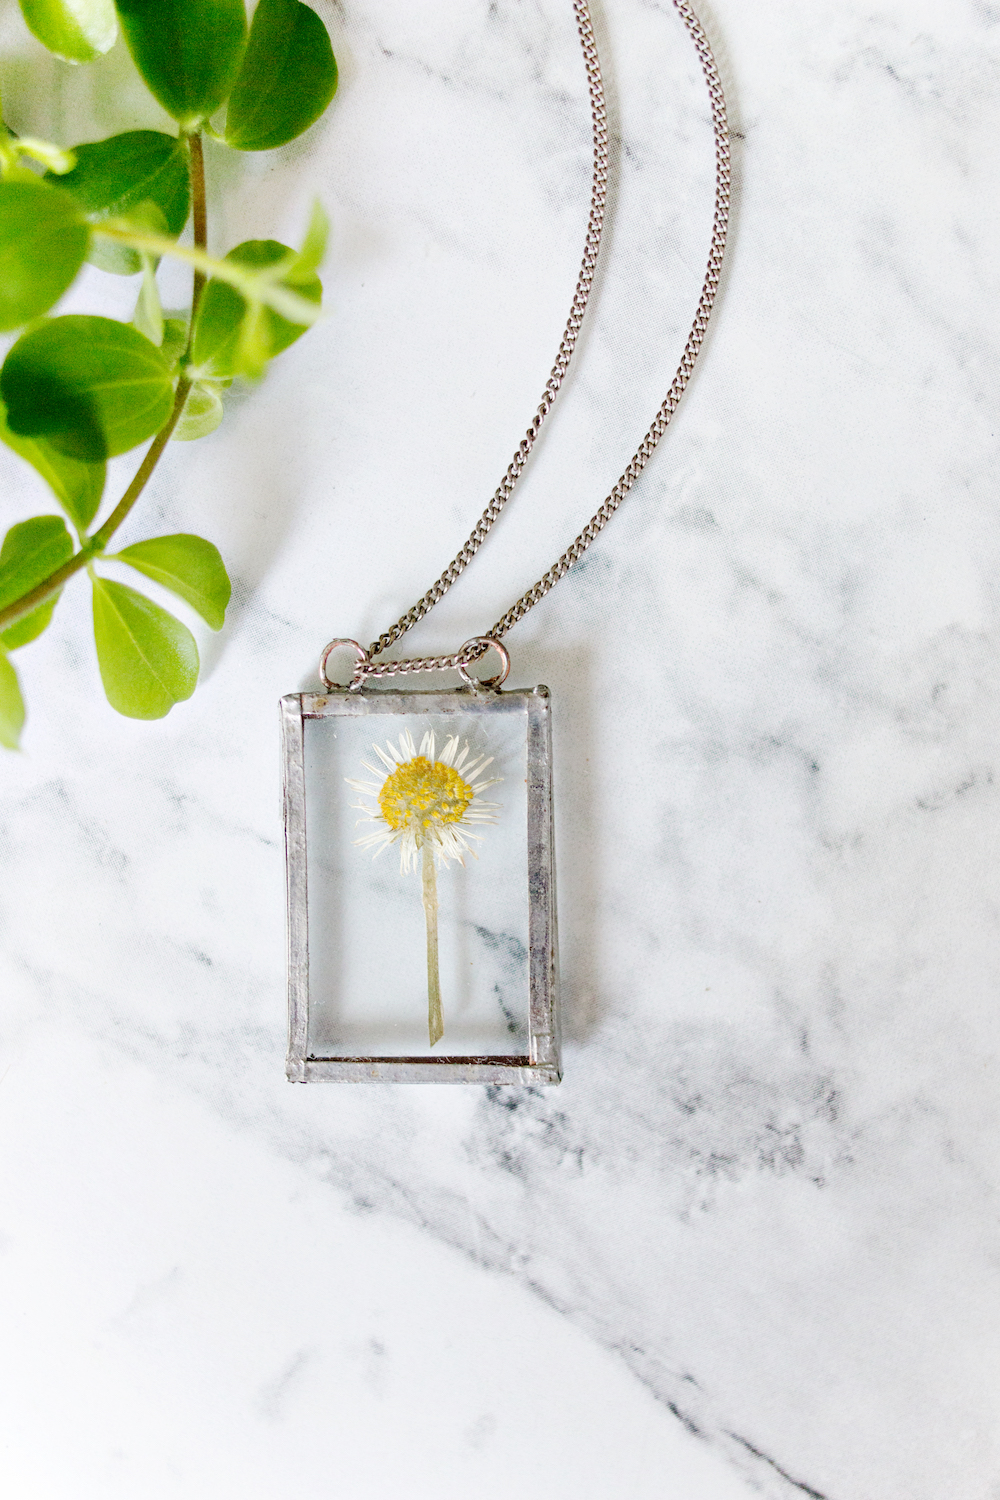
And that was it!! You survived it all! Hurray!
Now, let’s show your fancy advanced DIY necklace off to the world!
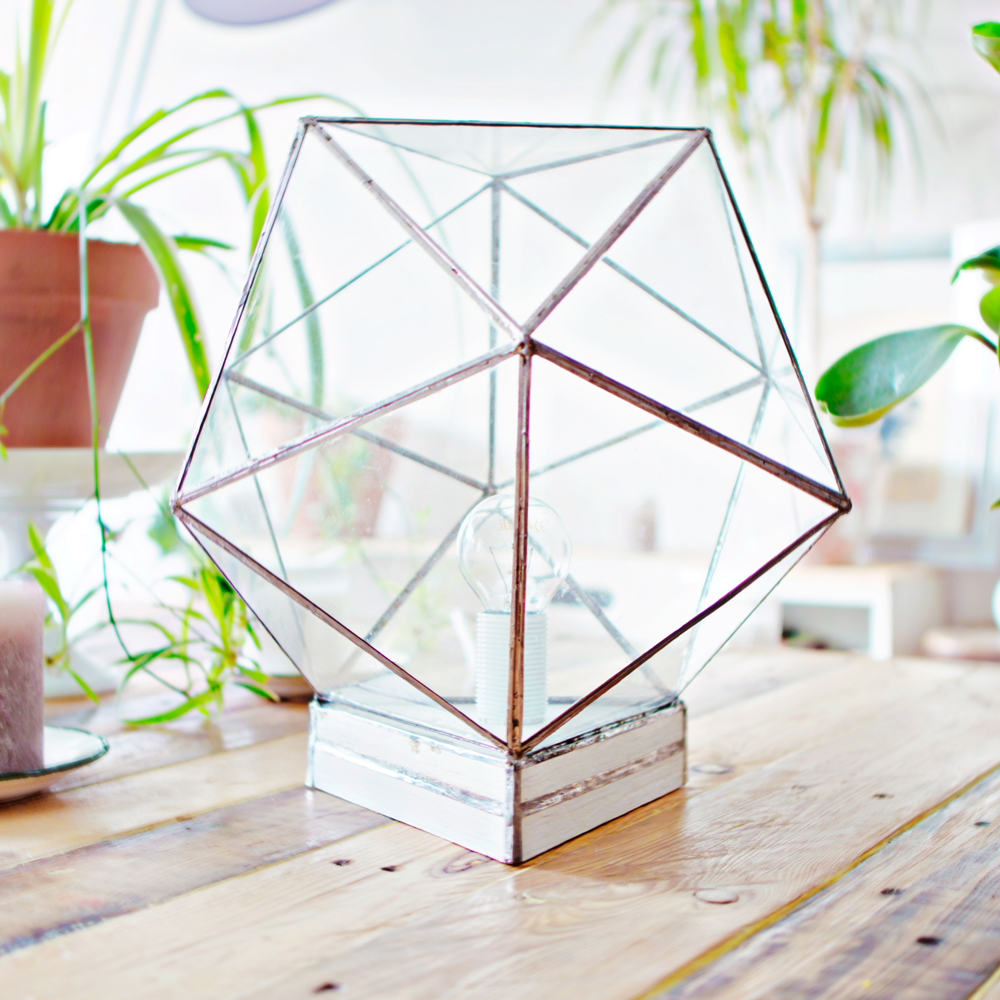
Getting the soldering vibes? After I made this necklace, I went on to more advanced projects like this glass lamp:
Soldering opened up a whole new DIY world to me, and I hope that you like it too!! Please let me know what you think or show me your soldering projects in the comment section!

15 comments
Wow, that looks great! I’ve tried soldering too but found it a little too hard…I’ll definitely give this copper tape stuff a try! Where did you buy it? I’m pretty sure gamma doesn’t sell it ;)
Have a nice day!
How great that you are going to give soldering another try! I promise that the copper tape will make it a lot easier!:) I couldn’t find any copper tape in regular stores like praxis or gamma, so I bought the 5mm tape online at: hobbyelectronica.nl it is called koperfolie tape.
This is the best tutorial ever….I can’t wait to do this! Thank you!
Take care!
This is brilliant – I had no idea you can use copper tape to soulder! xo
I have done these many years ago, thanks for posting your project, it has inspired me to get out my soldering iron again! Beautiful tutorial!
Thank you so much for your kind words Rebecca! And great that the project inspired you to start soldering again:) Let me know how it turns out!xx
This looks amazing! I would really like to do this for christmas presents for all the ones I love! How awesome! — How much do you think it would cost to get all the materials from scratch?
Hi Jessica!
What a wonderful idea to make these as Christmas gifts!
It really depends on how many you want to make and your location to decide how much it will cost.
But here is a list of how much I paid for the main materials, I bought most of them in Dutch online stores:
Soldering Tin: €7,95
2 small rolls of Copper Tape (5mm): €9,95
Glass cutter €5,00
10 cheap glass picture frames (A5 size) €10,00
Because I used a basic oldskool glass cutter, there is a chance that some piece might brake, so I recommend buying a few extra pieces of glass (picture frames) just to be safe.
Truly admired your ability to create crafts with so little money. DIY you are fabulous!!!
I’m going to give this a try, my sister gave me a necklace with flowers in it for my Birthday, I love it, so I’m going to make one for her, this is beautiful ,
Thank you for this! And I love that you are making this for your sister! Happy crafting, and please let me know if you have any questions.
Lana x
Hey there… do you ever find that the flux seeps into the glass? This is my problem at the moment and trying to find a way around it? Thanks
Hi Lauren,
I didn’t experience the flux seeping into the glass. Are you using copper tape? I think that the tape is what prevented the flux of seeping in when I created this project.
If it’s still seeping, it might mean that the soldering iron is too hot.
This link to a book about soldering, might help with your problem:
https://bit.ly/2LLhkrw
Please let me know how it works out, or if you have any other questions!
Lana x
I tried this trick tonight with two different kinds of ferns, but the heat from the solder turned the leaves brown :( any tips for this issue? Thanks for a great tutorial!
Hi Meredith, thank you for trying out the tutorial! And I am sorry to hear that the ferns are turning brown, because of the heat..
I googled it a bit, but couldn’t find a clear solution on how to prevent this from happening. The only thing that I can think of is to make the pendant slightly bigger, so the fern is in the center and to create more space between the soldering edge and the leaves.
Please let me know how it goes! Happy crafting!
Lana x