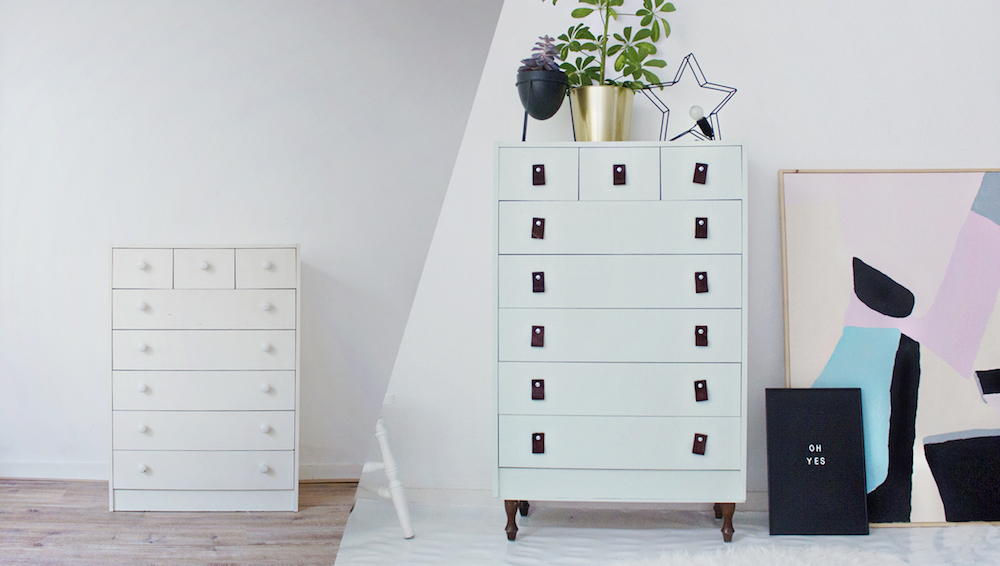
Are you ready for a fun ‘Before and After’ post?! Today I will be sharing my budget friendly dresser restyle project!
Upcycling is one of my favourite activities! And when I moved into my current studio, I had very little money to spend on decorating the small space and also didn’t want to invest in a new piece of furniture, since my next home might be too far away to bring it with me (yes, the luxurious struggles of a nomadic lifestyle!)
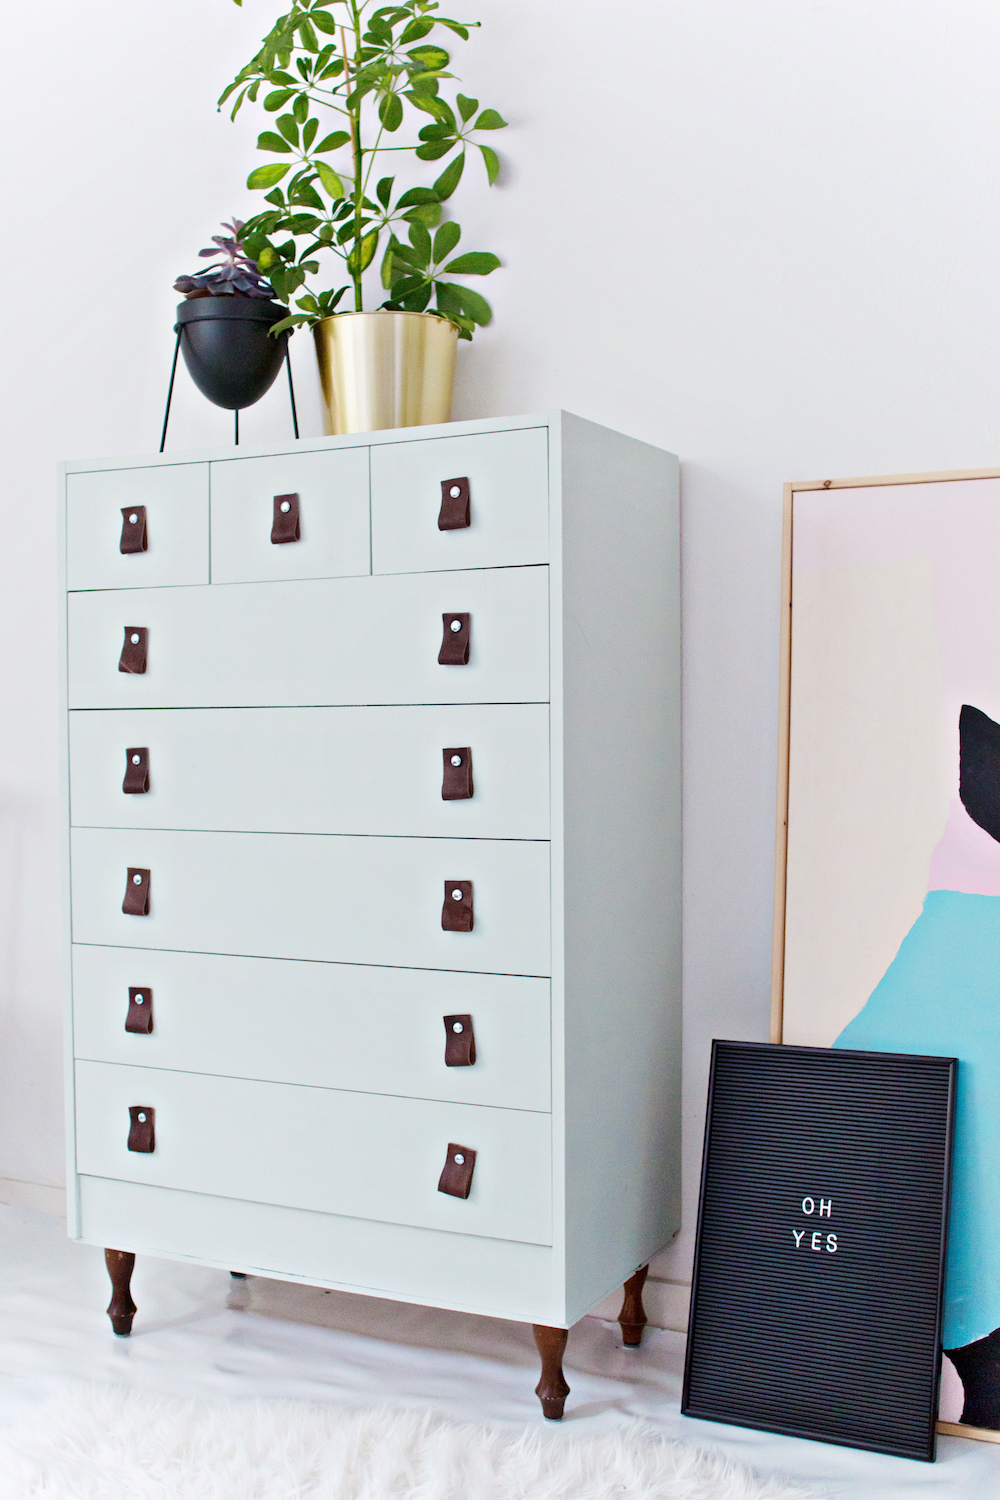
Luckily I found this old dresser for free and decided to give it a new life with just a few easy tweaks that completely changed it entire look.
My main wish for this dresser was to lift it to create space underneath it, since my studio is pretty small and one of the ‘tricks’ for living in a small space is to keep the floor surface visible.
And I wanted to paint it into a subtle color, since all of my walls are white, and I wanted to turn it into a practical statement piece.
Budget-friendly Dresser:
Upcycling old pieces of furniture really doesn’t have to cost much. The total costs for restyling this dresser were only: €19,00!!
- Dresser: free! (ask your friends, family, eBay for unused pieces of furniture)
- Wooden legs: I found these wooden table legs at a thrift store for 1 euro each and they matched perfectly!
- Handles: The leather handles are made out of a thrifted leather jacket that only cost 2 euro. The carriage bolts and matching nuts cost 8 euros at the local hardware store.
- Paint: Try Dollar/Euro stores! They often sell left over name brand paint cans. (And for the Dutchies among us: I bought the chalk paint at Action for only 5 euros.)
I was in a very pastel phase, when restyling this dresser. But as I try to do in all of my tutorials: you can adjust the project to your own style! Paint each drawer in a different color, choose felt instead of leather for the handles, put wheels under the dresser, etc. The possibilities are endless!
Are your ready to give your old dresser a new look? Scroll down for the full project!
DIY | How to Restyle a Plain Dresser
SUPPLIES
– Old dresser
– 4 Table legs
– Paint ( I used chalk paint for a matte effect)
– Primer – that is suitable for the surface of your dresser
– Paint roller and brushes
– Sandpaper
– Pieces of Leather
– Carriage bolts and matching nuts
– Fabric Hole Puncher
Optional
– Piece of wood for the bottom of the dresser
– Drill to attach the legs to the bottom of the drawer
STEP 1
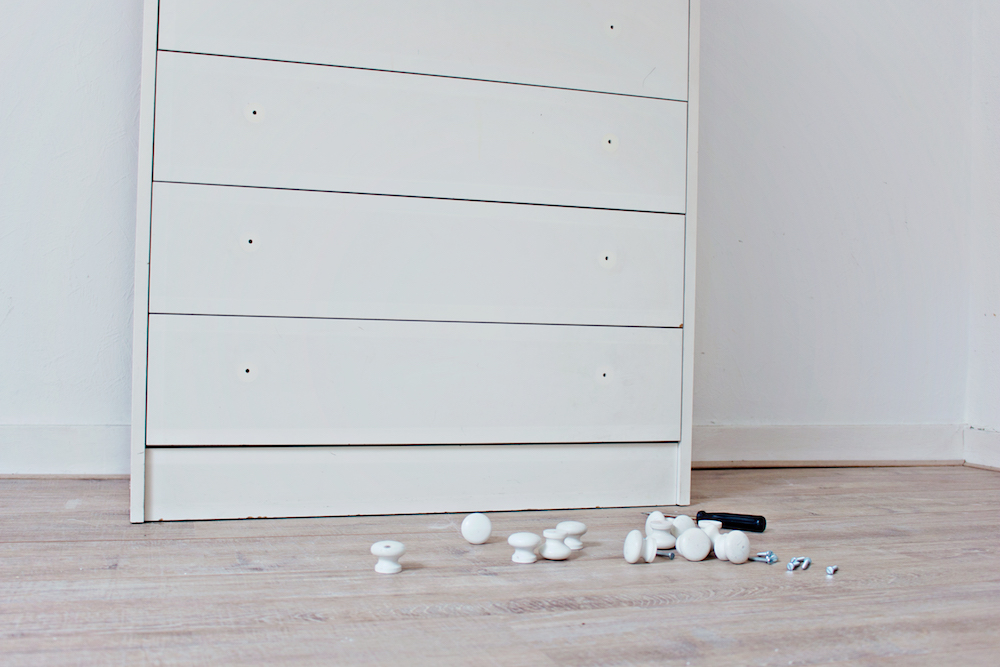
– Remove the original handles of the chest of drawers.
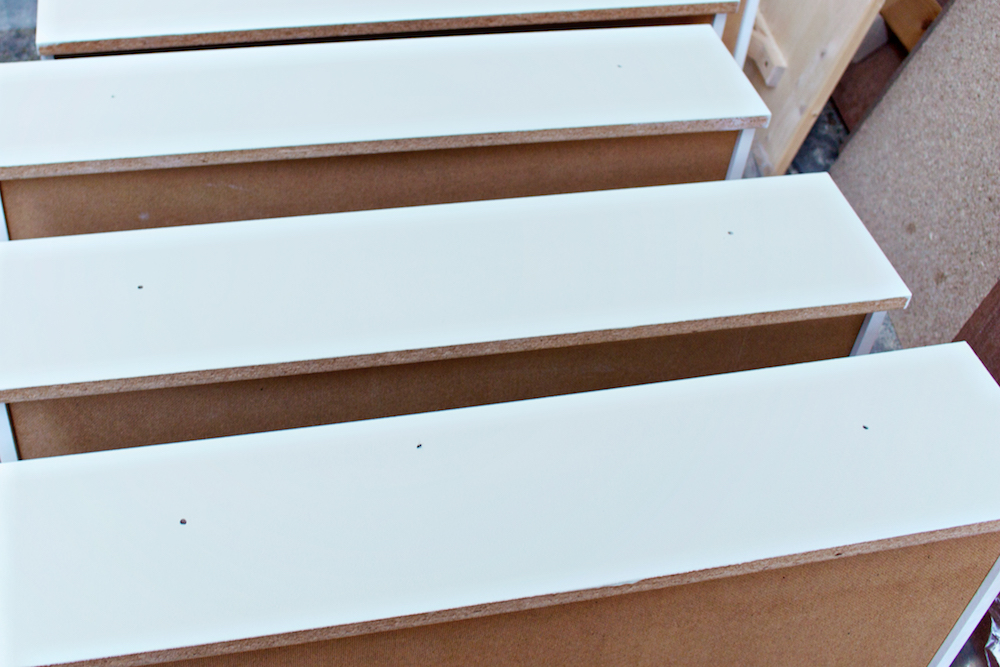
– Take all of the drawers out of the dresser.
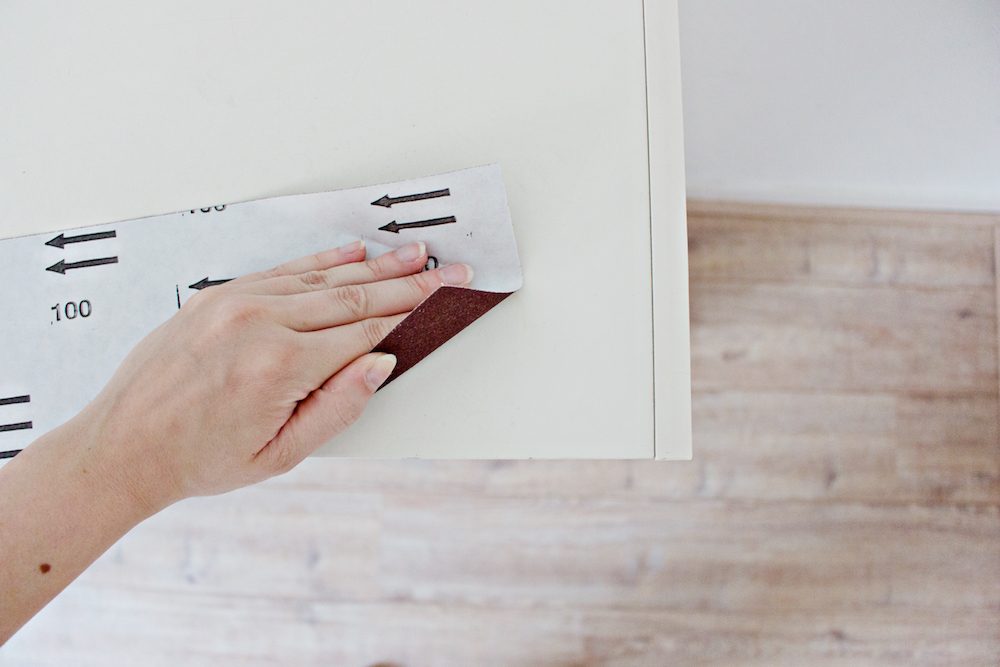
STEP 2
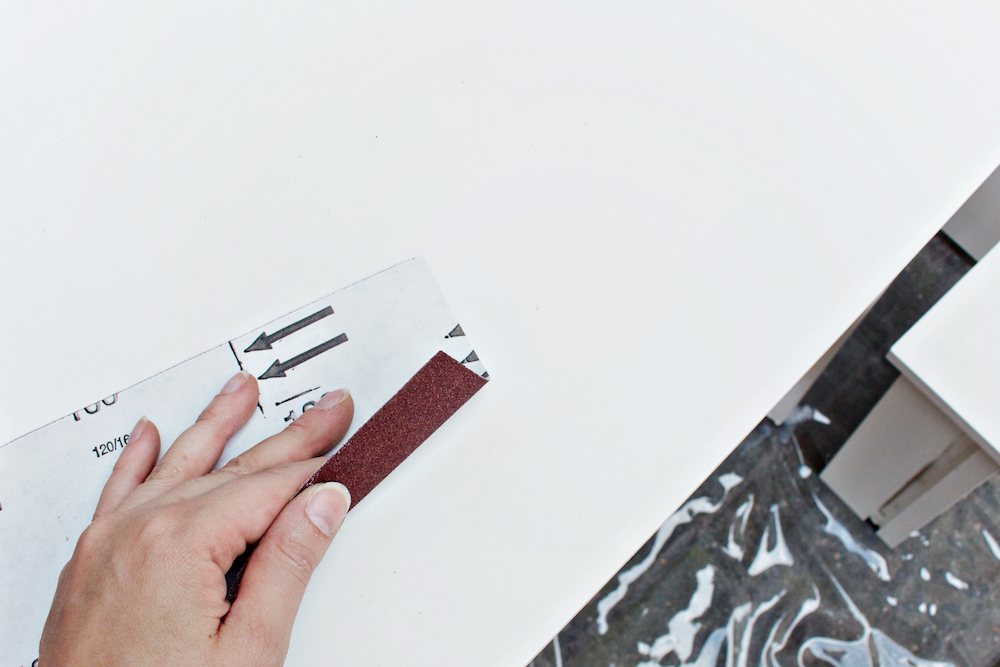
– Lightly sand the entire dresser including the front of the drawers.
– Clean the surfaces with a damp cloth after sanding.
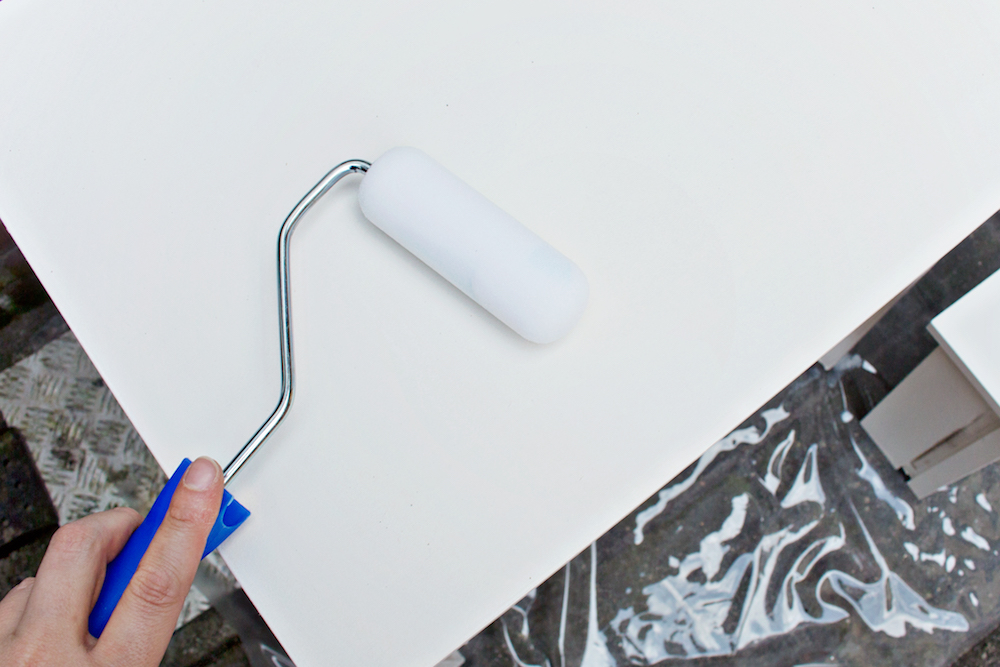
STEP 3
– With a soft roller, apply the primer to the outside of the dresser and drawers.
– Let the paint dry.
STEP 4
– After the primer has dried, lightly sand the painted surfaces.
– Clean the surfaces with a soft cloth before the next step.
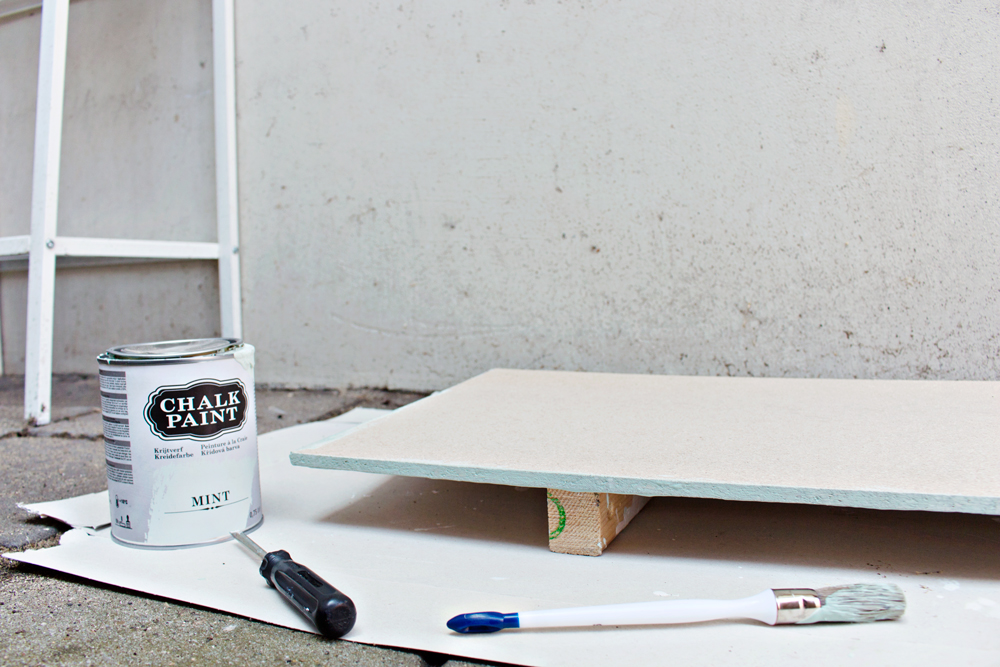
STEP 5
– Apply* your choice of paint to the outside of the dresser and drawers.
– let the paint dry, and if necessary, apply an extra layer.
* Use a roller or brush that is suitable for the type of paint that you are using
* I used a chalk paint in the color: mint
STEP 6
Preparing the leather handles
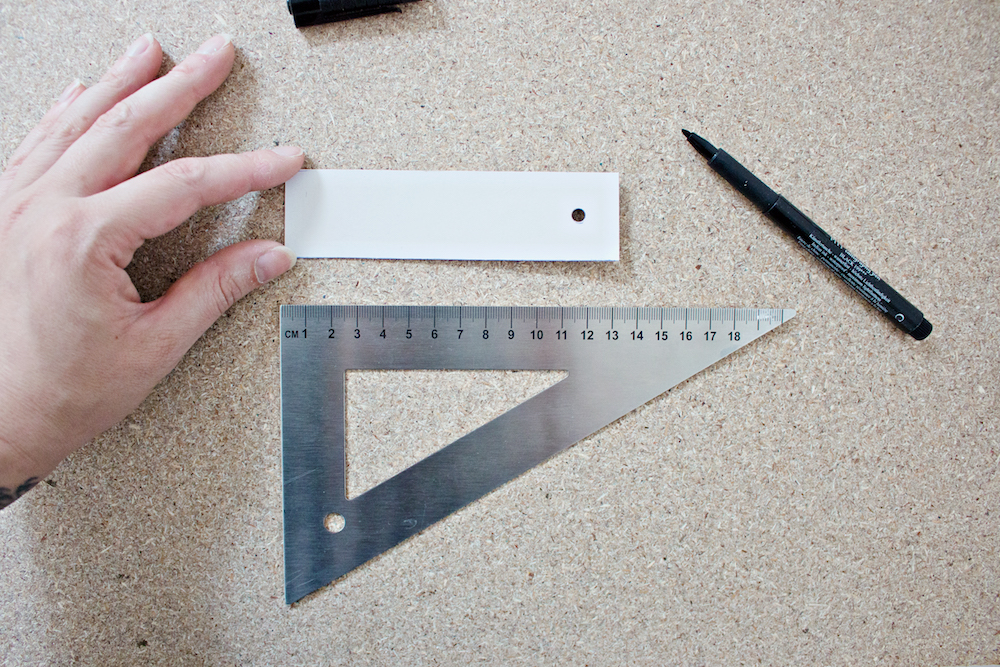
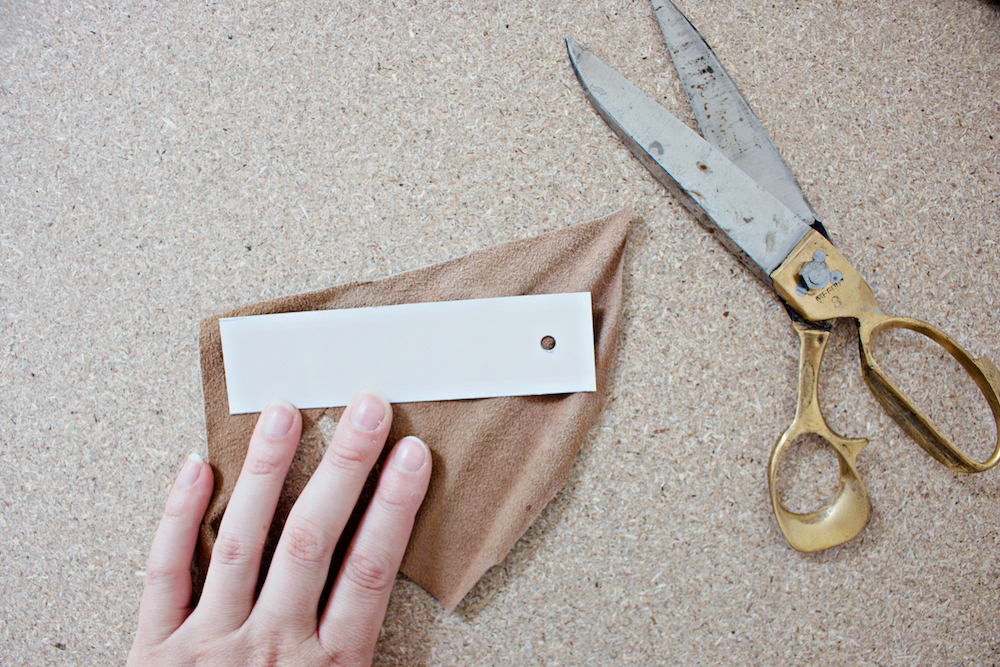
– Decide the width and length of the leather* handles.
– Double the length measurements (you will be folding the leather handle later on) and draw the measurements on a piece of paper or cardboard.
– Cut the measurements out of the cardboard.
– Make a hole on one side of the cardboard for the bolt.
* Are you also always on a budget? No worries! I made these leather handles out of a thrifted leather jacket to keep the costs to a minimum. And you can also always opt for animal friendly faux-leather pieces.
STEP 7
– Place your cardboard mold on a piece of leather and cut along the edges.
STEP 8
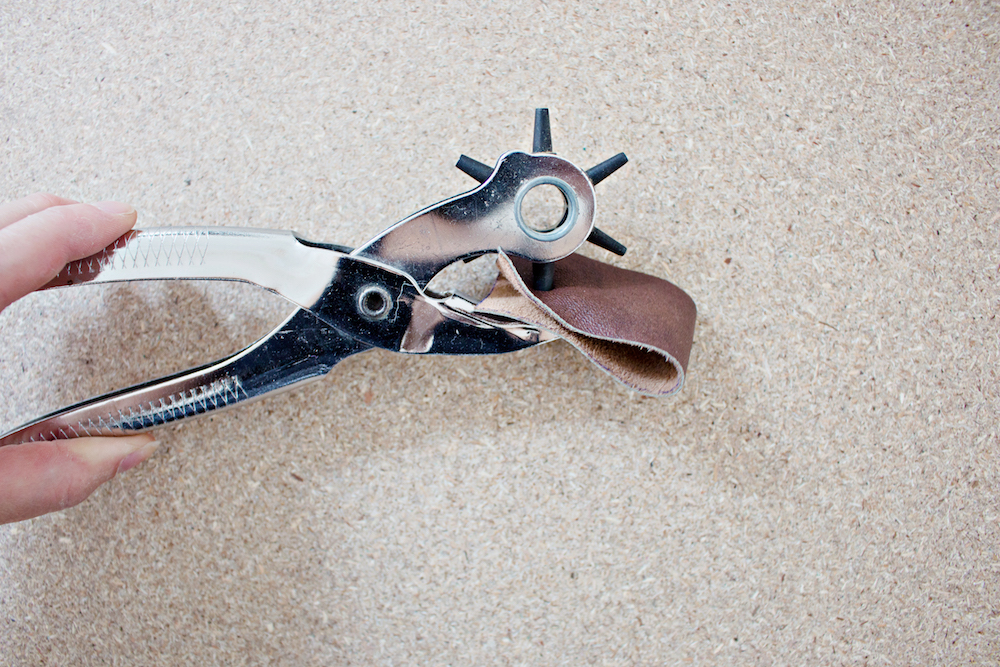
– Mark the hole placement and fold the leather piece double.
– Use your hole puncher (or something similar) and punch a hole trough both layers of the fabric.
STEP 9
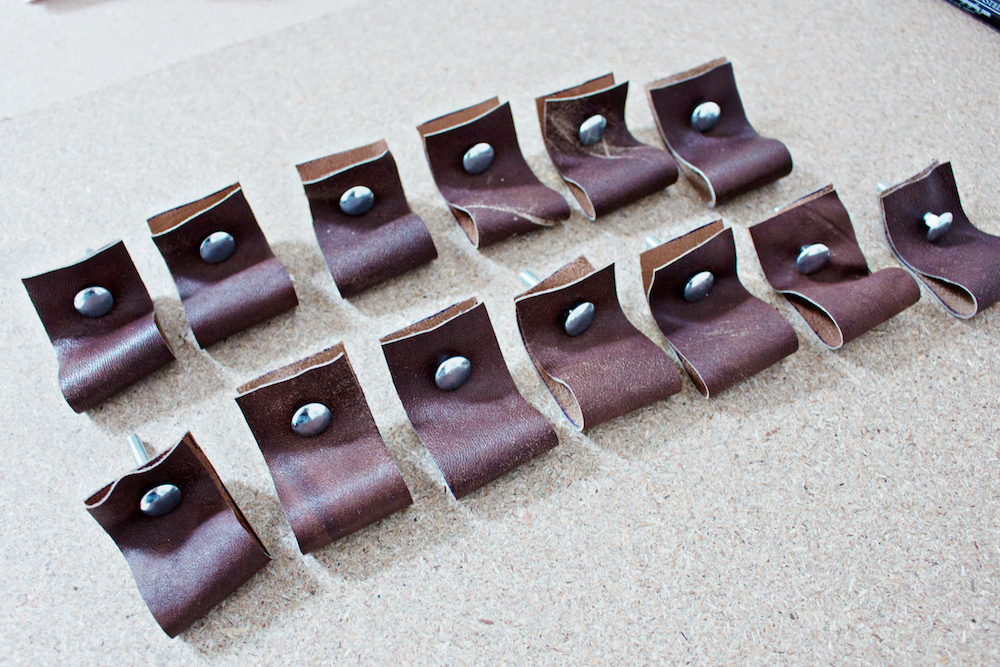
– Repeat step 7 & 8 for as many handles as you need.
– Prepare the handles by inserting the bolts trough both of the fabric layers.

STEP 10
– Press the bolt through the existing hole in the drawer, with the leather piece on the outside of the drawer.
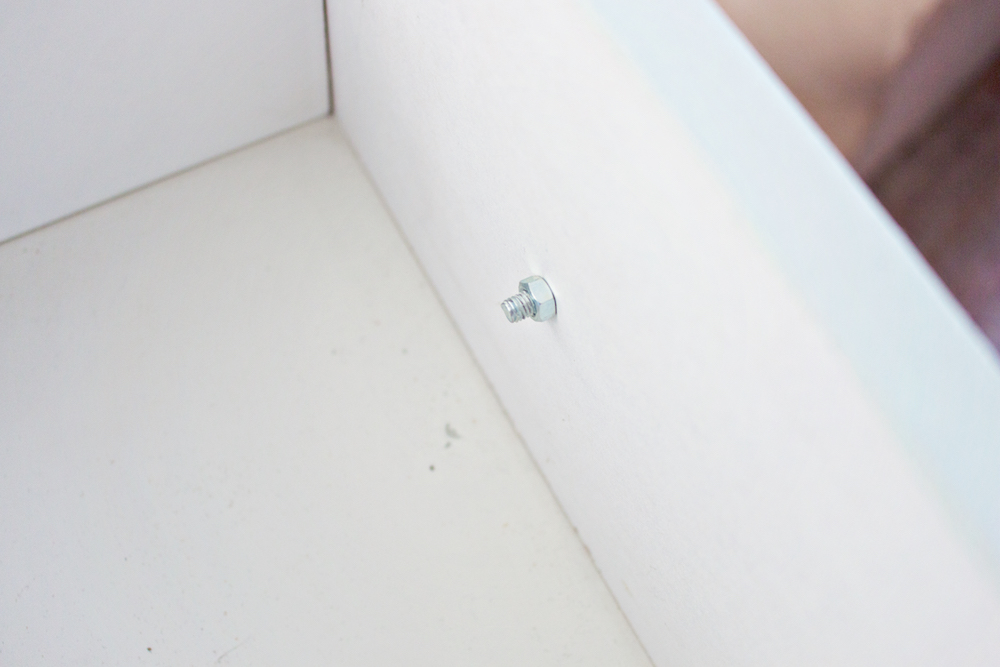
STEP 11
– Attach the nut to the back of the bolt inside the drawer.
STEP 12
Attaching the legs
Attaching the legs to the bottom of the dresser shouldn’t be too hard, depending on the type of legs and the bottom of the cupboard.
– If the dresser has an open bottom, take a piece of wood (you can have it cut in the size of the dresser at the hardware store) and paint the edges in the color of paint as the rest of the dresser.
– Turn the dresser upside down, and use small screws to attach the piece of wood to the bottom.
– How to attach the legs to the new bottom depends on the type. This website shows three different ways to attach new legs to your dresser.
And that is it! You will now have a brand new looking dresser!
CREDITS
– Chalk Paint by Action
– Star Light by Hema
– Gold Planter by Ikea
– Black Planter by Søstrene Grene
– Painting by Lana Red Studio
This blogpost is an original LRS Project and was not sponsored.