
Budget proof, stylish and ready in an hour: this hanging planter DIY project has it all! And the best part: it involves upcycling an item that everyone will have in their home: a plain sifter!
Yes, that’s right! These gold beauties are the cheapest sifters that I could find and I transformed them into these gold hanging planters. And so can you!

Why it’s a game changer:
– Each planter cost about €5,00 to make
– Don’t like gold? Use your favourite colour!
– With outdoor spray paint, you can also hang them in your garden.
– Add green into your home without using any valuable space
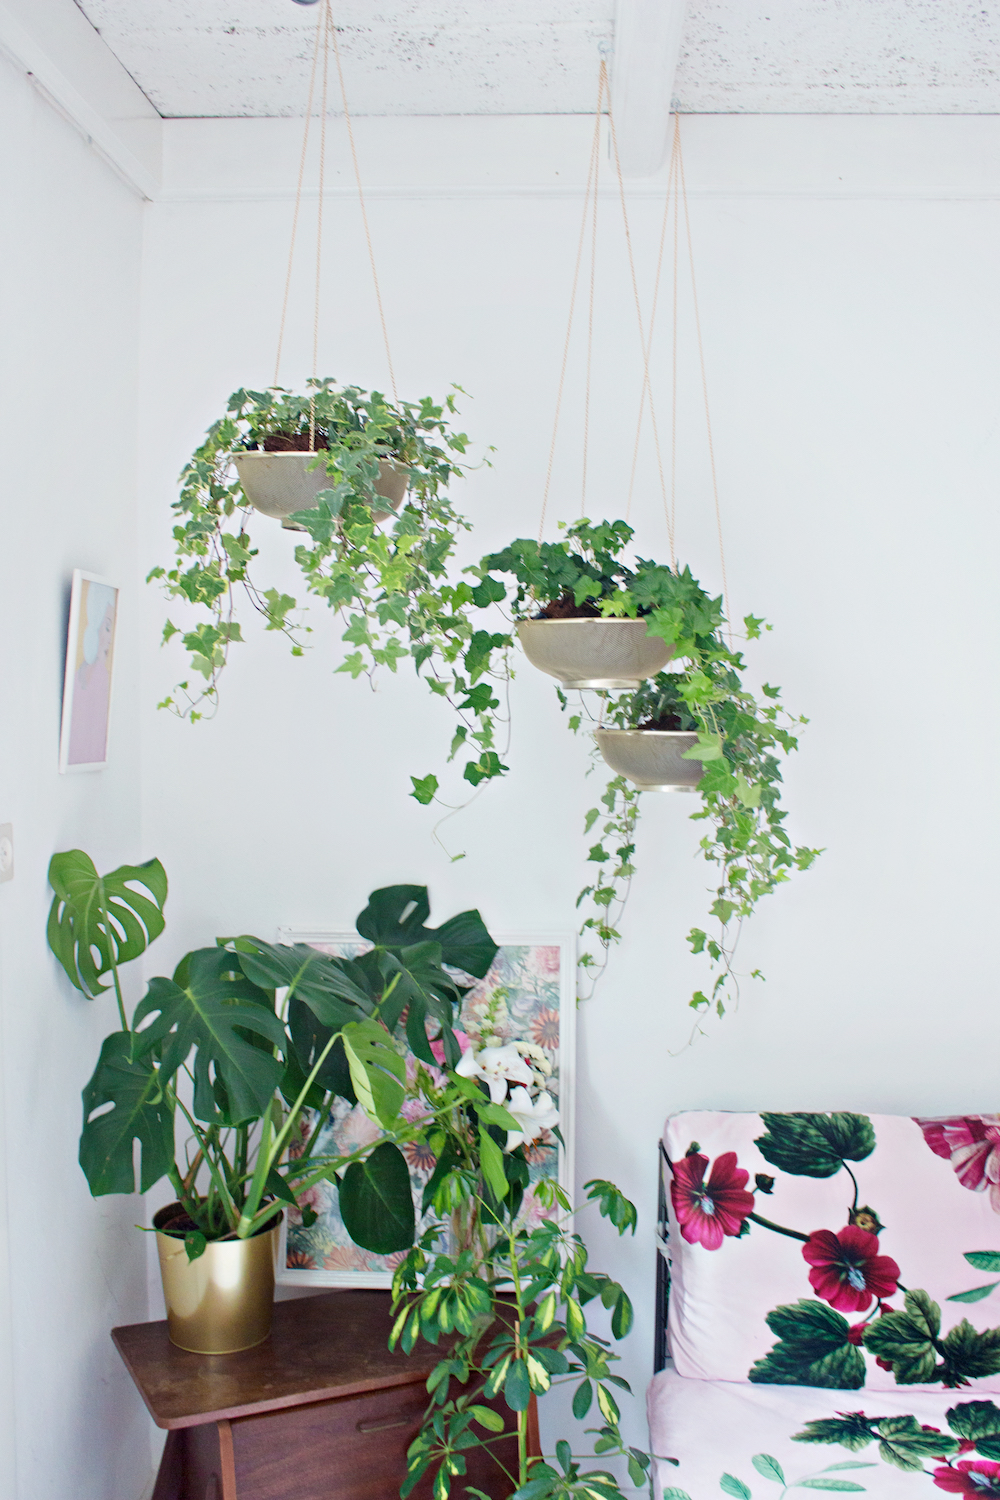
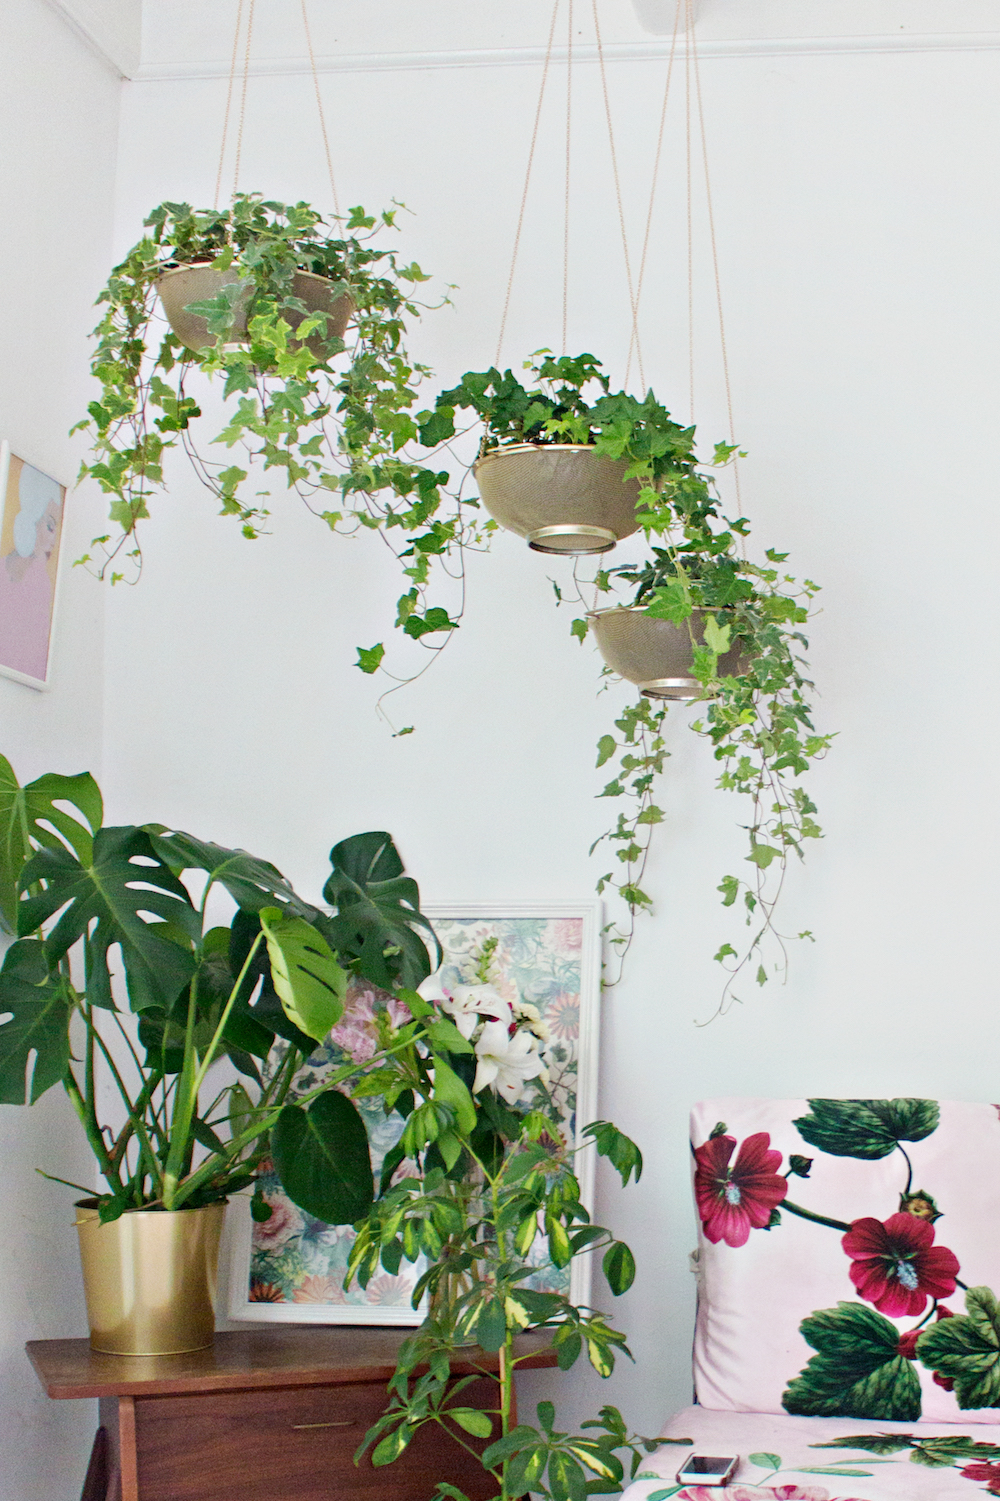
Why this works best for my home is because I have a tiny studio and only one wall that I often use as a photo wall.(the wall behind my sofa) Since I can’t put any wallpaper on the wall or hang anything on there, because it has to stay clean and white, it really felt very dull and plain compared to the rest of my living space.
These hanging planters were the perfect solution! They don’t take up any valuable space in my tiny home and I can easily take them down when I have to use the entire wall for a photoshoot.
The best part is that it really makes the room become more alive, I think that it works so well because they are hanging in different heights.
Are your ready to make your own hanging sifter planters? Scroll down for the full project!
HANGING PLANT DIY | From Sifter to Planter
SUPPLIES
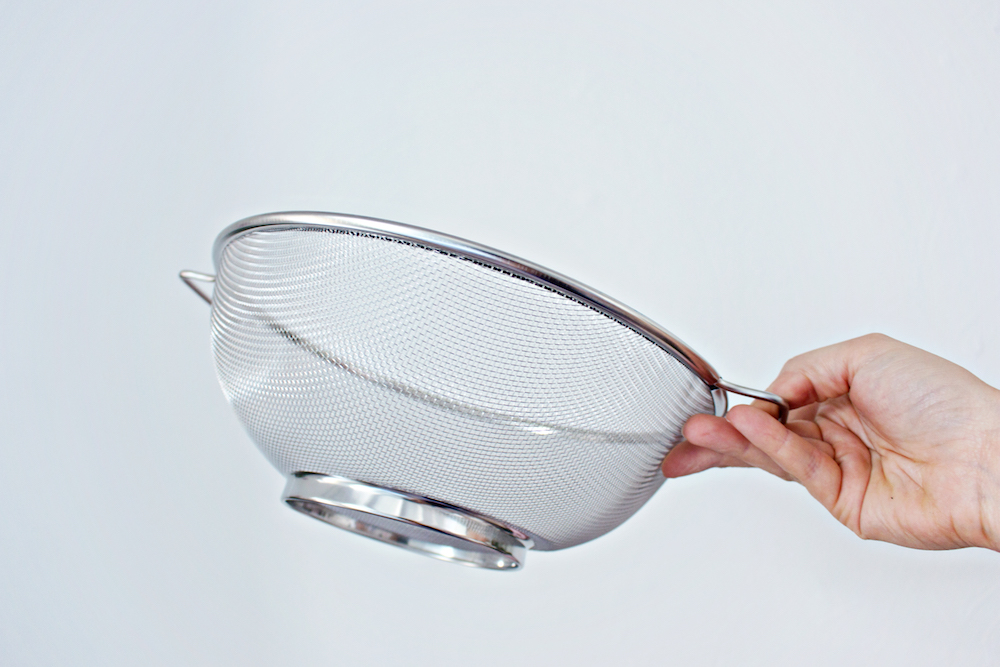
– Sifter
– Gold Spray Paint
– Gold hoops (3 small, and 1 big hoop)
– Gold Chain
– Pliers
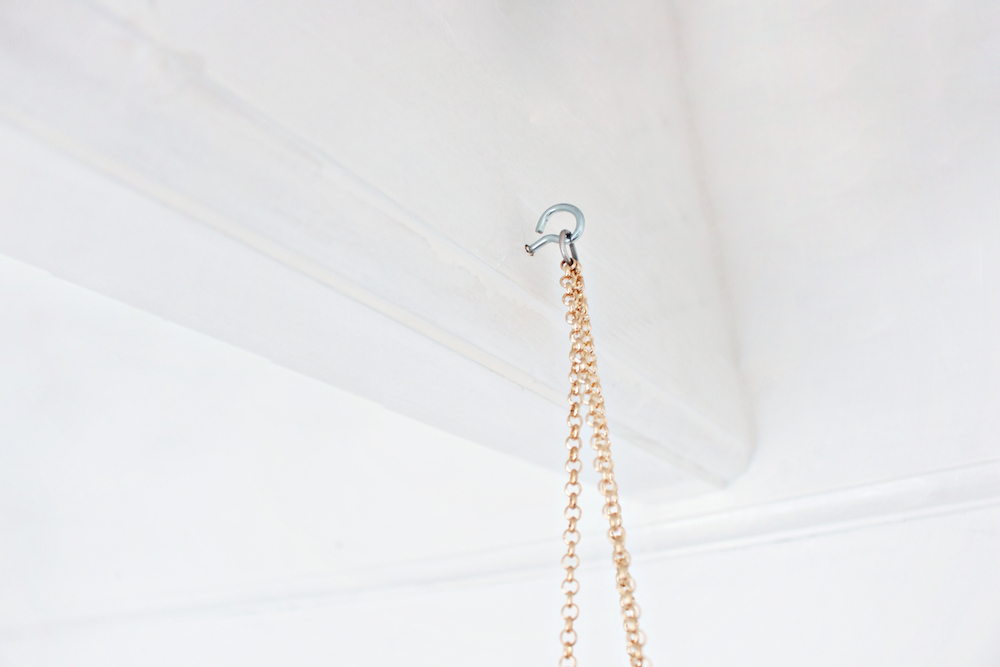
– Screw Hook
– Plastic Bag
– Scissors
– Measuring Tape
– Hanging Plants
STEP 1 – Preparing
– Take your sifter, wash and dry it to prepare for the next step.*
*To help attach the spray paint, you can lightly sand the smooth surfaces of the sifter.

STEP 2 – Gold
– Place your sifter upside down on a surface that can get dirty.
– Lightly spray your paint onto the sifter. Repeat spaying light layers of paint onto the surface of the sifter, letting the paint dry in between.
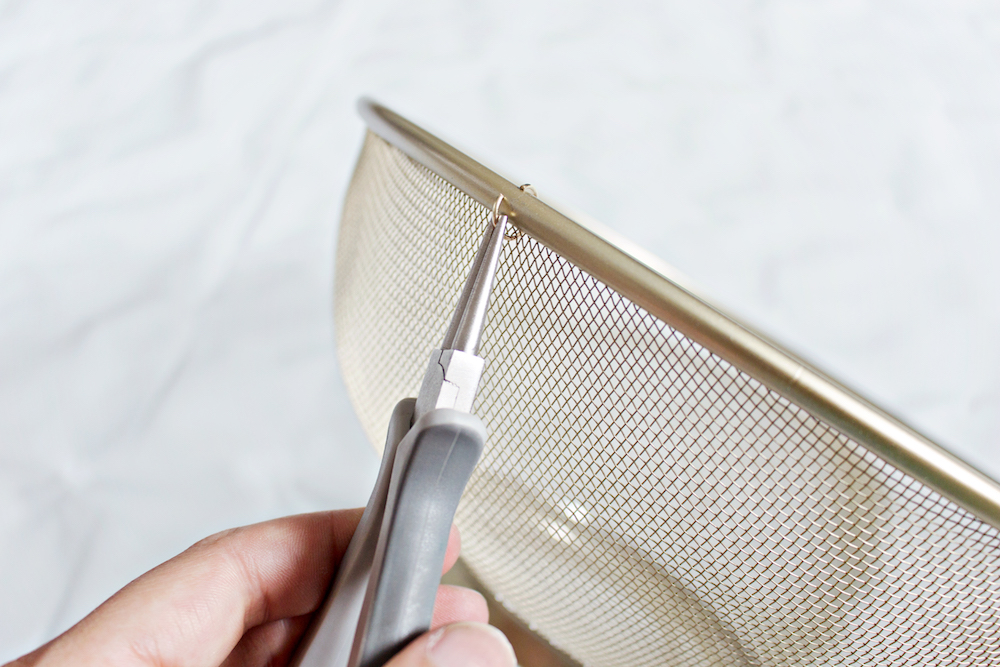
STEP 3 – Hoops
– Measure the top rim of the sifter and divide this by three. These will be your hanging spots.
– Attach a small hoop through the holes in the sifter. One on each of the three point.
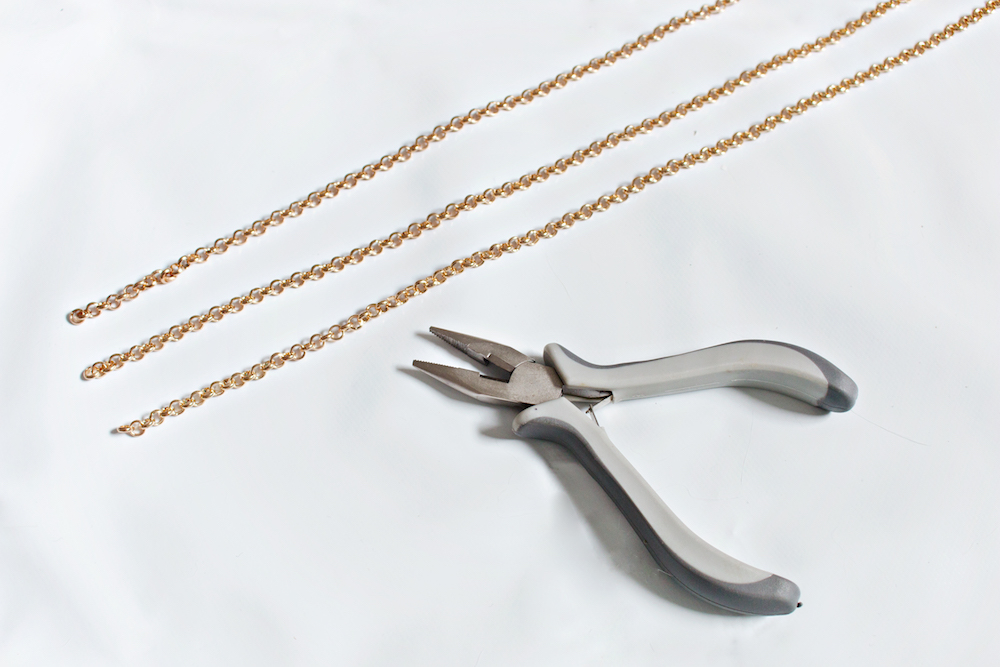
STEP 4 – Chains
– Measure the height of the ceiling and decide the placement of your hanging planter.
– Cut three pieces of your chain in the desired length with your pliers.
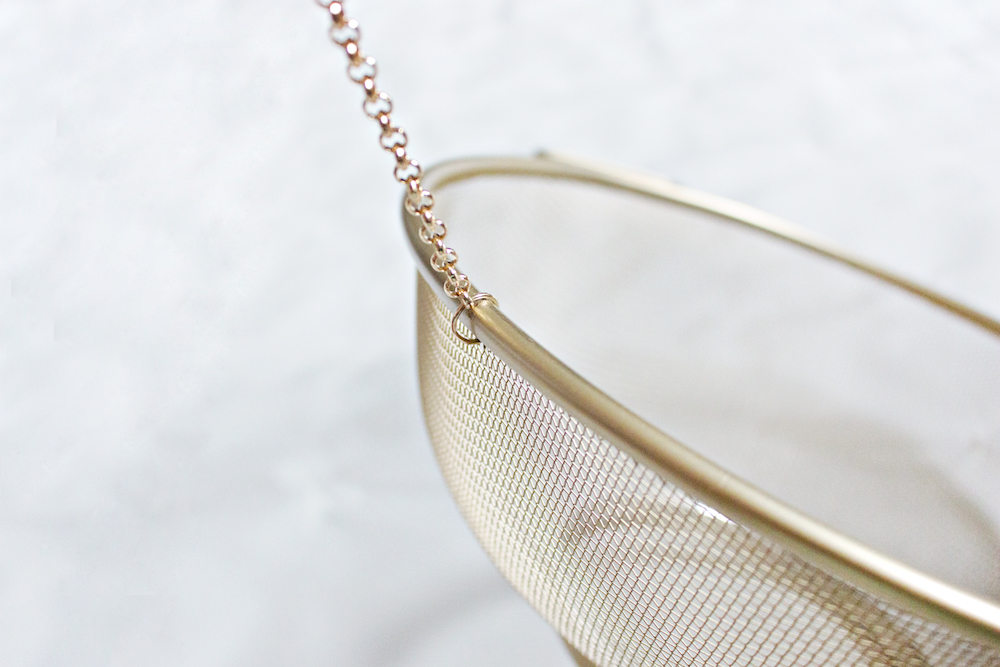
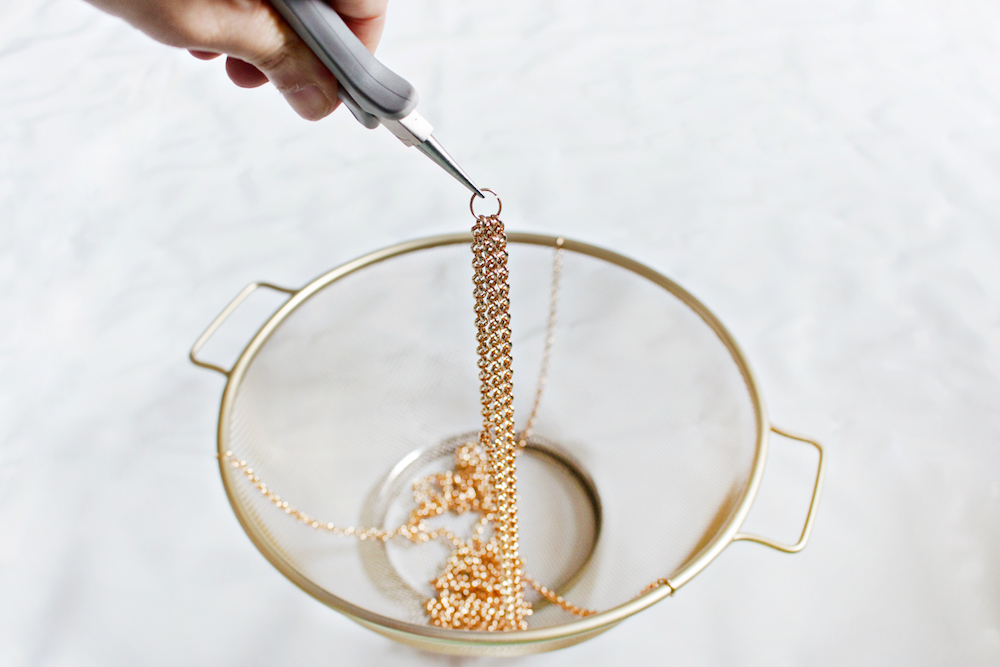
STEP 5 – Attaching the chain
– Attach one chain to one hoop ring and close the ring with your pliers.
– Repeat this for all three hoops and chains.
STEP 6 – Big Hoop
– Attach all three chain endings to the big hoop with your pliers.
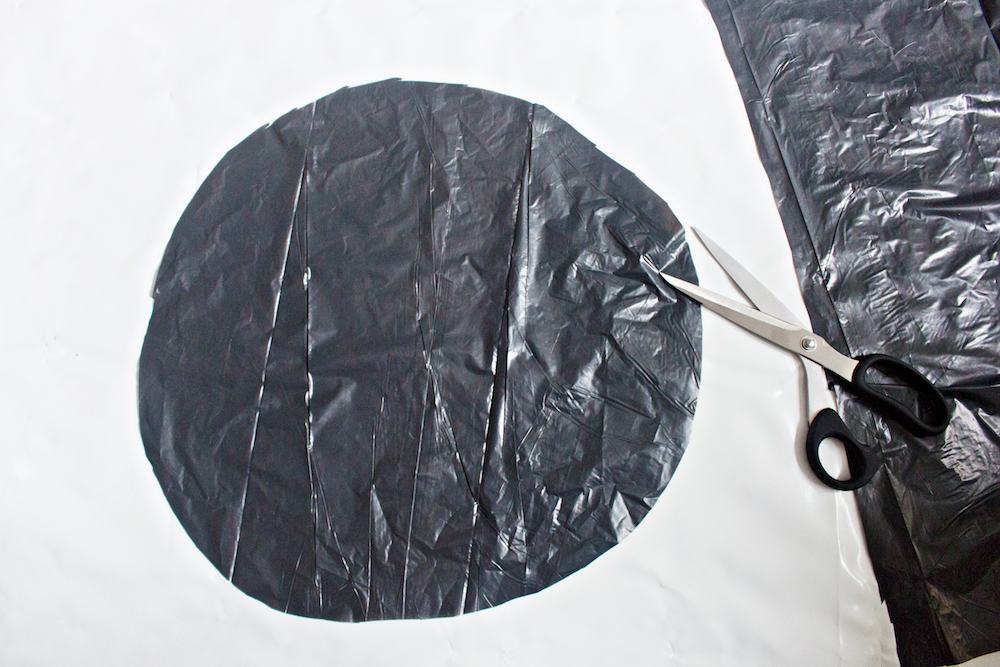
STEP 7 – Plastic
– Cut your plastic bag in a large circle with your scissors.
STEP 8
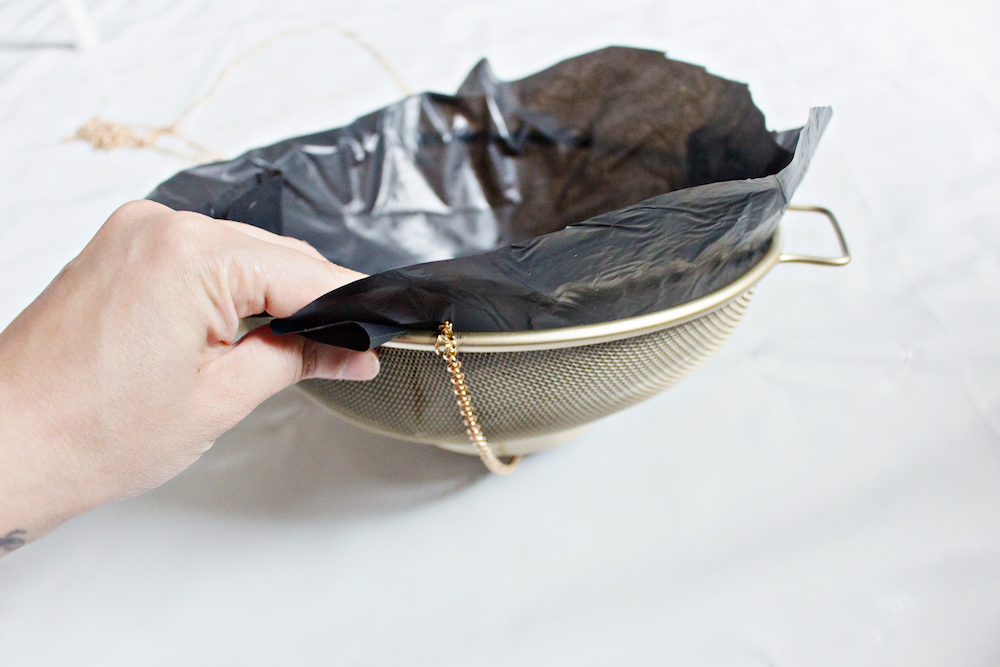
– With the chains on the outside of the sifter, place your plastic into the sifter.
– Keep the ends of the plastic sticking out for now.
STEP 9
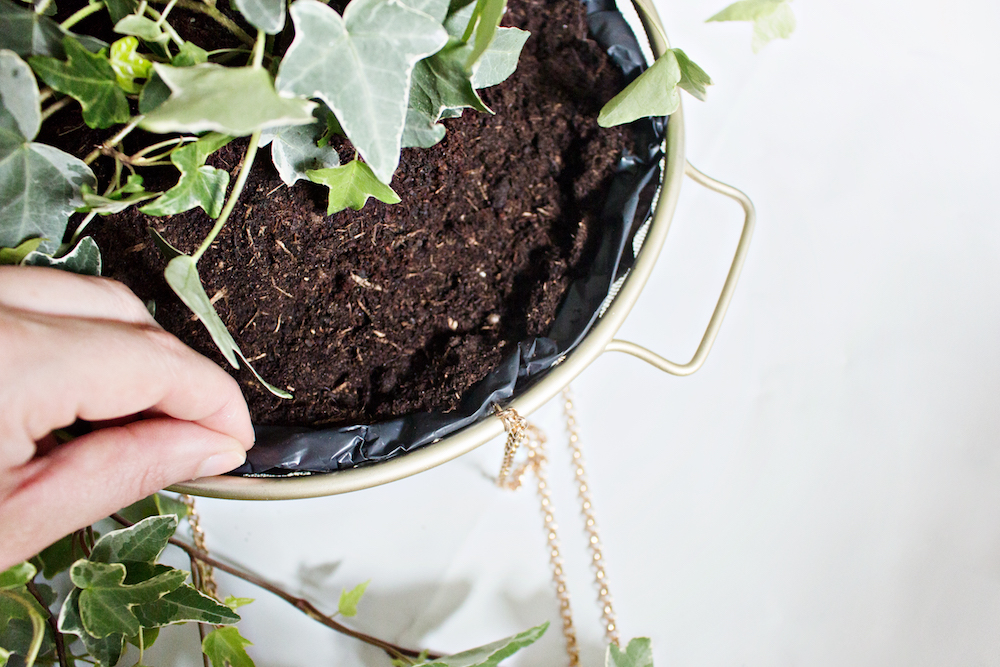
– Place your plant into the plastic bag in the sifter.
– Add some extra soil until the entire sifter is filled.
– Roll the edges of the plastic towards the plant until it creates a small edge.
– Water the plants.
STEP 10
– Attach the hook into your ceiling (My ceiling has wooden beams, if yours doesn’t you can use other ways to attach the planter: This website offers several ideas)
What I love most about this project
- You can play with several sifters in different heights.
- Mixing different plants in one sifter would also look awesome!
- This hanging planter would also be great to hang in front of your window and create a little bit of privacy instead of using curtains.


CREDITS
– Sifter – Action
– Gold Chain – Xenos
– Plants – Ikea
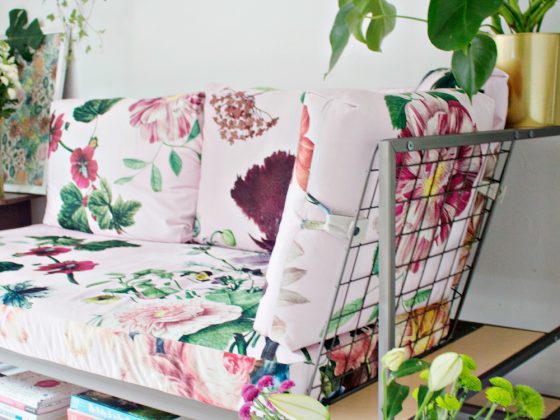
– Sofa – Design by LRS in collaboration with Spoonflower
– Rugs – by Ikea
– Floral Framed Artwork – by LRS and Spoonflower
– Portrait Artwork – by Piet en Kees
This blogpost is an original LRS Project.
2 comments
“Great read! I loved how the author presented their arguments.”
This post is a must-read for everyone. It’s thought-provoking and inspiring.