LRS
  • START HERE
  • DIY
    • SEWING & STYLE
    • HOME DECOR
    • JEWELRY
    • TECH DIY
    • ANIMAL
    • ROUNDUPS
    • CHRISTMAS CRAFTS
  • FASHION
    • NAIL DESIGN
    • HAIR
    • MAKE-UP
    • OUTFITS
    • FASHION INSPIRATION
    • TIPS & ADVICE
  • RECIPES
    • BREAKFAST
    • DESSERTS
    • TREATS
    • SAVORY
  • TRAVEL
    • TRAVEL
    • BERLIN GUIDE
  • INSPIRED
    • ART
    • BLOGGING
    • PERSONAL
  • ABOUT
    • CONTACT
  • SHOP
  • START HERE
  • ABOUT
  • CONTACT
  • SHOP
L A N A R E D S T U D I O
  • CRAFTS

    SEWING & STYLE

    HOME DECOR

    JEWELRY

    ROUNDUPS

    TECH DIY

    CHRISTMAS CRAFTS

    ANIMAL

    UPCYCLING

    HOME DECOR

    UPCYCLING DIY | Decoupage Lampshade, with paper napkins

    TECH DIY

    DIY | Card Holder Phone Case

    JEWELRY

    JEWELRY DIY | Polymer Clay Flower Earrings

  • FASHION

    OUTFITS

    HAIR

    MAKE UP

    NAIL DESIGN

    FASHION INSPIRATION

    TIPS & ADVICE

    HAIR STYLES

    HAIR DIY VIDEO | Braided Scarf Hairstyle

    NAIL DESIGN

    NAIL DIY | It's a Glittery Sharpie Christmas

    Outfits

    OUTFIT | Autumn, Me & My Tripod

  • RECIPES

    DESSERTS

    SAVORY

    TREATS

    BREAKFAST

    BREAKFAST

    RECIPE | Sugar Free - Banana Bread

    TREATS

    RECIPE | Courgette Chips

    SAVORY

    RECIPE | Sweet Potato & Goat's Cheese Tart

  • INSPIRED

    ART

    BLOGGING

    PERSONAL

    BLOGGING

    HOW TO | 10 PRACTICAL Tips Every Blogger Should Learn

    PERSONAL

    PERSONAL | Grief and other things

    ART

    DIY | Double Exposure Photography

  • TRAVEL

    Berlin

    TRAVEL | BERLIN GUIDE

    Travel

    LIVING ABROAD | How to Make Your Temporary Home Feel Like Home

    explore

    TRAVEL

    BERLIN GUIDE

  • Jewelry

DIY | Tassel Necklace

Total
2
Shares
0
0
2

DIY | Tassel Necklace

I can’t really remember when tassels officially got back in style, but I am a big fan!

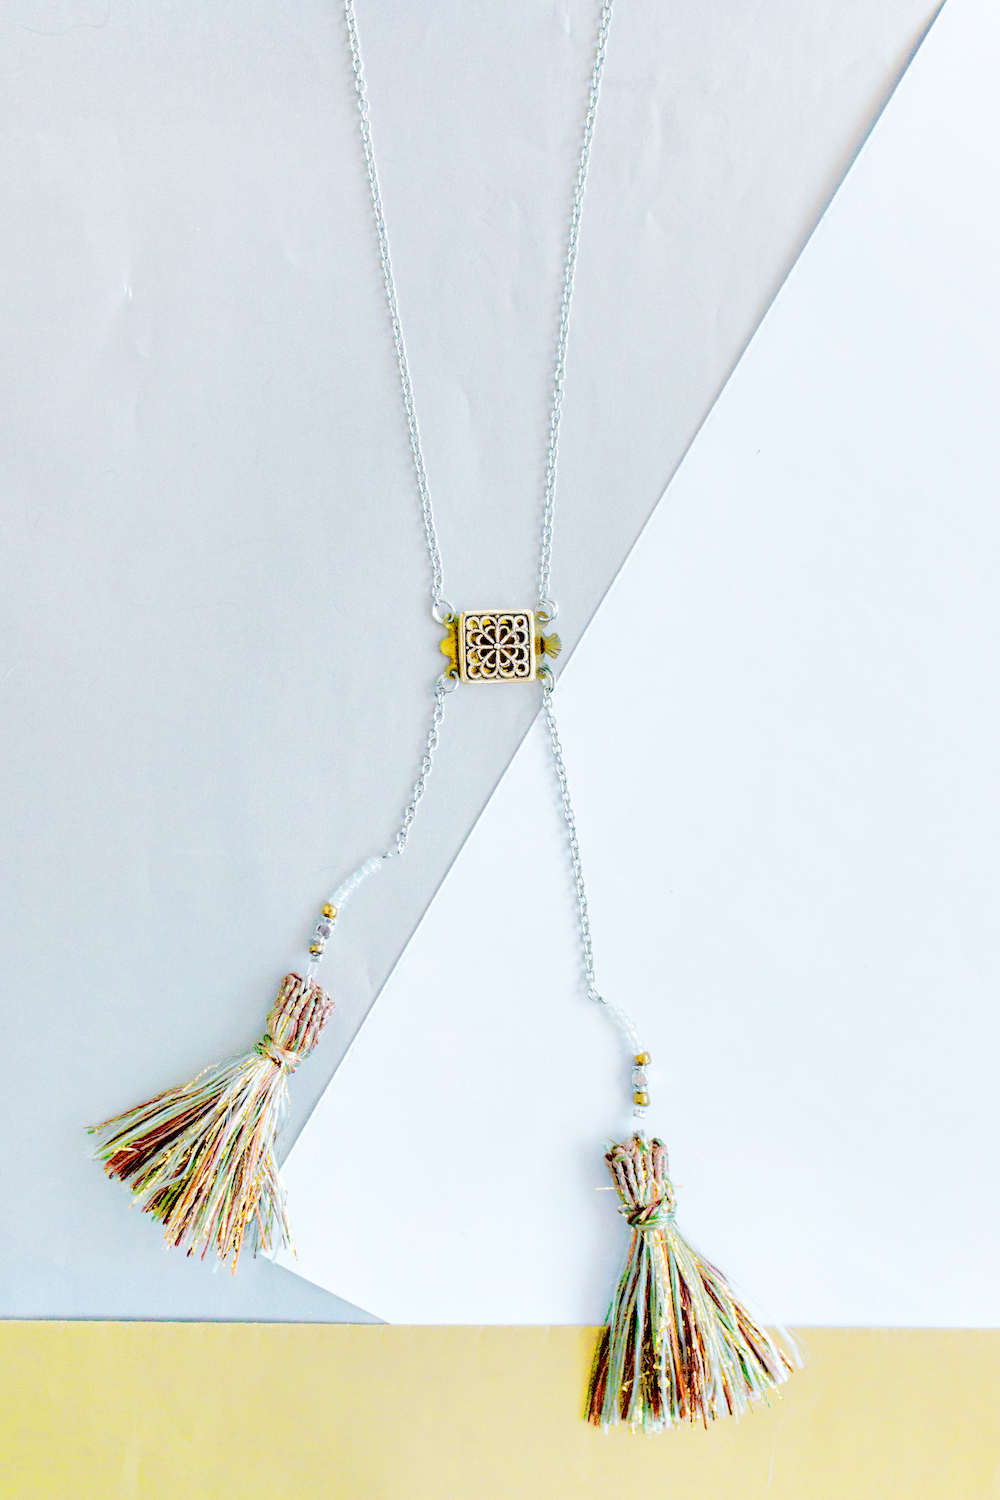
I have already made a tassel earring project in the past, and I have been wanting to use the tassel trend for something new for a while now. That is how I came up with this necklace. I made it as a part of my first L1 Fashion Collection. And completely forget to share the tutorial with you!

I have been wearing it pretty frequently and it is still holding strong, and looks like new! (I know it is not really subtle to be complimenting your own designed pieces, but hey, sometimes you just have to give yourself a little credit ;))

The necklace really goes with everything thanks to it’s length, but I urge you to redesign this DIY to your own taste, because it is so much fun! You can make the tassels in any color that you like, and play around with different types of beads to really give it that personal detail.

You will only need basic jewellery supplies, except for the center piece, that is something that you can choose. You can either get it from an old piece of jewellery or find it in a craft store.

Have fun!

DIY:


DIY | Tassel Necklace

SUPPLIES:

– String for the tassels
– Beads of your choosing
– Center piece of your choosing (or a big jump ring to connect the chains)
– Chain
– Crimp beads x2
– Jump Rings x 6
– Transparent thread/wire
– Pliers
– Scissors

DIY | Tassel Necklace

STEP 1 – Decided the length of your necklace by taking the piece of chain and draping it around your neck. Mark the length and use your pliers to cut it in that length.
– Next, cut a small piece of chain (around 4 cm) of each end of the long chain.

DIY | Tassel Necklace

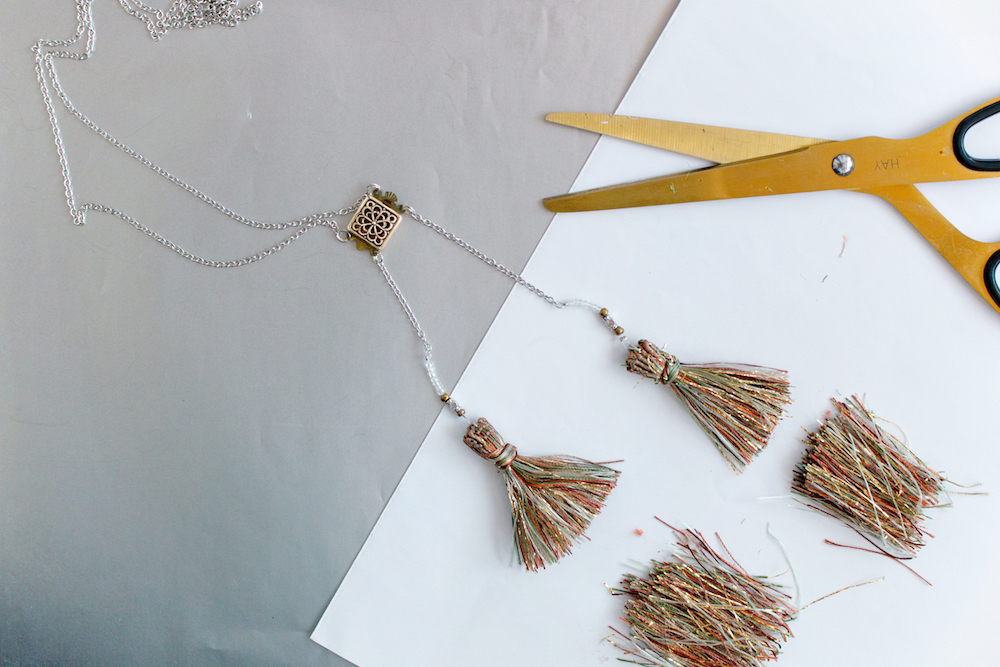
STEP 2 – Secure your center piece with the pliers and jump rings to the long piece of chain. Attaching a jump ring on each side.
– Attach the the smaller chains to the bottom of the center piece with jump rings.DIY | Tassel Necklace

STEP 3 – Take your transparent thread and slide the beads onto the thread.

DIY | Tassel Necklace

STEP 4 – Push the end of the thread inside the last bead. Keep in place while sliding the crimp bead onto the folded thread. Use your pliers to crimp the bead.
– Repeat this for the other end of the transparent thread.
– Attach the short piece of chain onto the transparent thread loop with a jump ring.

DIY | Tassel Necklace

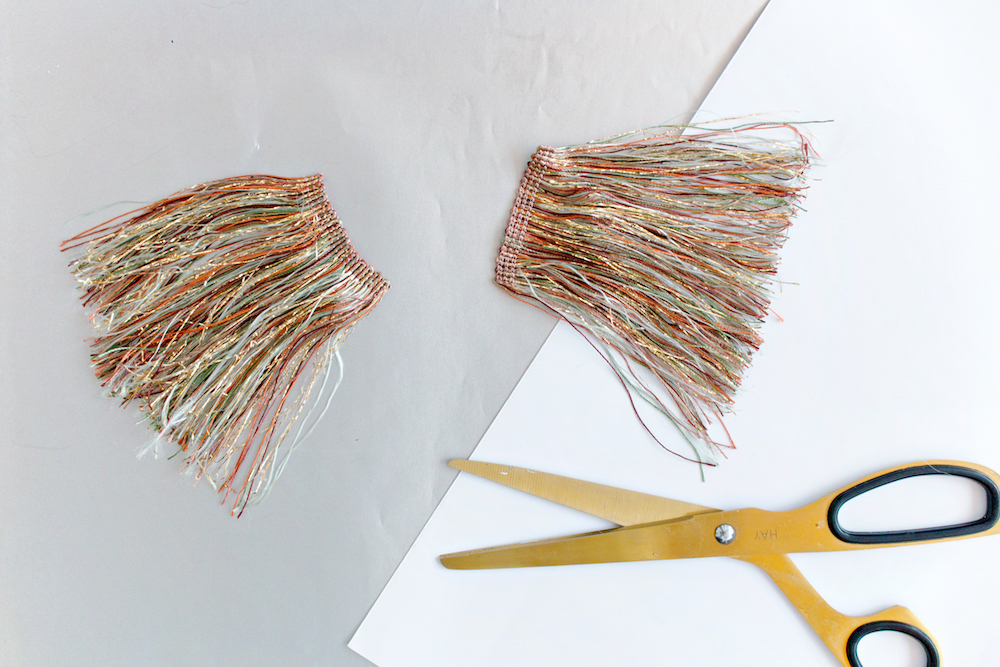
STEP 5 – Collect your material for the tassels and decide the thickness. Cut bot of the tassel basics.

DIY | Tassel Necklace

STEP 6 – Roll the top of the tassel and secure with a similar color thread.

DIY | Tassel Necklace

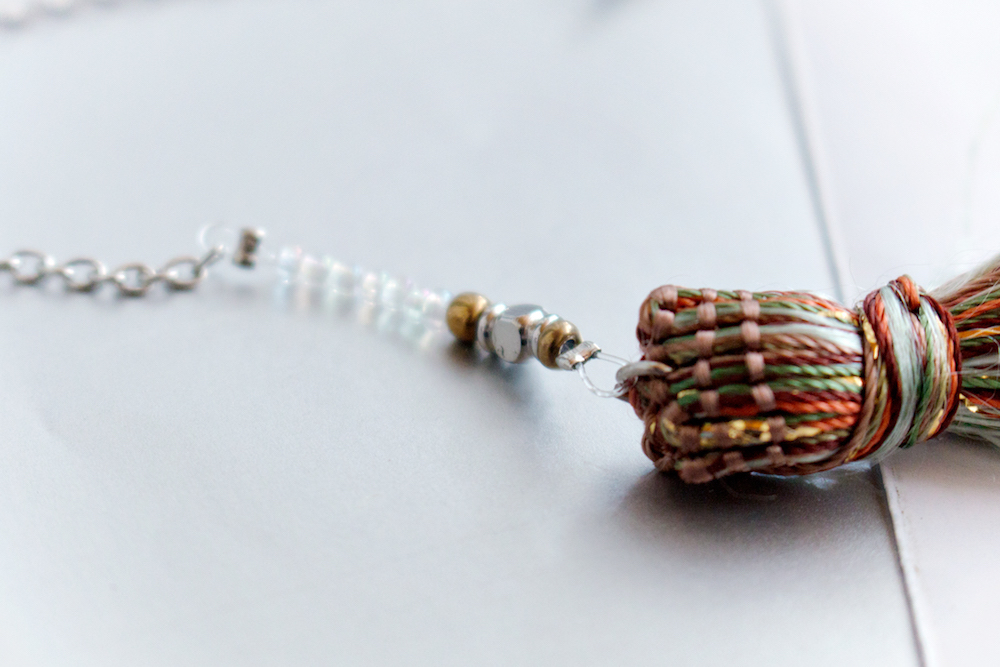
STEP 7 – Pull the  jump ring from the necklace ending through the top of the tassel and close with your pliers.
– Repeat this for the other side.

DIY | Tassel Necklace

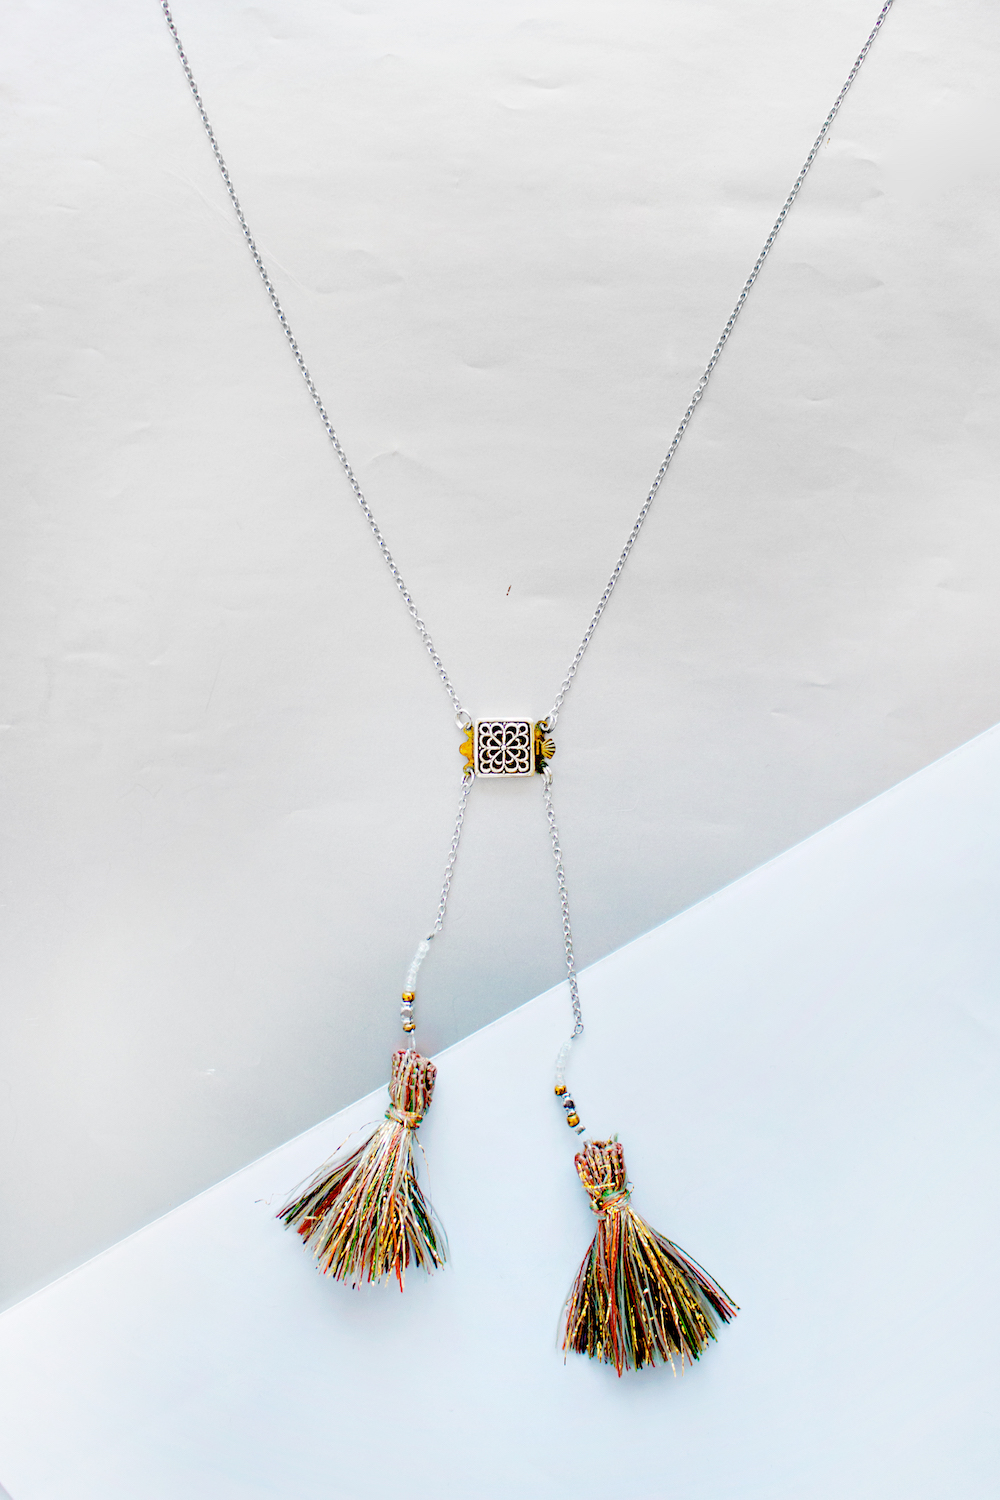
STEP 8 – Cut the tassel in your desired length.

All done!


DIY | Tassel Necklace
DIY | Tassel Necklace DIY | Tassel NecklaceDIY | Tassel NecklaceDIY | Tassel Necklace

Total
2
Shares
Share 0
Tweet 0
Pin it 2
Previous Article
  • Featured

DOUBLE FEATURE | Doodle Stitch and more!

View Post
Next Article
  • Outfits
  • Sponsored

OUTFIT | Oh So Seventies

View Post

Sign Up for the LRS Newsletter

Be the first to receive lots of crafty news!

1 comment
  1. thejewelcreation says:
    23rd October 2019 at 12:44 pm

    this tassel necklace is really beautiful! thanks for sharing

    Reply

Leave a Reply Cancel reply

Your email address will not be published. Required fields are marked *

THE LRS NEWSLETTER
  • JEWELRY DIY | Polymer Clay Flower Earrings
  • DIY Decoupage Lampshade
    UPCYCLING DIY | Decoupage Lampshade, with paper napkins
  • JEWELRY DIY | Beaded daisy flower for Necklaces, Earrings and Bracelets
    JEWELRY DIY | Beaded daisy flower for Necklaces, Earrings and Bracelets

Sign Up for the LRS Newsletter

Let's be friends!

  • Privacy Policy

Input your search keywords and press Enter.