
In case you missed it: plants are thé home decor accessory of 2016. Pinterest is booming and people are loving the green items filling their homes. I am also very much in love with this trend and embraced it with a giant statement wall DIY!
I collaborated with mooiwatplantendoen.nl (thejoyofplants.co.uk) and represent the Flower of the Month: White Fragrant Plants.
Can you imagine: collaborating with a company that is all about flowers?! I certainly danced around at the news;)
And if things couldn’t get better, the plants really do smell amazing!
The plants arrived a while ago and ever since I started working on this DIY my home is filled with smells that can only remind me of a warm spring day.
About the DIY: I started a Pinterest board that is all about Green 2 months ago, and I have been looking for inspiration on incorporating plants in DIY projects. Thejoyofplants.co.uk already has an amazing database of plant tutorials. So I was really looking for something original, but also something that is adjustable to everybody’s home, whether your house is small, big, temporary, etc.
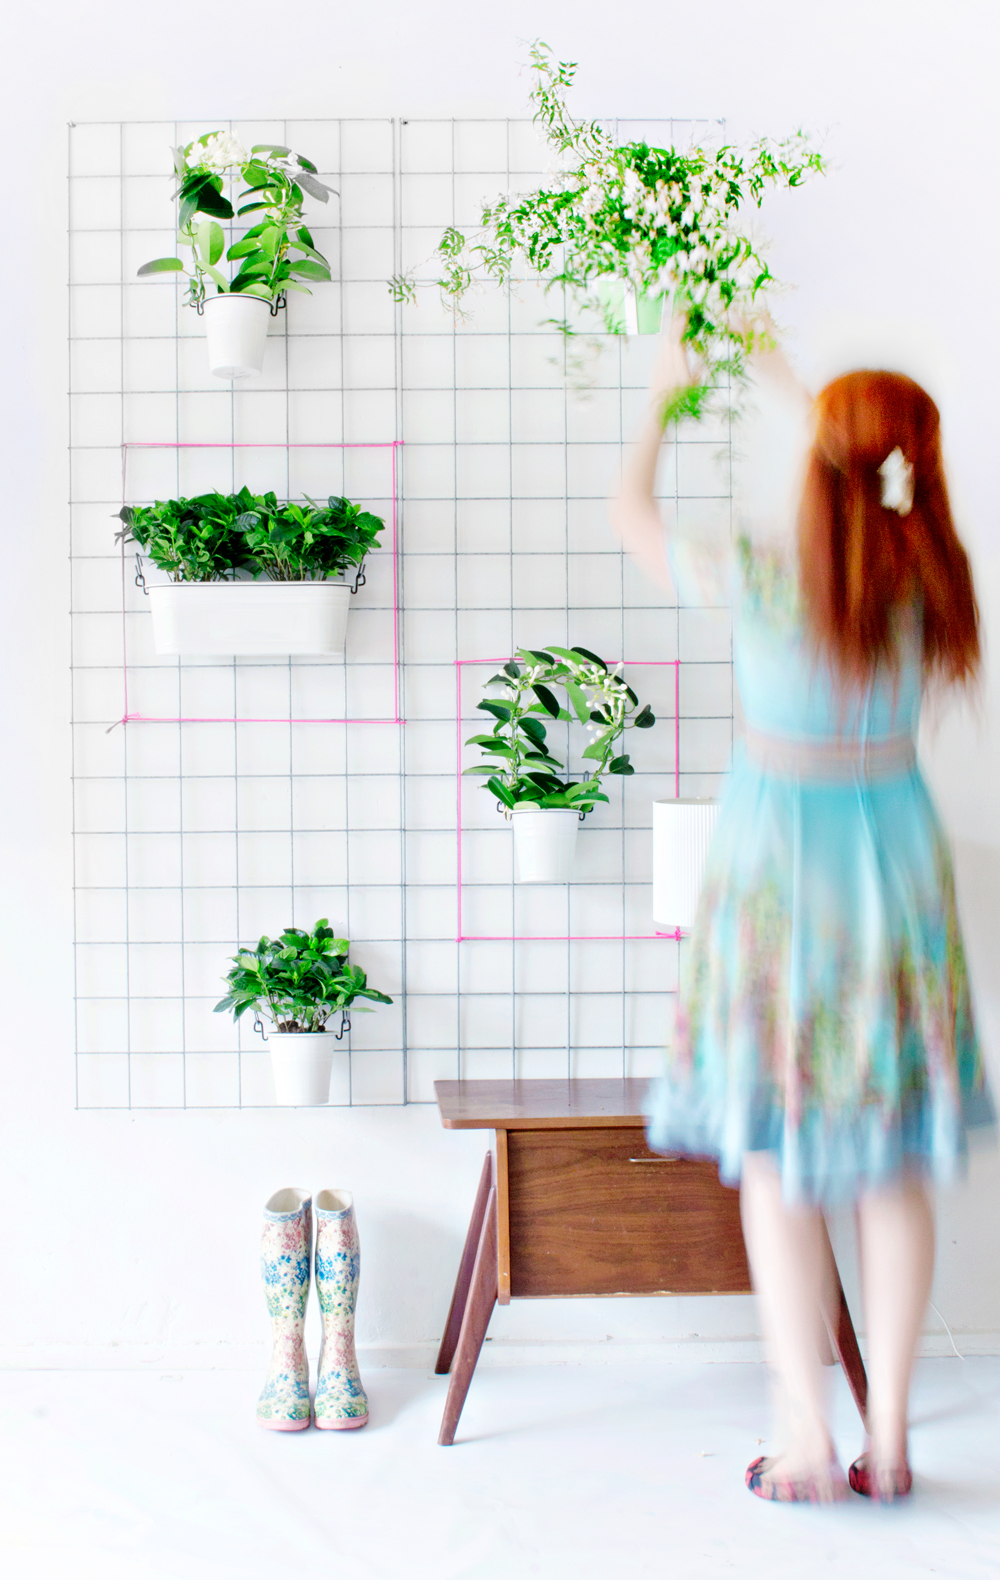
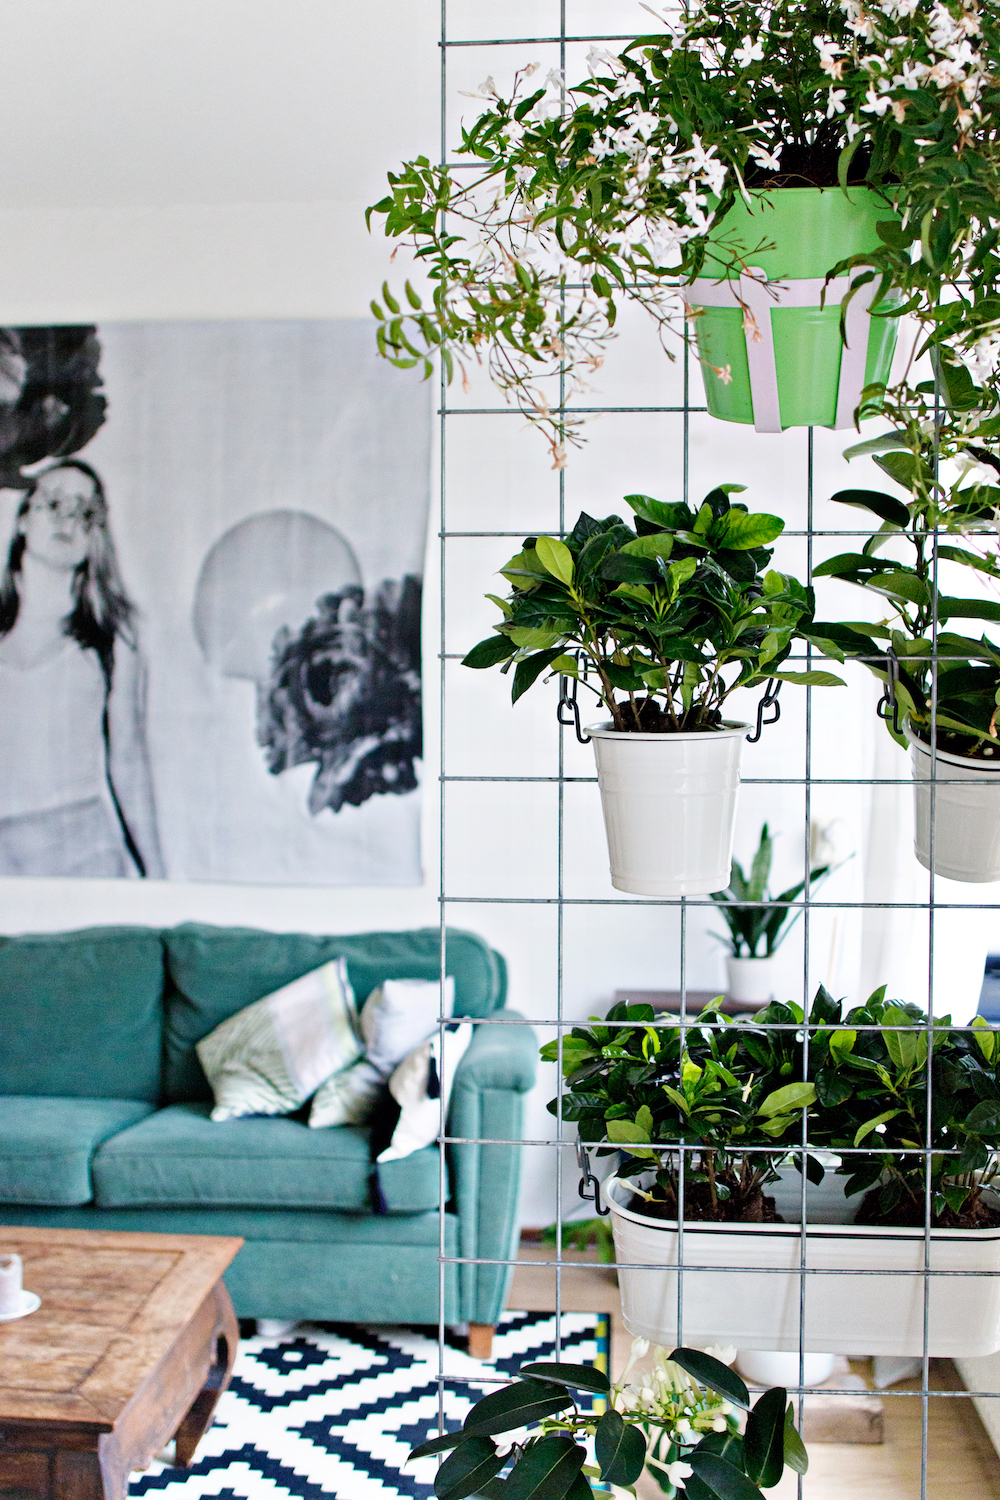
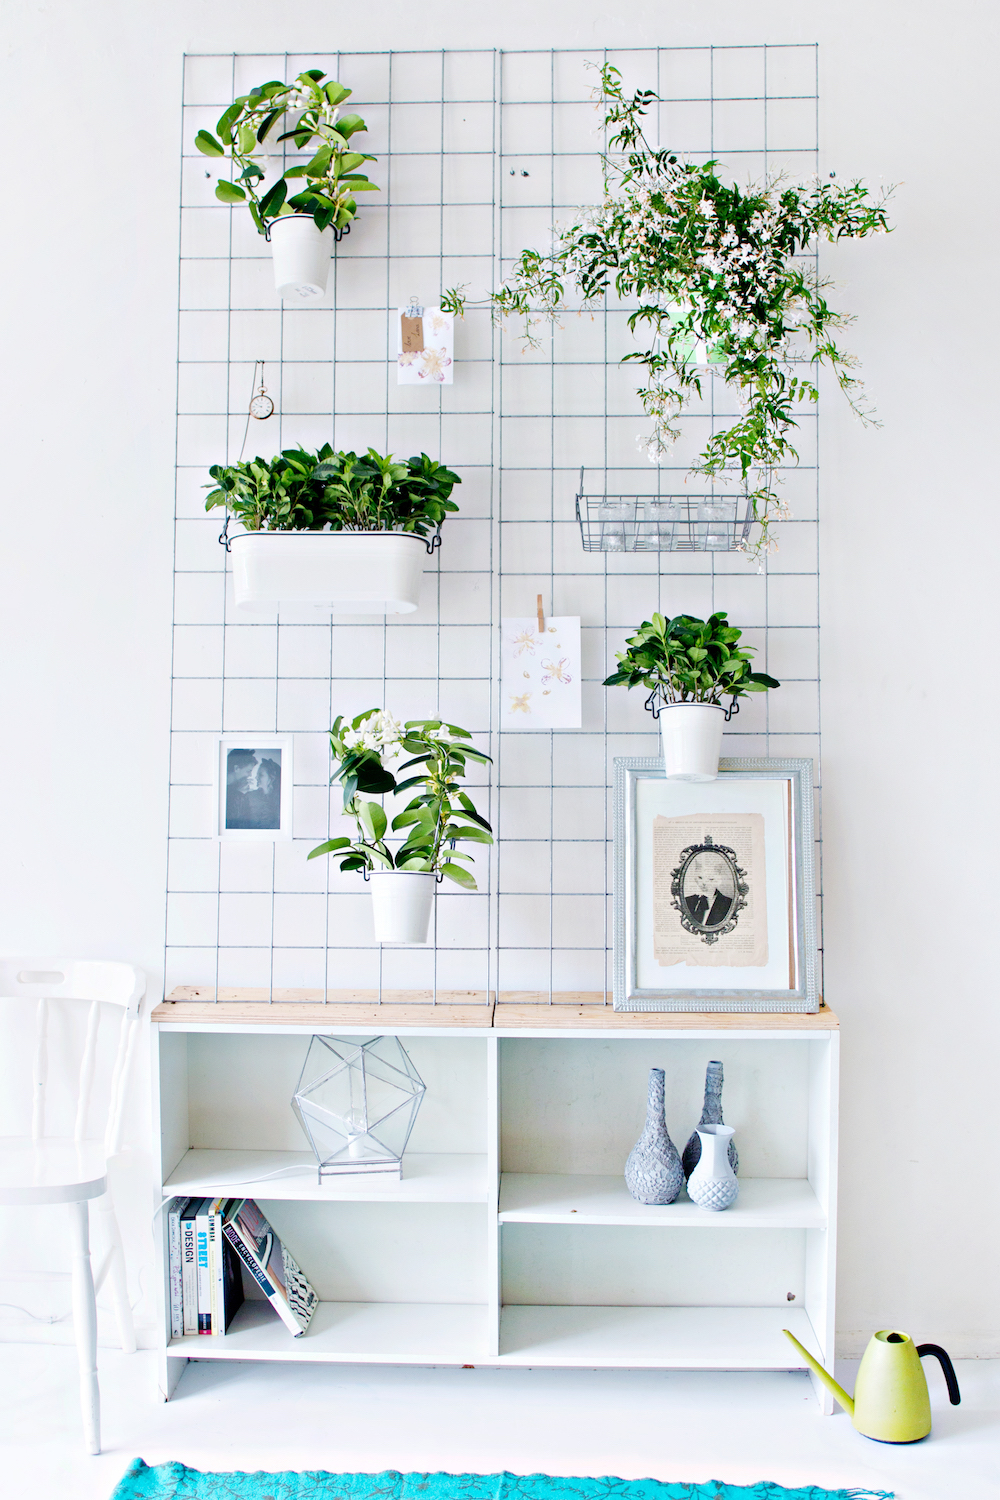
This vertical wall plant system was the perfect solution! The steel mesh comes in a great variety of shapes and sizes, and you can hang it on the wall, use it as a room divider or place it on top of a flat surface if you are not able to drill holes in your walls.
It is also perfect to decorate according to taste: keep it minimal, add a touch of colour, or fill it with personal items. The options are endless!
As you can see, I am very excited! And looking at it in my house always brings a smile to my face, because it is BIG, but it doesn’t feel like it. It also doesn’t take up any space in the room, since it is on the wall.
Excited?!
Well embrace yourself for a little bit more excitement, because this DIY is also available on video! This is a LRS first: a DIY video!! Woohoo!
So take your pick: video or, photo, or both, go crazy! ;)
Here is the Video DIY:
PHOTO DIY:
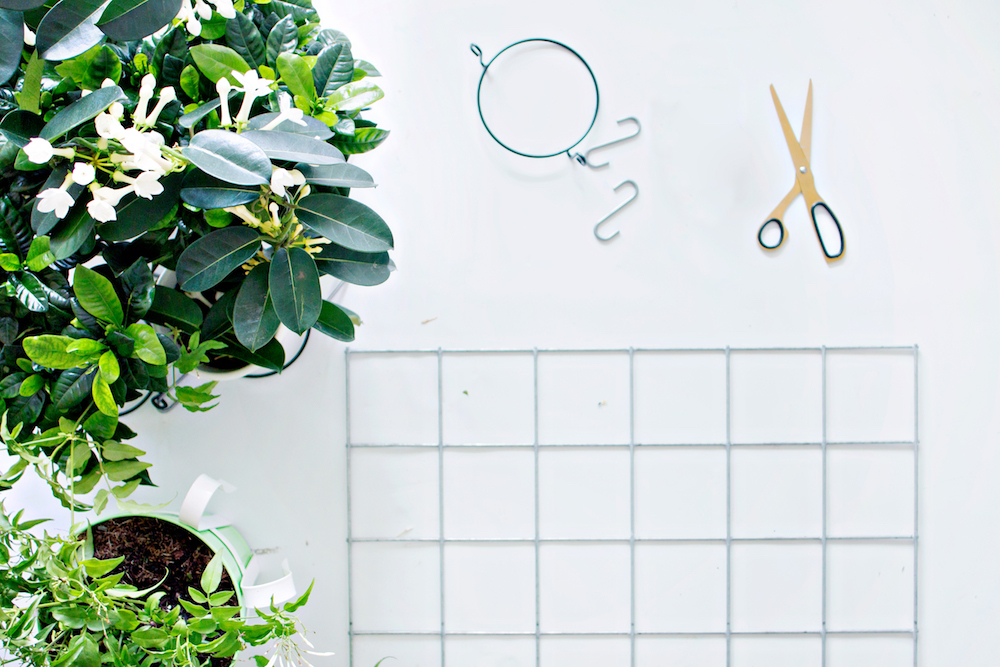
SUPPLIES
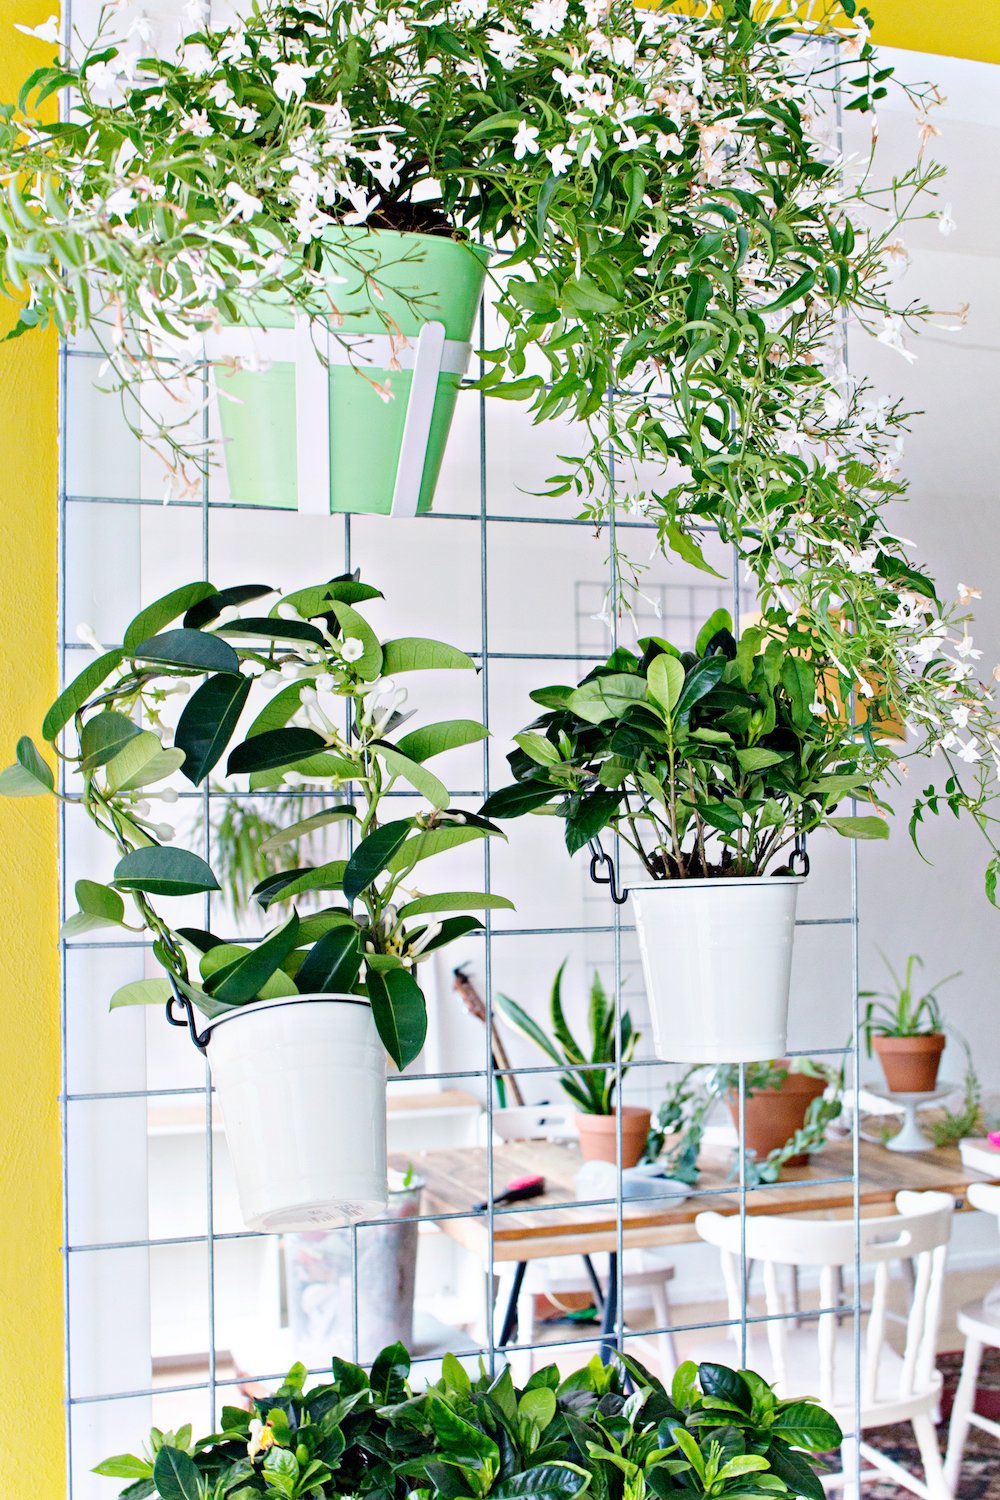
– Plants. I used 3 different plants:
– Gardenia
– Stephanotis
– Jasmine
– Steel Mesh ( I bought mine at the local gardenstore, they come in a variety of colours and sizes and are perfect for this low budget project)
– Hanging Pots (The pots used in this tutorial are from Ikea, and originally used in the kitchen)
– Hooks (from Ikea)
* Optional – Neon coloured rope
STEP 1
– Pot the plants. Be very careful not to damage the roots and if necessary add a little bit of extra soil.
STEP 2
– Water all of the plants after repotting them.
STEP 3
– Attach the rings and hooks to the pot.
STEP 4
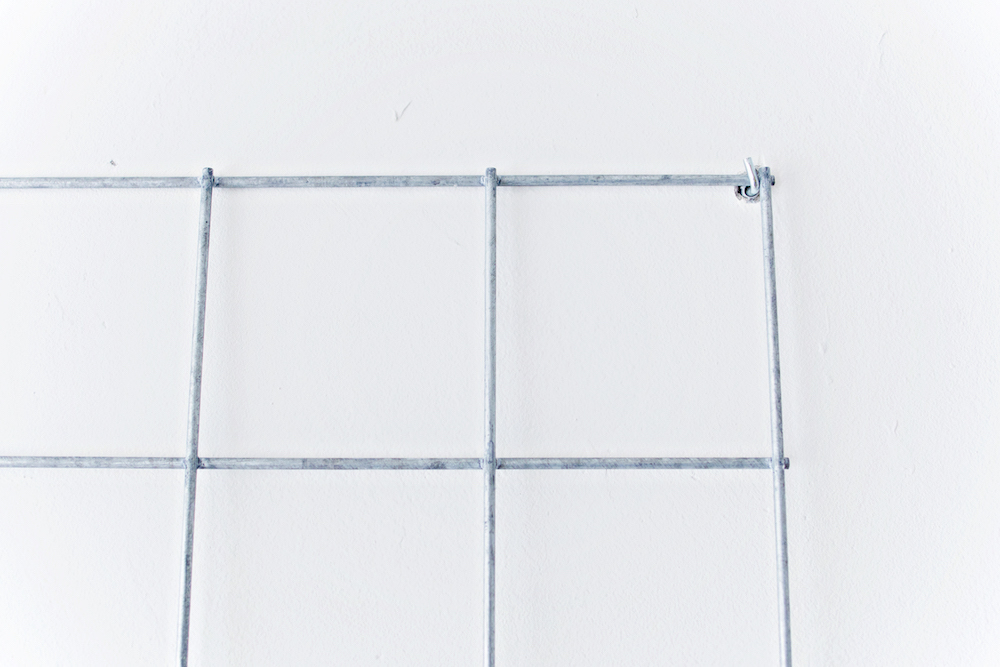
– Place the rack/mesh on the wall or on a flat surface, depending on your choice of presentation.
– If you choose to hang the mesh on the wall, check to see what type of foundation your wall has (plaster, wood, etc.) and buy the right supplies* needed.
* I choose to drill a hole in the wall and added a wall plug before screwing in a ‘hook screw’ to hang the mash on the wall. More information about hanging heavy items on the wall can be found here.
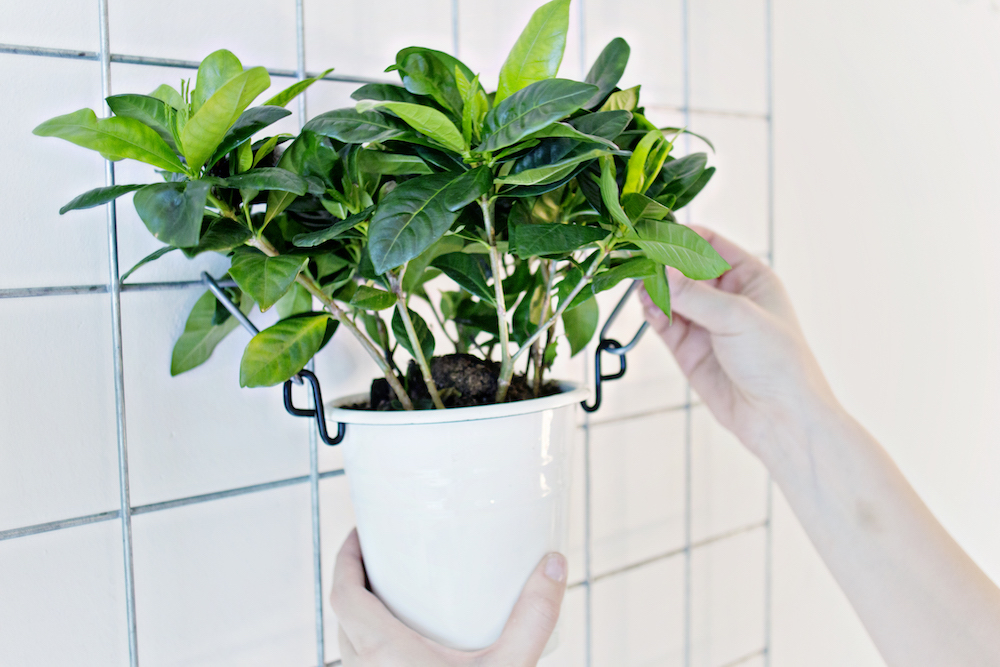
STEP 5
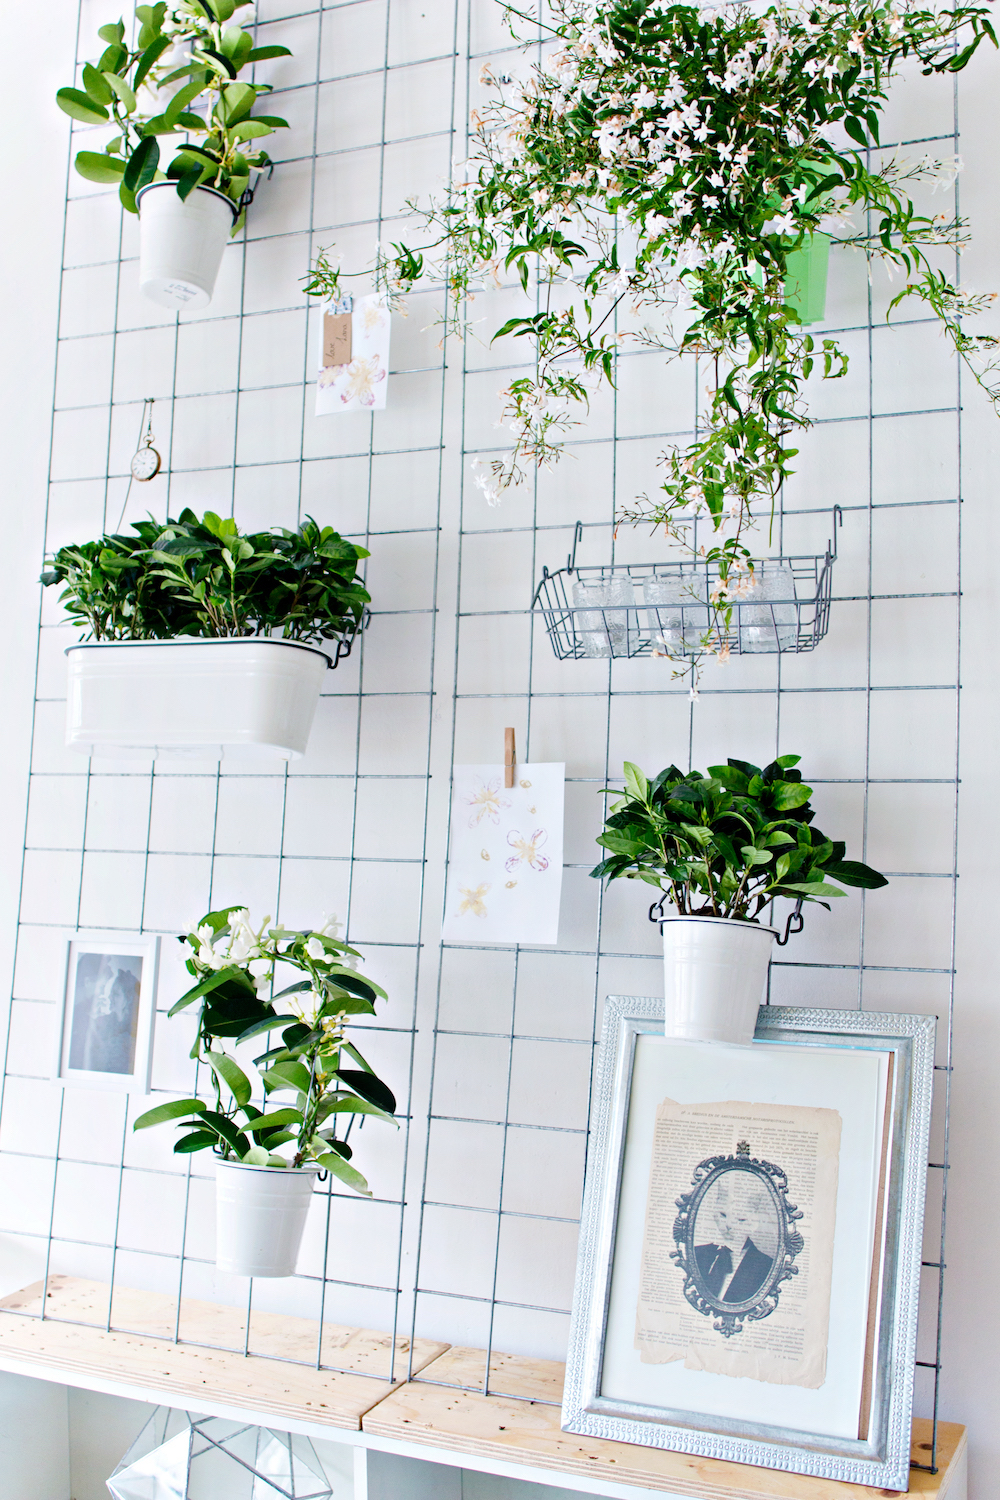
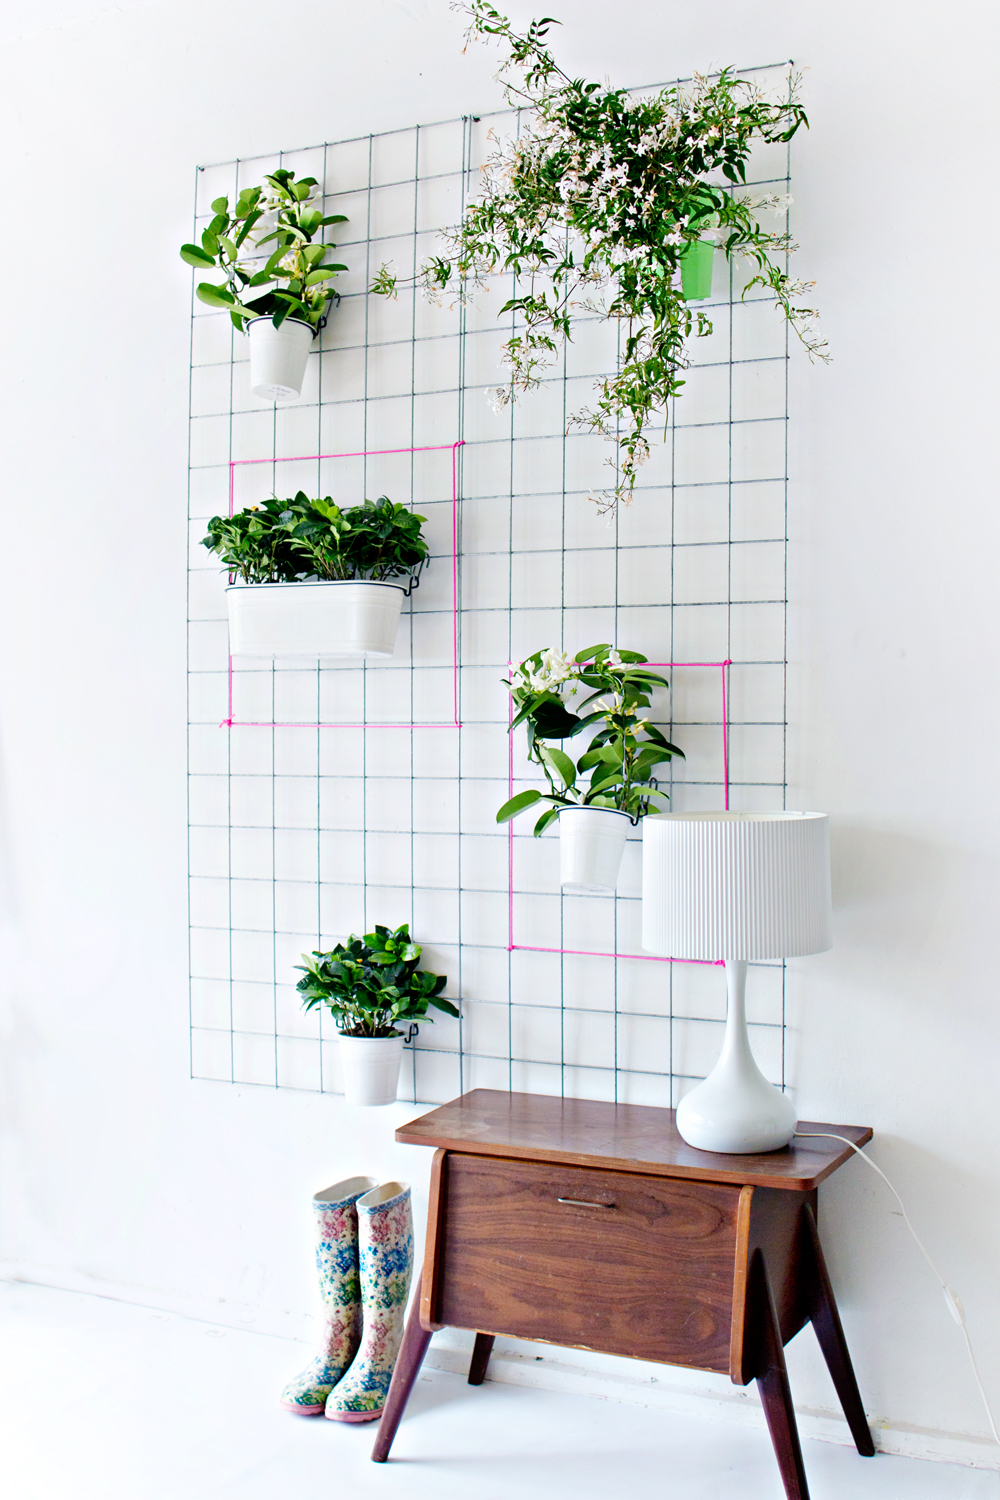
– Hang the pots onto the rack. Mix and match different pots and plants.
Style tip: Decorate the empty spaces with artwork, memorabilia, notes and other fun personal items to create a statement wall
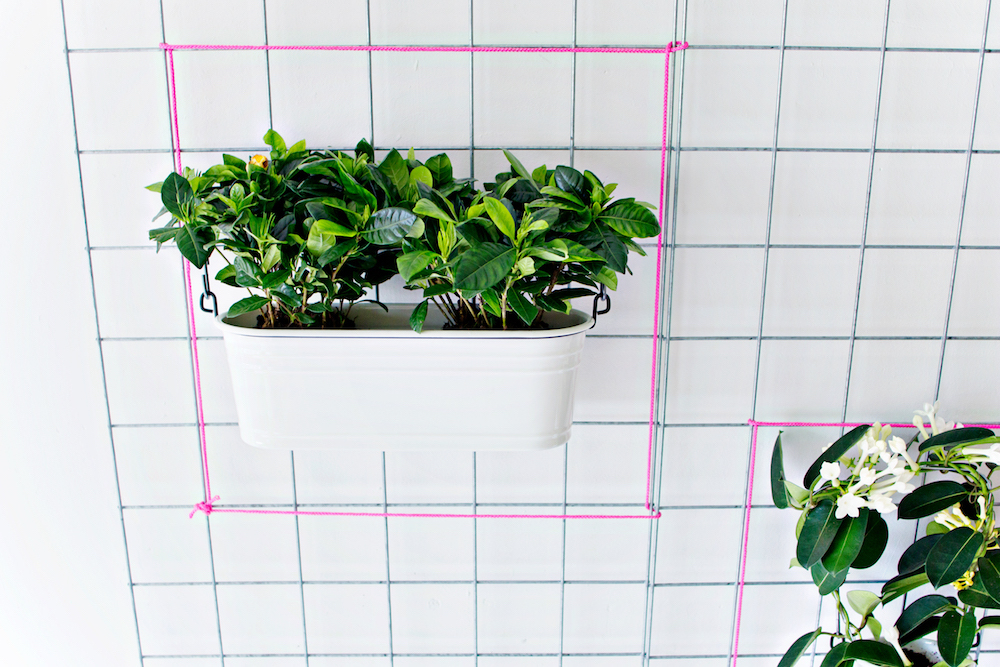
* Optional – Decorate the rack with neon coloured rope around the plants. This wall add a splash of colour and shows you when the plant has grown.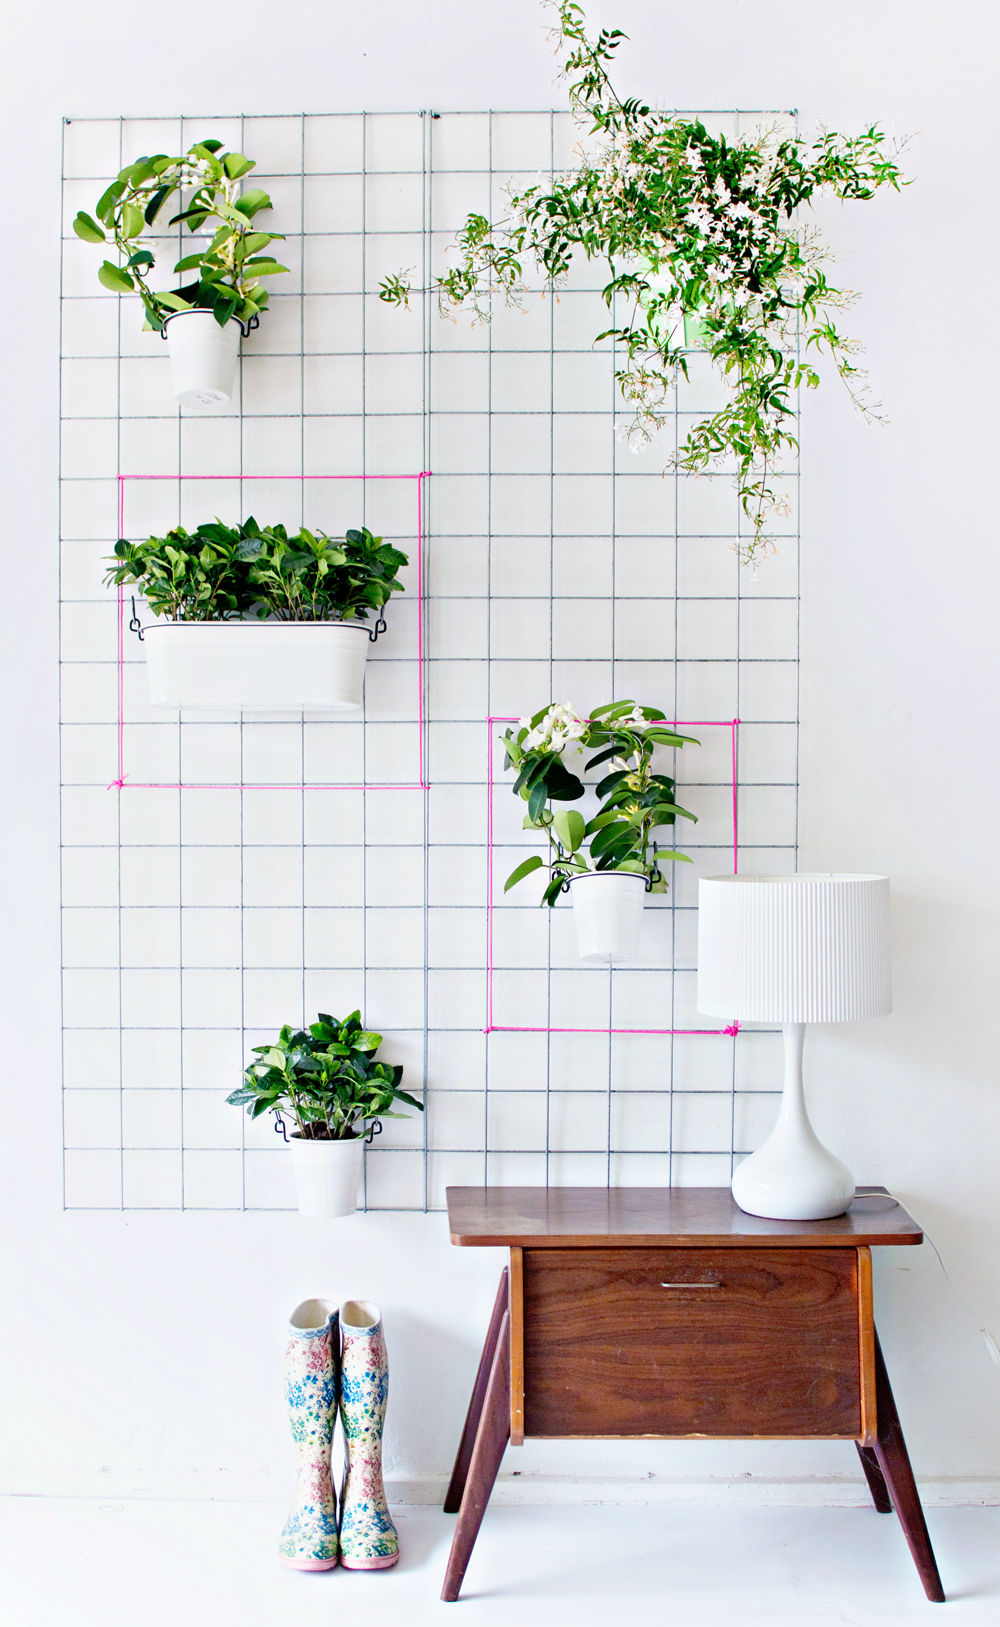
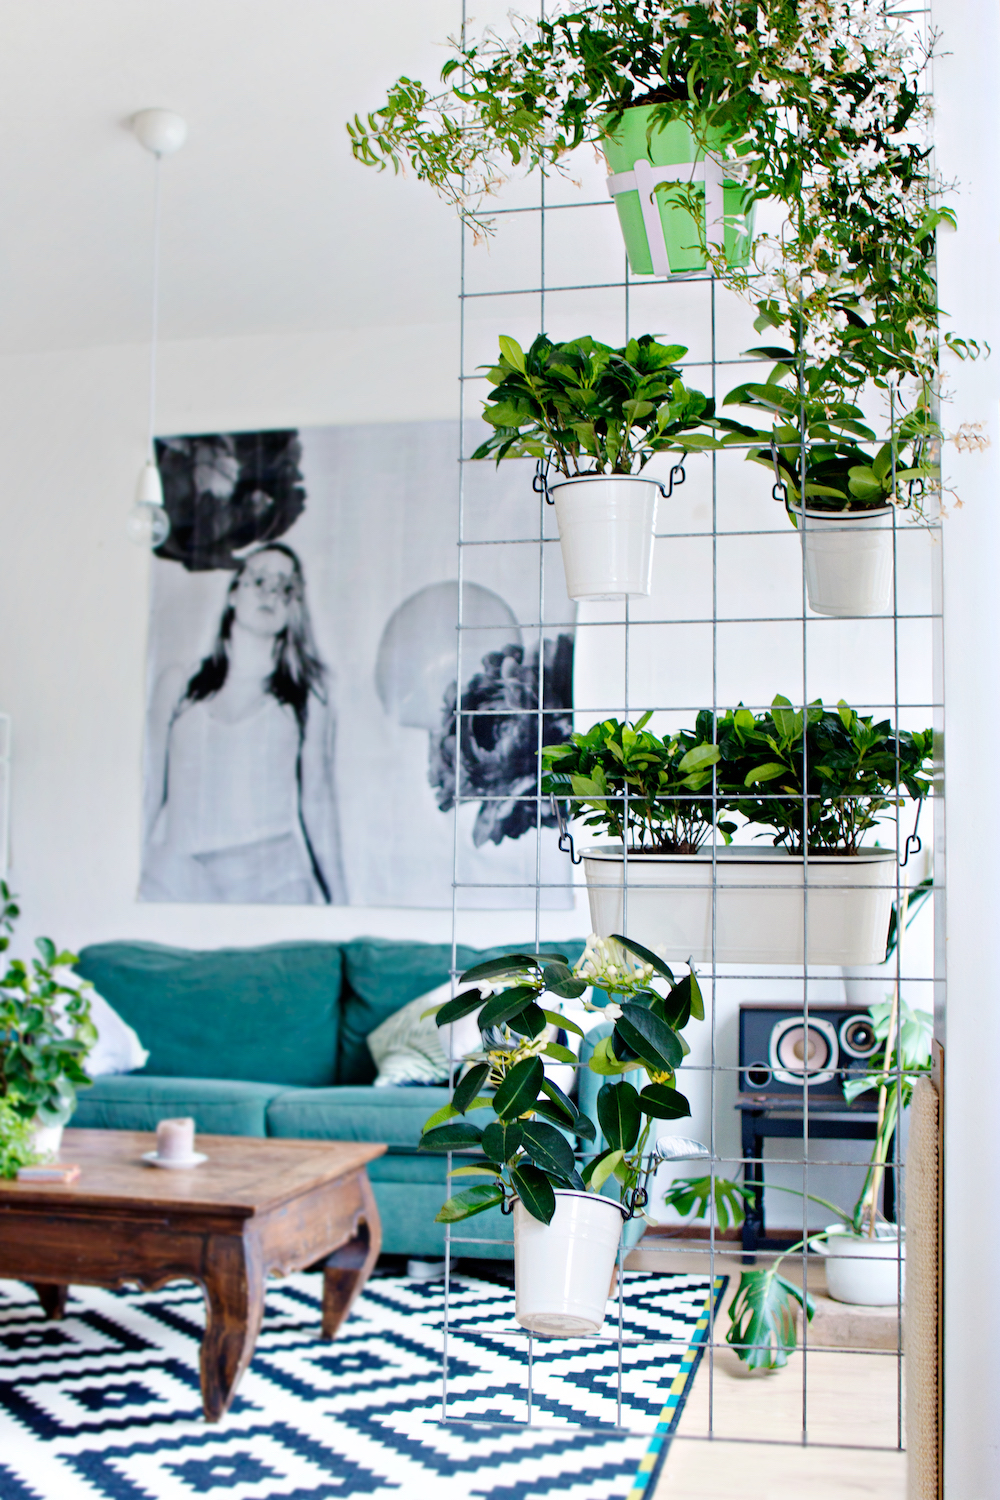
Small space in your home or living in a studio apartment? Use this tutorial as a room divider! Create a private space by adding as many plants as you want to cover the entire surface or keep it open by spreading the plants.

Want to add more personality? Fill the empty spaces with memorabilia, such as: picture frames, drawings, cards, personal notes and candles. The possibly are endless and you can change it as often as you like!

Lana Red Studio Items used:
– Flower Printing DIY
– Book Print DIY
More information on how to take care of your white fragrant plants can be found on the website of thejoyofplants.co.uk.

32 comments
Taking notes on this, what a great idea. I love plants but I’ve run out of window sills to put them on since long! :-)
Great that you like it! Plants are the best:)
This is a great idea to display house plants! Was the steel mesh on a roll when you purchased it or was it flat? I’m finding steel mesh on a roll, and thinking that it would make it difficult to flatten.
Great that you like the idea! The mesh was bought flat, it was too thick and sturdy to be rolled up (there is a good shot of the mesh in the DIY video in this blogpost at 00:45minutes. The rolled up mesh might also work, but it will be a bit less stable with the heavier plants and pots and it has a bit of a different ‘look’.
Hi! This is a lovely idea. What size mesh did you use in this instance? The squares look pretty big — 3″ x 3″ or so? I seem only to be able to find the smaller netting!
Thanks so much for your help!
Hi Suzanna! I am actually not sure.. I looked on the website of the store where I bought them, but they don’t seem to sell them in that size anymore. They are pretty big, so if I had to guess it would be between 7cmx7cm and 10cmx10cm (3″x3″ and 4″x4″)
I think that smaller ones would also work well, just make sure that the hanging pots still fit into the netting.
Good luck!xx Lana
HI – I love the idea and would like to implement this in my flat! I can’t seem to find the pots with rings anywhere though…would you mind sharing where you had purchased the pots + rings?
Thank you! And great that you are using the project for your flat! I bought the pots at Ikea. They are officially utensil holders but you can easily use them for plants as well. They are called ‘Fintorp’:http://www.ikea.com/us/en/catalog/products/00202079/
The hooks have to bought separately but Ikea also has does :)
Thank you!
How did you attach the mesh to the wall. This step is not outlined at all in your tutorial. I see the photo that shows a hook holding the mesh…but can you provide guidance on the hook size, type, etc?
Hi! Thank you for your question. Because the mesh carries some weight and walls can be completely different structure-wise (drywall, plaster, wood, etc.), I choose not to include a detailed step about it. I updated the tutorial a bit, because you are completely right about it having no outline at all! So sorry about that!
Each type of wall really requires different tools to hang anything up. Here’s a link that helps to choose the right tools for each type of wall: https://www.thisoldhouse.com/how-to/how-to-choose-right-hanging-hardware
And in case it helps to know my process: I drilled 4 holes in the wall (2 for each side of the 2 meshes) with a 6mm drill bit. In the hole I placed a ‘wall plug’ that matched the 6mm drill bit size and in the plug I screwed a ‘hook screw’ that also matches the size of the hole.
Please let me know if this is clear or not, or if I need to be more specific. And happy crafting!xx Lana
Hi Lana,
Thanks for clearing that up. It totally makes sense that you used wall anchors. I did not know that anything other than screws can be used with wall anchors. This is great, and definitely going on my spring project list!
Hi! I am happy to hear that it makes sense now! And great that you plan on making it:) Please let me know if you have any other questions when working on the project.x
This is fabulous! I am wondering how you attached the mesh to the wall in the case of using it as a room divider (for example: in the last photo, it appears to just be floating). Did you use anchors and hooks like in the flat against the wall method? Thanks for the great tutorial!
Hi Kate! The room divider version was attached to a wooden beam that was part of an archway in my living room. There were no anchors needed because it was wood, so I only used a ‘hook screw’ on each side of the mesh.
That teal couch is to die for! Where did you get it?
Thank you! I actually found it at a thrift store.
This tutorial is really useful, I’m going to work on this for my room during my spring break. I’m thinking of painting one of the pots a different color, too, to add a pop of color. :)
I’m curious about how you take care of the plants? How do you water them if they don’t have any drainage? How is it working out for you? Any tips? Thanks!
Yup i had the same question
Same here… would be great to hear how it’s going. I think it would be better to just put the plans in their pots in those planters. I have the same ikea pots and I plan to do this project
Hi! I don’t have the planter anymore, due to a move abroad. But the plants were doing very well before I had to give them away.
If you are worried about drainage, you can use plants that don’t need an excessive amount of water. Or you can use small ‘aqua globes’ to keep the soil moist. Please let me know if you have any other questions:) Lana x
Hi – I have something similar in my home but I used wood but what a job. If I had seen your idea first I would definitely have used it. It also looks as if it also lets plenty of light in, the wood not so much.
GREAT IDEA.
South Africa
Hi Lydia, thank you for your message! And a frame made out of wood sounds like a beautiful structure!
Wow, such a great project! Here I am looking at this several years later. I picked up almost a dozen of the Ikea oval planters last year and finally getting around to using them. I wish I had known there were rings for them!! I am scouring the internet for them so I can hang these planters on the wall or from the ceiling. Lucky person who inherited this!