 I guess you can say that I have gone origami crazy! After my origami embroidered book cover DIY, I started to make even more projects with this fantastic technique!
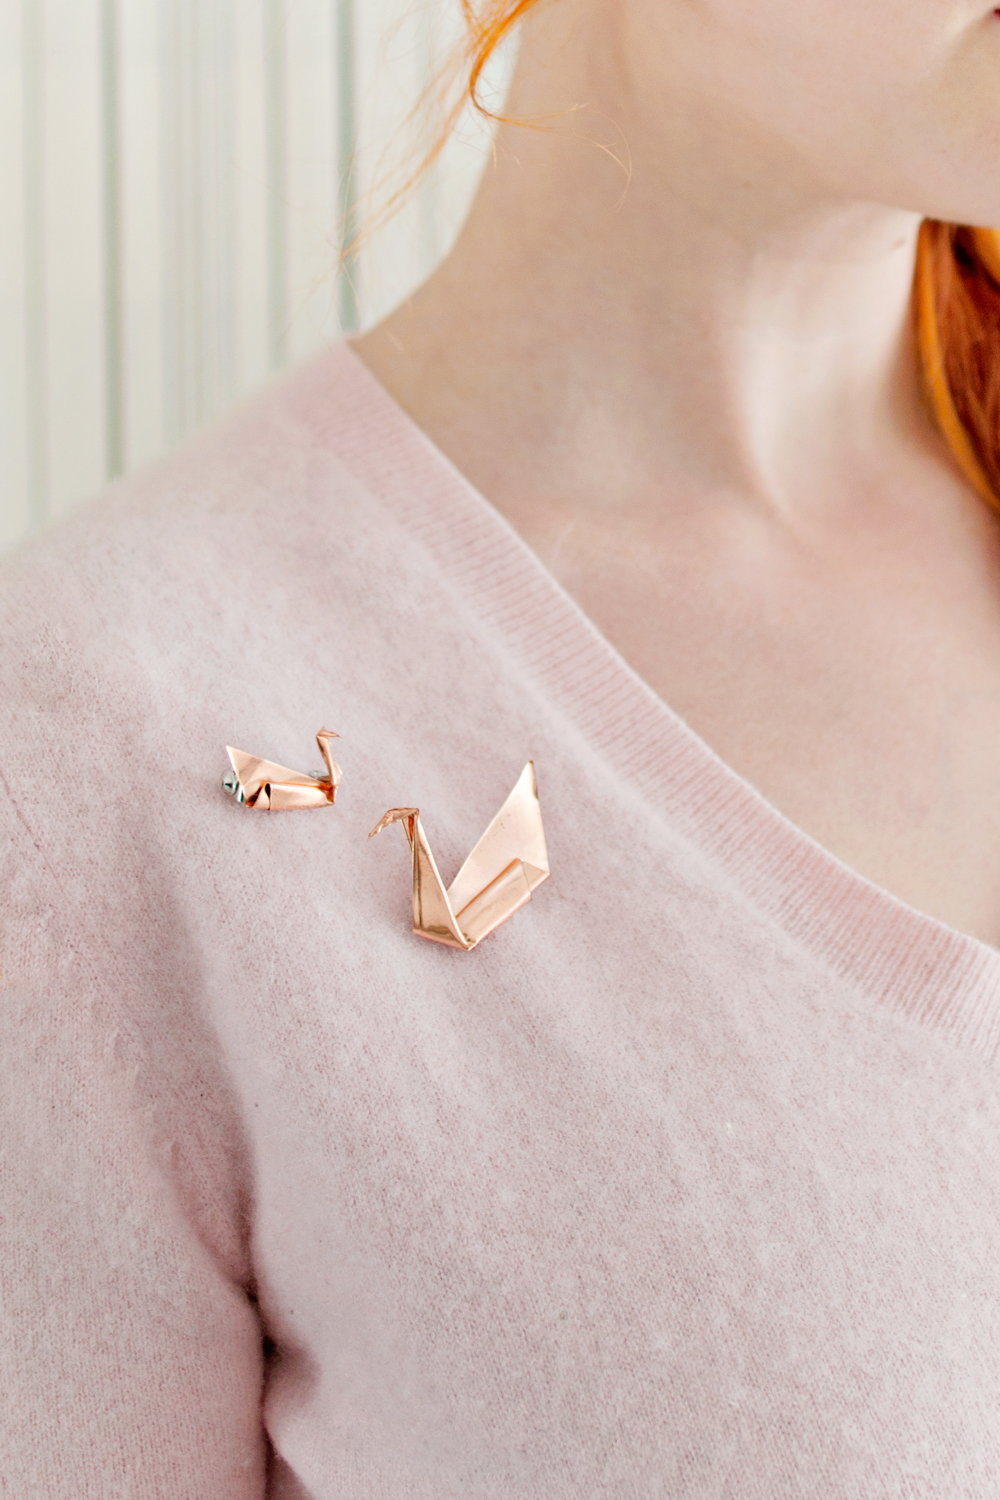
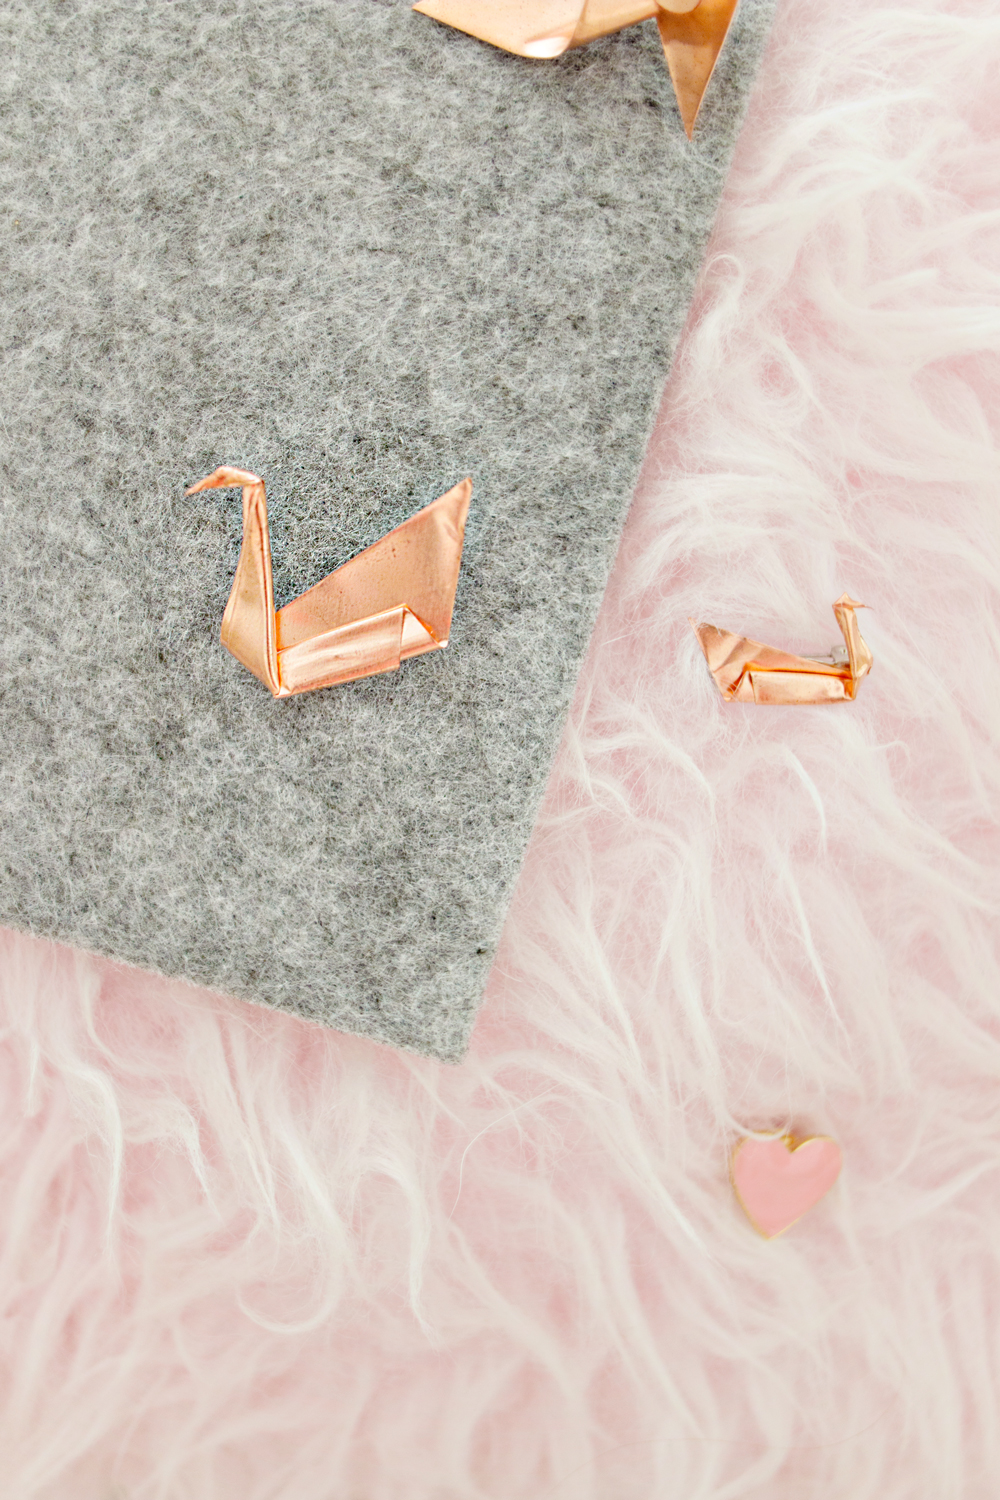
Today I am sharing my new jewellery DIY project with you: an origami swan made out of copper foil.
Copper foil is a material that always seemed way to advanced to use. I would see a pretty pendant or a pair of earrings on Etsy and figured that the only way that I could make something like that would require some serious professional tools.
But guess what, I could not have been more wrong! When walking in a big craftstore here in Berlin (Modulor), I noticed a piece of copper foil and it was actually bendy, pretty and affordable! (I am still confused by the term foil, because 0.1mm foil feels to thick to be considered foil.. oh well:))
After making a couple of different shapes I decided to share my Origami Swan pin with you. It’s easy, it doesn’t require lot’s of supplies and you can turn it into a brooch, necklace, earrings, and so much more!
Origami Swan DIY
This project is a part of the LRS DIY it / BUY it collection.
Make it yourself, or buy it today!
I bought two pieces of foil and started experimenting with it. And it is such a fun material to use!
Here are some things I learned about using copper foil:
– Up to 0.3mm foil is perfectly suitable to be cut with regular scissors.
– Up to 0.2mm foil also let’s itself be cut with a hobby knife, making it possible to create a stencil, etc.
– Once you make a crease, it is almost impossible to remove it, so plan ahead with your design.
– You can use a pushpin to make holes in the thinner pieces of foil, perfect for including hoop rings.
For this tutorial I found that up to 0.2mm foil works the best (thicker than that, and it will be hard to fold the last steps of the swan)
MATERIALS
– Copper foil/plate or silver foil/plate – Mine was 0.1mm thick. You can also use 0.2mm. (I don’t recommend using a thicker version than that)
– Scissors
– Pin/ Brooch
– Jewellery Glue
– Paper
– Pencil
STEP 1
– Decide the size of your swan. If your are not sure, I suggest looking at the size of your brooch and go from there.
– Draw a square in your desired size onto a piece of paper. (I used a post-it, because the sticky part will come in handy later on. But any kind of paper will work.)
STEP 2
– Cut the square out of the paper with your scissors.
STEP 3
– Place your paper onto the copper foil . Cut the square out of the foil with your scissors. Try not to let the foil bend too much. Any crease will be hard to remove from the material.
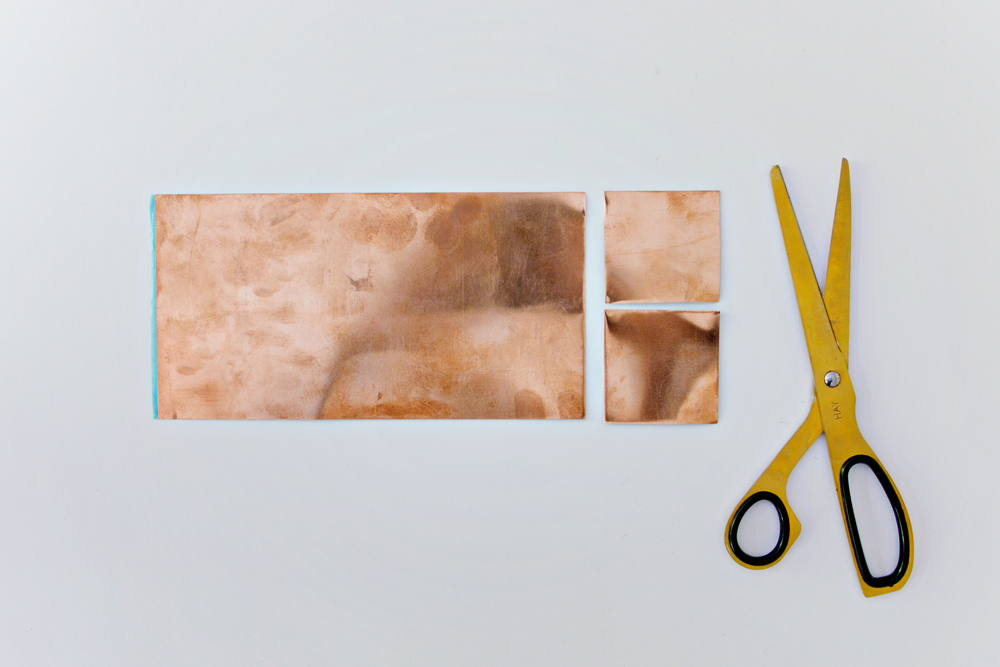
STEP 4
– You will now have your square ready. 1 Square is good for two origami swans. If you would like to make more, you can cut as many squares as you would like.
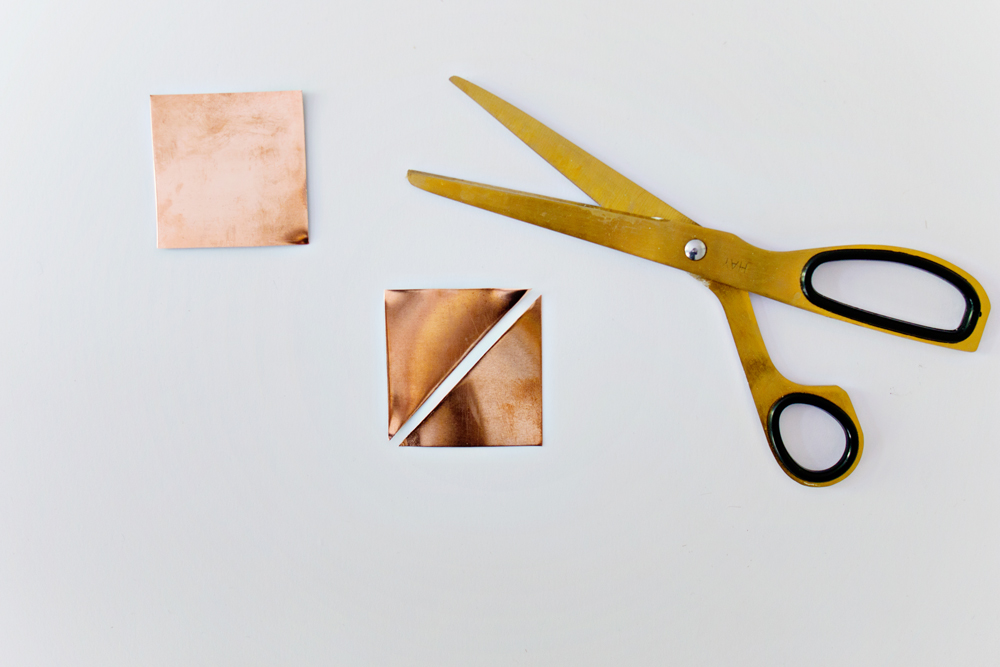
STEP 5
– Cut the square in half, following the diagonal line.
STEP 6
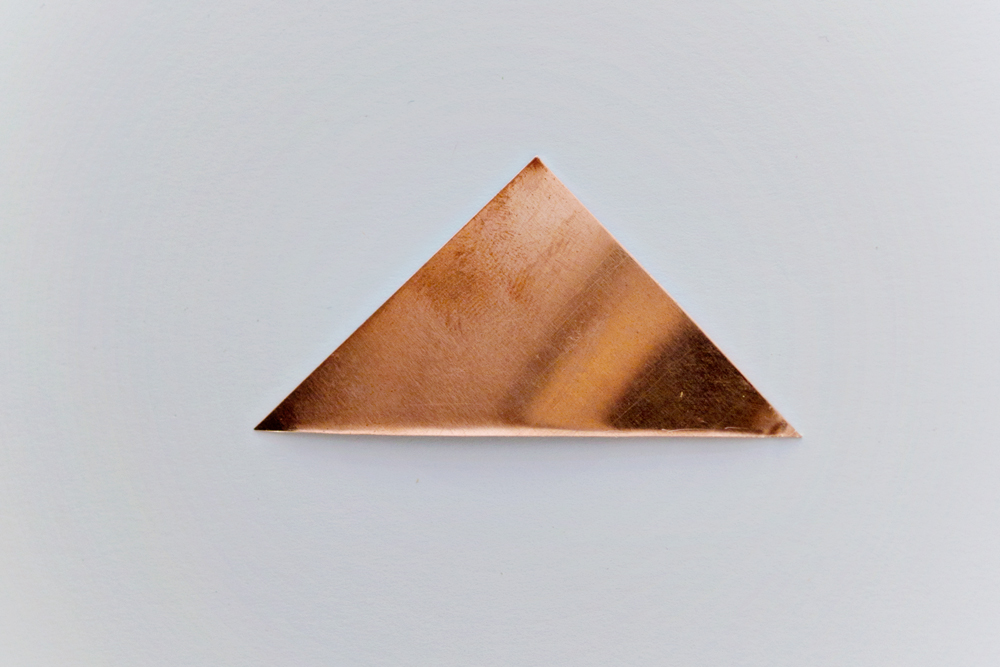
– Place your triangle onto a flat surface.
STEP 7
– Fold the triangle as shown above.
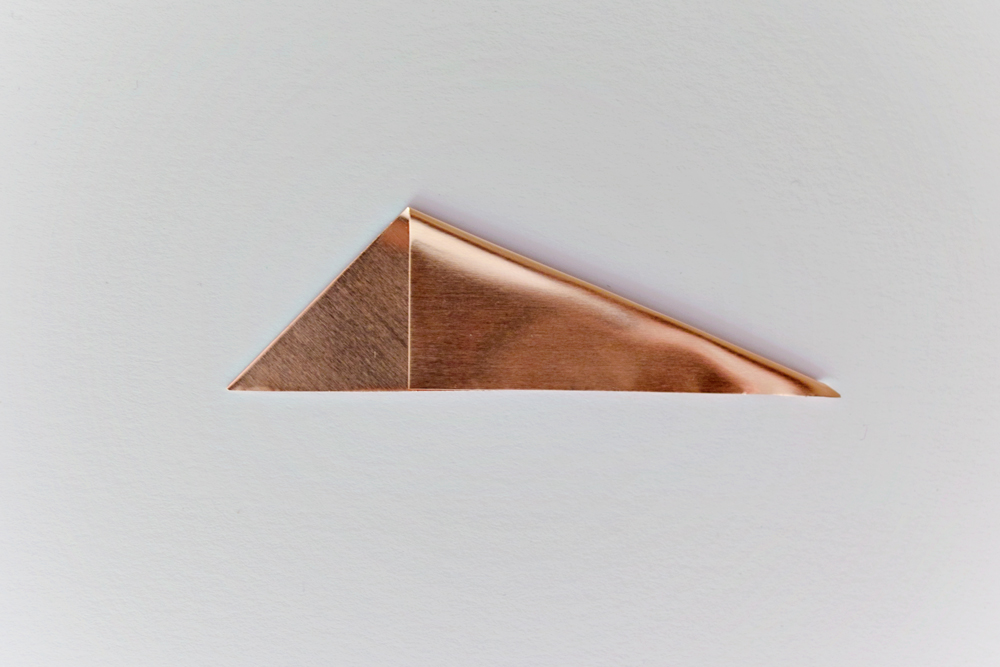
STEP 8
– Flip your foil vertically and fold as shown above.
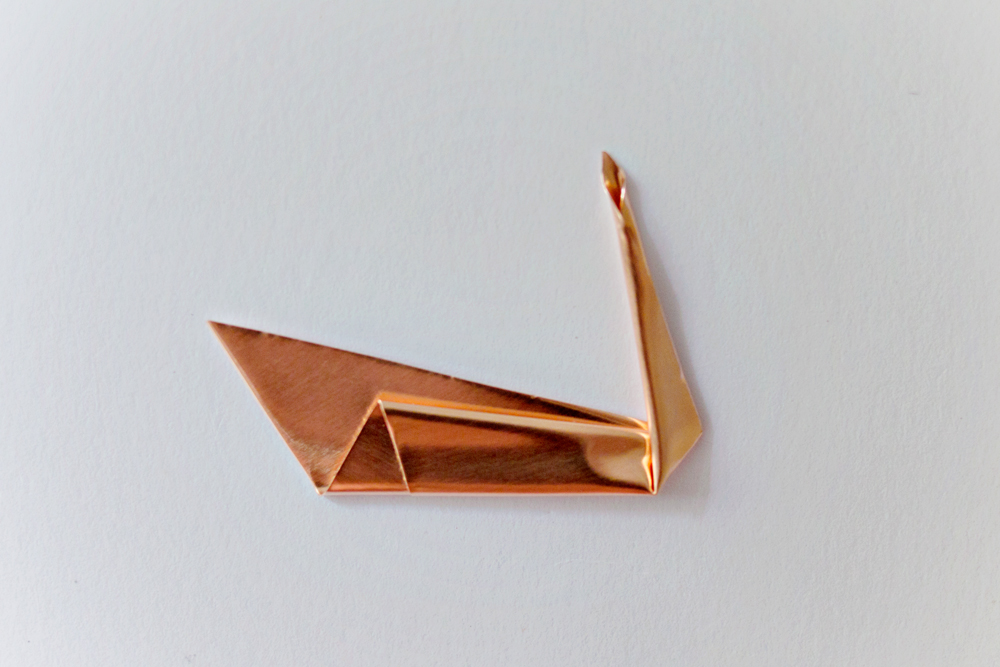
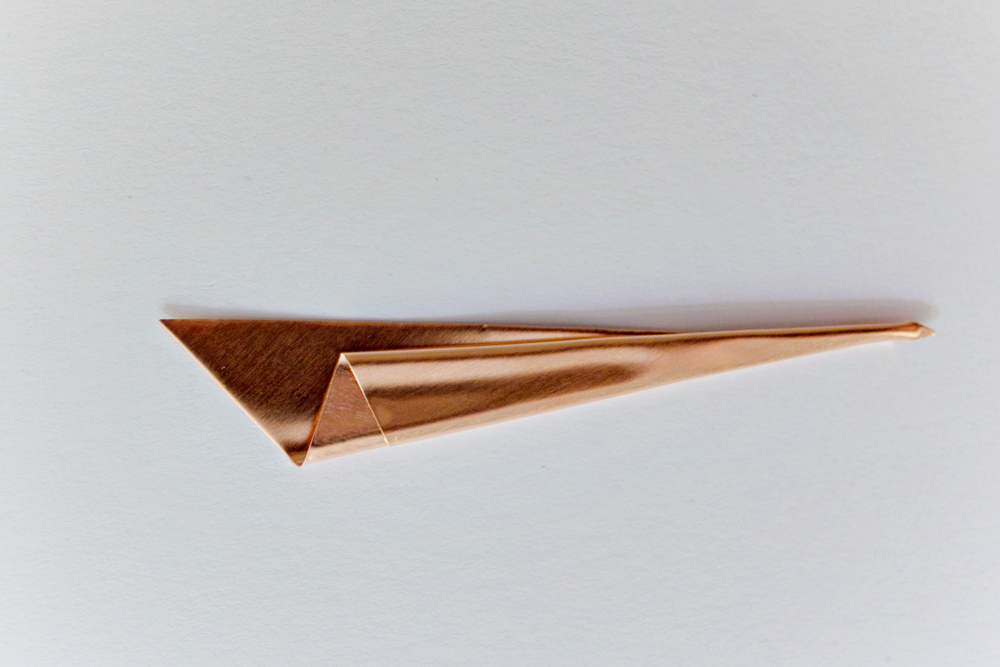
STEP 9
– The basis is ready, now it’s time for the neck: Fold the neck as shown above. The angle of the fold will decide the angle of the neck.
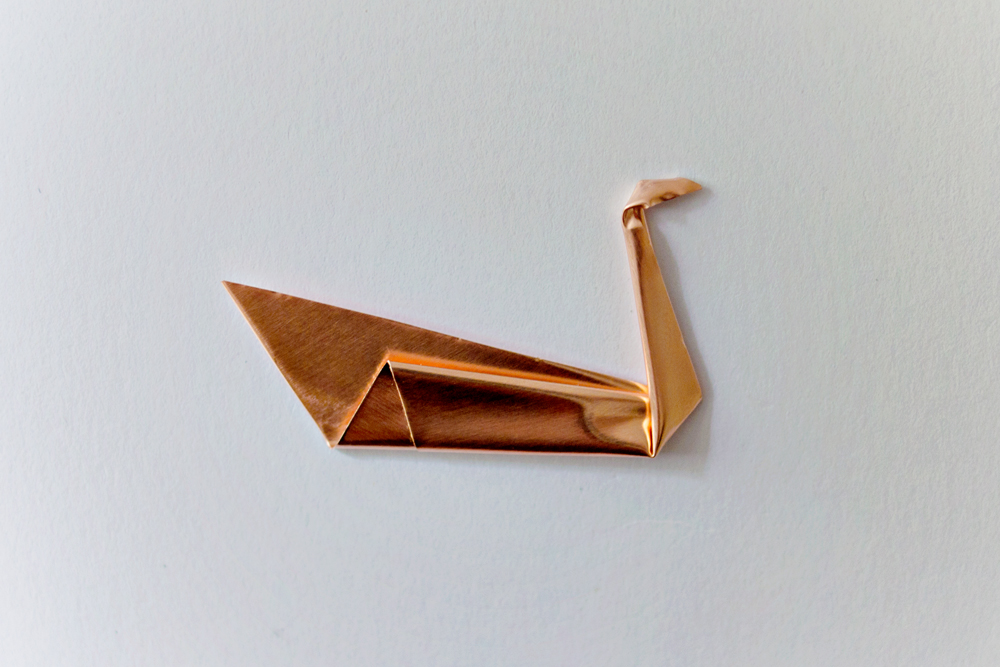
STEP 10
– Fold te tip of the neck as shown above, to create the ‘face’ of the swan.
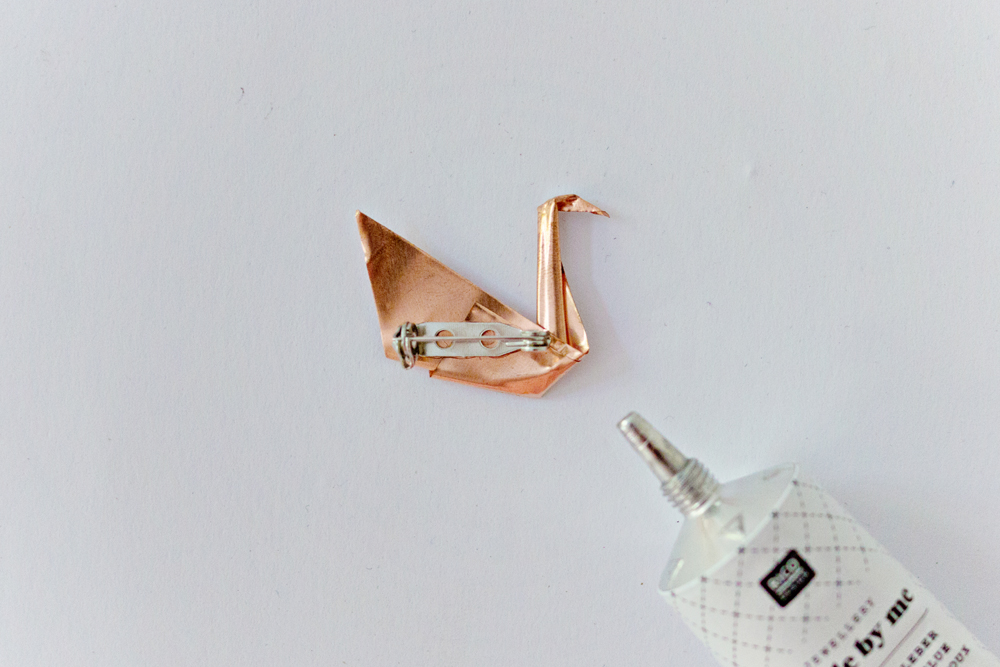
STEP 11
– Add a drop of jewellery glue to the back of the swan and press the brooch or pin onto the back.
– Let the glue dry for a couple of hours before wearing your pin.
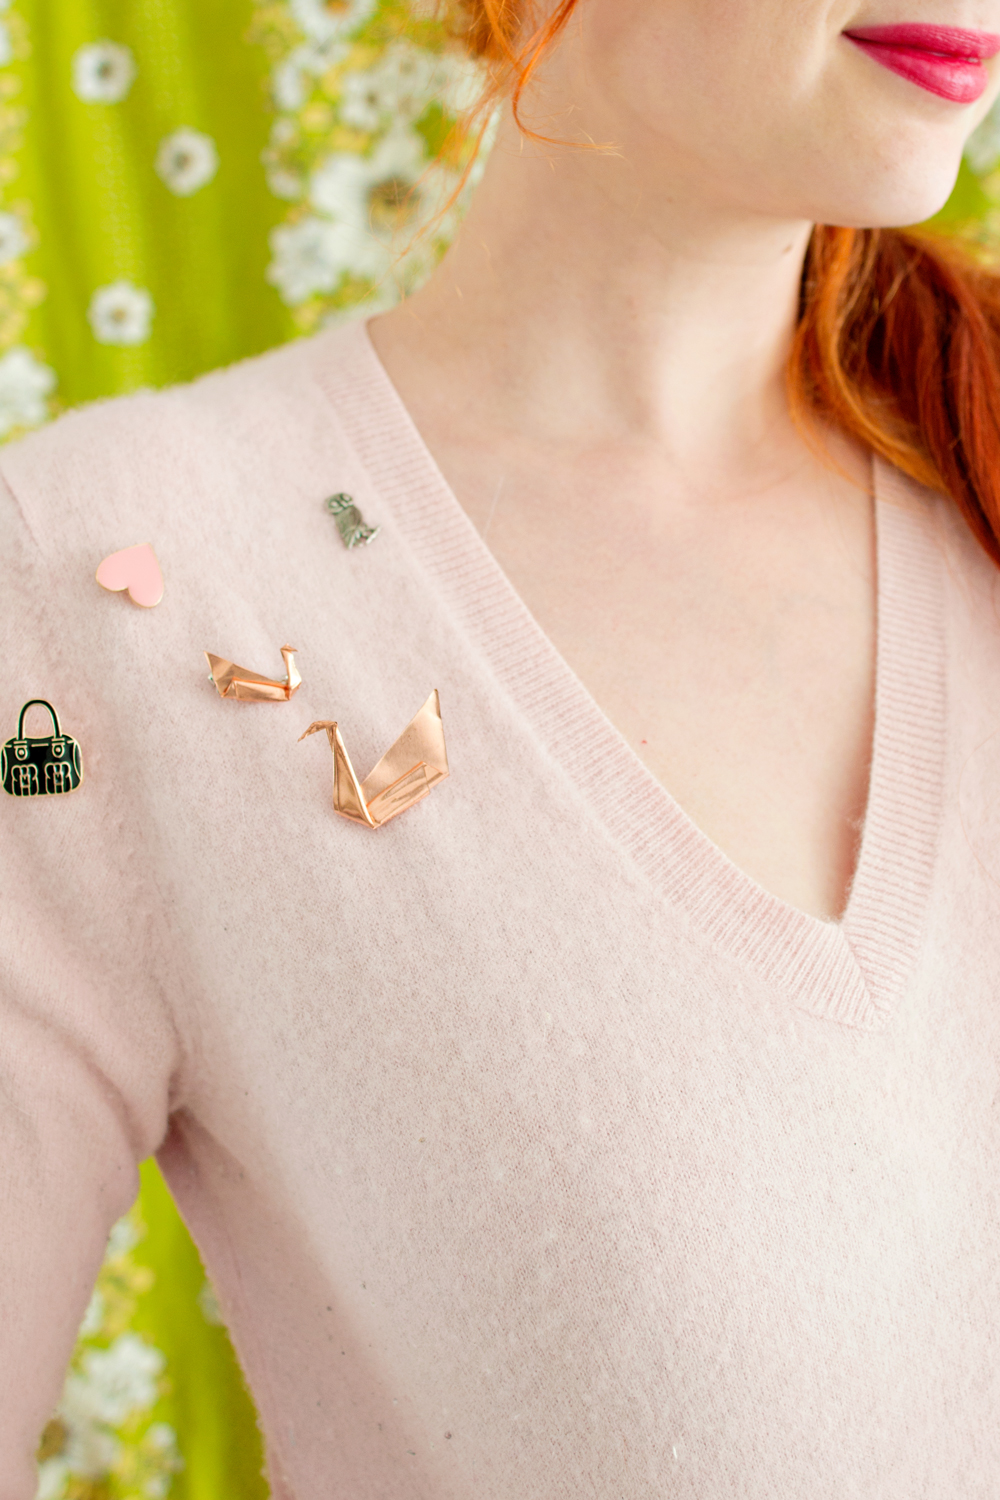
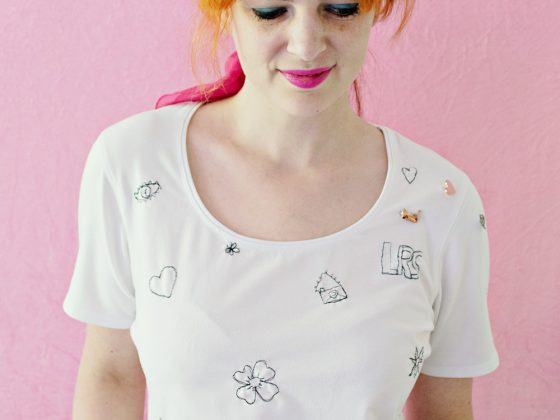
Style tip: Combine the brooch with other pins on a sweater or jacket. I have been spotting many pins and brooches on the runway for next season and I love that they are coming back in style!
Since the material is fairly cheap and you won’t need much to make a piece of jewellery, this would make a great gift! Bridesmaids, friends, mothers day, you name it! (or keep it all to yourself and embrace the compliments you will be getting ;)Being origami crazy as mentioned before, you can expect more origami themed project on the blog pretty soon.
I will also share another copper foil tutorial this month, involving a thicker piece of foil and an unexpected extra material. Curious? Stay tuned!

6 comments
Love this for a gift! Sooo unique!
This is genius! I’m in love! I am obsessed with swans AND origami, so this is a dream DIY for me. Thanks for sharing!
What glue did you use, if you don’t mind my asking?
Hi! I used jewelry glue. You can find it in craft stores and on Amazon.